
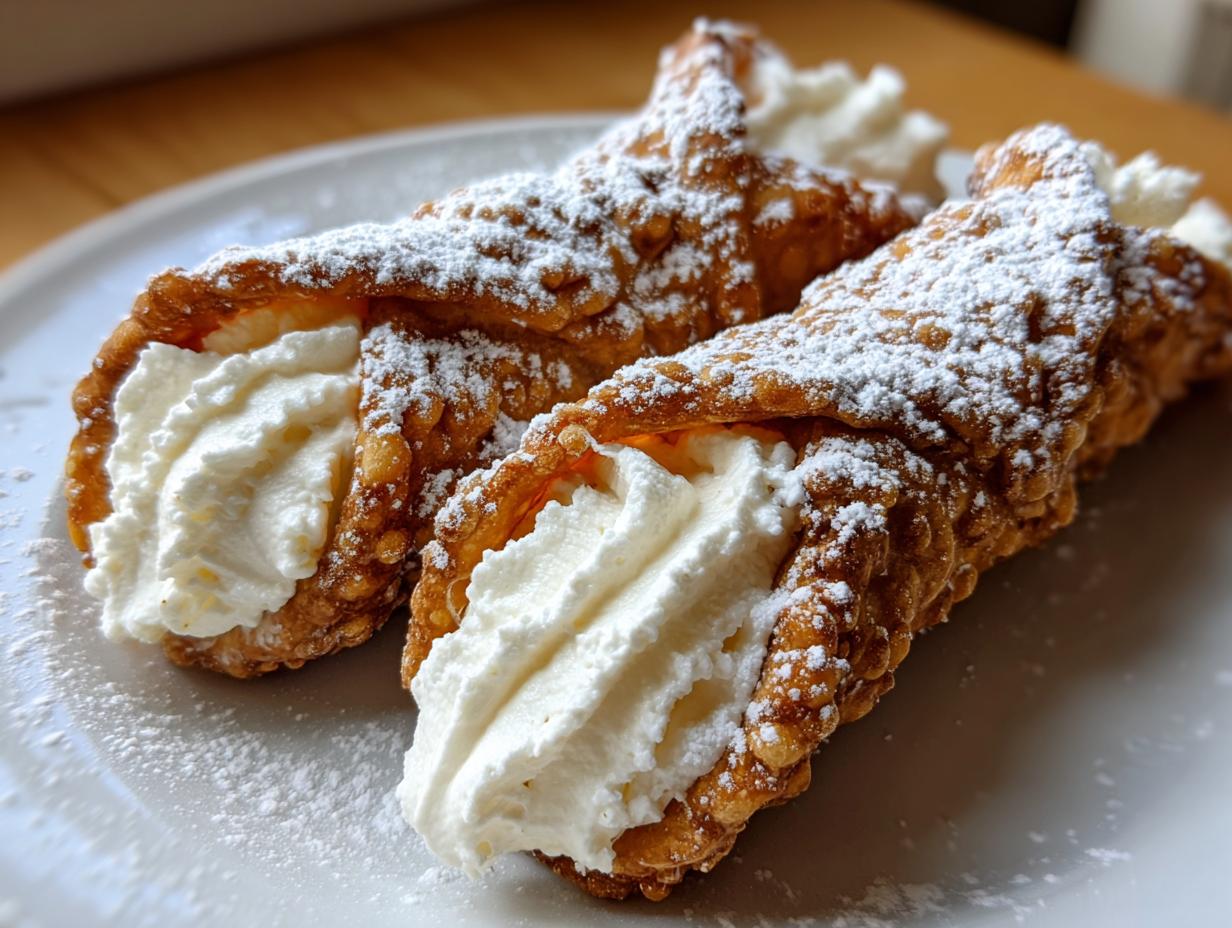
Oh, my dears, if you want to truly taste Italy without leaving your kitchen, you must try your hand at cannoli. They are truly the centerpiece of classic Italian Baking. I know that word, “fried,” can sound intimidating, but please don’t let it scare you off! After thirty years of teaching first graders how to write their names neatly, I promise you, I can explain complicated steps with patience. This cannoli recipe is absolutely one you can master. We aren’t cutting corners here; we are going to make those beautifully crispy shells and that perfectly smooth, creamy filling completely from scratch. Trust me, the effort makes these the best cannoli you’ve ever eaten!
- Why This Authentic Homemade Cannoli Recipe Works (Best Cannoli Recipe)
- Ingredients for Your Classic Cannoli Recipe
- Step-by-Step Instructions for the Cannoli Recipe
- Tips for the Best Traditional Dessert Guide Cannoli Recipe
- Serving Suggestions for Your Italian Dessert Recipe
- Storage and Make-Ahead Tips for This Cannoli Recipe
- Frequently Asked Questions About the Cannoli Recipe
- Estimated Nutritional Data for This Cannoli Recipe
- Share Your Homemade Cannoli Recipe Experience
Why This Authentic Homemade Cannoli Recipe Works (Best Cannoli Recipe)
When people rave about cannoli, they are talking about that incredible contrast—the flaky snap of the shell against that rich, sweet filling. That’s what we’re achieving here! This cannoli recipe is reliable because we pay attention to the two main components. Making this From Scratch Italian Cooking project worth your time means focusing on texture. We want that delicious crunchy dessert experience, not a limp wrapper!
Achieving Perfectly Crispy Cannoli Shells
The bubbles and crunch in the shell aren’t magic; they come from science, bless its heart! That little bit of white wine or vinegar in the dough helps develop a sturdy structure that resists oil absorption. When you get your oil just right—aim for 375°F, no hotter—the dough puffs up beautifully and cooks fast. Those two things together guarantee you those famous Crispy Cannoli Shells everyone loves.
The Secret to Creamy Ricotta Filling
If your filling ever comes out watery or runny, I guarantee you skipped the most important step! For the best Creamy Ricotta Filling, you absolutely must drain the whole milk ricotta cheese. My note says overnight for a reason, though even four hours helps! When you beat that thick, rich cheese with the sugar, the texture is just heavenly, much thicker and more like a true dessert cream.
Ingredients for Your Classic Cannoli Recipe
Now we get down to Brass Tacks! Gathering your ingredients is half the battle, isn’t it? I always lay everything out beforehand because when you start frying, things move quickly. As a former teacher, I like to organize things clearly so there are no last-minute scrambles. Having everything measured out ensures this cannoli recipe turns out perfect, whether it’s for a casual weeknight treat or when company pops over unexpectedly. Don’t forget that wonderful recipe I shared for chocolate pudding—sometimes you can adapt those chocolate chips into a filling idea too!
For the Cannoli Shell Dough
- 2 cups all-purpose flour
- 1 tablespoon granulated sugar
- 1/2 teaspoon salt
- 1/4 cup unsalted butter, cold and cubed
- 1 large egg yolk
- 1/2 cup dry white wine (or water, if you must!)
- 1 tablespoon white vinegar
- Vegetable oil or shortening, for frying (you’ll need a few inches deep!)
For the Creamy Ricotta Filling Recipe
- 1 pound whole milk ricotta cheese, drained overnight
- 1 cup powdered sugar, sifted
- 1 teaspoon vanilla extract
- 1/4 teaspoon ground cinnamon
- 1/4 cup mini chocolate chips (optional, but highly recommended!)
And finally, you’ll want some extra powdered sugar ready for dusting everything generously right before serving. This is how you know it’s a truly special Italian Dessert Recipe!
Step-by-Step Instructions for the Cannoli Recipe
Alright, let’s get those hands dusty! This is where the real fun starts. We need to work our dough first, get the filling ready to chill (because patience is key for the creamy ricotta filling recipe), and then we get to the exciting part: frying the shells! I know frying sounds like a lot of work, but if you keep your oil steady, you’ll find this Classic Cannoli Tutorial is very straightforward. I’ve linked to my recipe for classic butter cookies if you want another baking project to do while the dough chills!
Preparing and Chilling the Cannoli Dough
First, we mix up our dry stuff—flour, sugar, salt—in a big bowl. Then, you need to cut in that cold butter. Use your fingers if you don’t have a pastry blender; just work quickly so the butter stays cold! You want it to look like coarse crumbs, nothing bigger than a pea. Next, whisk together the wet ingredients—your egg yolk, wine, and vinegar—and pour that in. Mix it just until it comes together into a shaggy mound. Do not knead it aggressively! Just press it together until it looks uniform, maybe two quick minutes on the counter. Overworking the dough makes the shells tough. Wrap that ball up tight and pop it in the fridge for at least an hour to let the gluten relax. That rest time is so important for a tender bite!
Making the Easy Cannoli Filling Recipe
While that dough is resting, we tackle that glorious filling! Remember I said to drain that ricotta? Good. Now, put that thick ricotta into your mixer. You need to beat it until it’s completely, totally smooth—no graininess allowed! Only after it’s silky smooth do you add the sifted powdered sugar, vanilla, and cinnamon. Beat that until it’s lightened up a bit. If you want those little sweet surprises inside, fold in those mini chocolate chips gently by hand. Cover this bowl and stick it right back in the fridge to chill for at least an hour—it needs to firm up before we try to pipe it!
Forming and Frying the Crispy Cannoli Shells
Once the dough is chilled, roll it out super thin. I mean thin—you should almost be able to see your hand through it, about 1/16th of an inch thick. Use your round cutter, and then it’s time to wrap. Take each small dough piece and wrap it securely around those metal cannoli tubes—you want a slight overlap! Brush that overlapping edge with a dab of water to seal it tight, or it will pop open while frying! Heat up your oil to 375°F. This temperature is crucial. Carefully lower 2 or 3 shells into that hot oil. Use tongs to gently press them down and keep them underwater and straight while they bubble up—this makes those wonderful air pocket textures! They cook fast, about a minute or two per side until golden brown. Pull them out, drain them right away on paper towels, and *while they are still warm*, slide those tubes out. If you wait until they are cold, they stick!
Tips for the Best Traditional Dessert Guide Cannoli Recipe
Making this cannoli recipe feels like an adventure, but trust me, those little bumps in the road are easy to smooth over with just a little foreknowledge. Since I taught classes for so long, I learned that explaining *why* a step matters helps folks like you remember it! These tips are pulled right from my own notes on making sure these Traditional Dessert Guide cannoli are just perfect every single time.
Ricotta Draining: The Non-Negotiable Step
If you take only one thing away from this whole post, let it be this: you must drain your ricotta! Whole milk ricotta is beautiful, but it holds a lot of water. If you just plop it into the mixer, your beautiful filling will be soupy, and—oh dear—it will dissolve those crispy shells almost immediately. Pop that cheese into a fine-mesh sieve lined with a little cheesecloth or even a coffee filter, and let it drip in the fridge for at least four hours. Honestly, overnight is best. That slow draining removes the excess liquid, which is why we end up with such a wonderfully thick, creamy ricotta filling recipe.
Substitutions for Cannoli Tubes
Now, don’t panic if you pulled out your pots and pans and realized you do not own special metal cannoli tubes. That happens! You absolutely do not need to run to the store before you can enjoy this Italian Dessert Recipe. If you don’t have tubes, you can create your own molds. Take some heavy-duty aluminum foil and roll it very tightly into thick dowels—the thicker the foil, the better it holds shape. You need something sturdy because the dough will push against it while frying. You can also use metal dowels from your hardware store, but make sure they are clean and haven’t been treated with anything that isn’t food safe! Just wrap the dough snugly around your shiny new homemade tube and you are good to go. I even shared a really easy French toast recipe for mornings when you need quick satisfaction, but trust me, these cannoli are worth the little bit of effort with the tubes!
Serving Suggestions for Your Italian Dessert Recipe
You finally have those beautiful, crisp shells and that cool, dreamy ricotta cream—now comes the presentation! Filling them right before you serve is essential, just like making sure your corn side dish is piping hot for dinner. For a real showstopper when you’re making these for a party, think about dipping the ends of the filled tubes into something extra. Finely chopped pistachios are traditional and give such a lovely color contrast! If you didn’t put chips inside the filling, dipping the ends adds that perfect texture. Finish everything off with a generous shake of powdered sugar over the plates—it looks like a little dusting of snow and really elevates this simple cannoli recipe.
Storage and Make-Ahead Tips for This Cannoli Recipe
Now, this might be the most important lesson in the entire cannoli recipe, so listen up! If you try to make these ahead of time and fill them the day before dessert, you are going to be very disappointed. The beauty of a truly authentic Sicilian cannoli is the contrast between that bubbly, crispy shell and the luscious, cool cream. As soon as that air-dry ricotta filling meets the fried pastry, the moisture starts wicking right in, and before you know it, you have a soft, soggy shell.
We are aiming for crunch, remember? So, the trick is to keep the two components happily separate until the very last minute. You can happily make your dough dough and let it chill, and you can certainly whip up that creamy ricotta filling recipe and keep it covered tight in the fridge for up to two days. The shells, once completely cooled, can be stored in an airtight container at room temperature for about two days as well. They stay wonderfully crisp if they stay dry!
My advice, just like I taught my grandbabies when they wanted to help with holiday baking? Only fill the shells a few hours before you plan to serve them. Seriously, no more than three or four hours ahead. That gives you enough time to pipe them beautifully, dust them with sugar, and arrange them on the platter without sacrificing that perfect, audible CRUNCH when someone bites in. It’s the same rule I follow when I make my peanut butter fudge—prepare components separately, assemble only when needed!
Frequently Asked Questions About the Cannoli Recipe
It’s natural to have questions when you decide to make something special like this cannoli recipe for the first time! As a teacher, I know preparation takes the worry out of cooking, so here are a few things my family often asks me when they try this Italian Baking classic.
Can I use store-bought shells with this creamy ricotta filling recipe?
Oh, I know you’re looking for a shortcut sometimes! Yes, you certainly can use store-bought shells if you are in a real pinch, and our creamy ricotta filling recipe is so good it will still taste wonderful. But I have to be honest with you: the joy of this authentic recipe comes from that bubbly, crispy snap of a shell you make yourself. I really encourage you to try frying them at least once!
What is the best wine substitute for the cannoli dough?
If you don’t have dry white wine on hand—or just don’t feel like opening a bottle—you can absolutely use plain cold water. That’s what my mother used to do in an emergency! If you want a tiny bit of tang to help tenderize the dough, a teaspoon of lemon juice mixed into the water works beautifully as a substitute. It won’t change the flavor much, but the dough will still accept the rest time well; just make sure you check out other simple recipes like my lasagna casserole while you wait for it to firm up!
How long do the fried cannoli shells stay crunchy?
This depends entirely on how well you stored them! If you keep your completely cooled shells in a truly airtight container at cool room temperature, away from any humidity or steam, they should stay delightfully crunchy for about four to six hours. That’s why we wait until the last minute to fill them! If you fill them earlier than that, they start to soften, which is a tragedy after all that hard work making those perfect Crispy Cannoli Shells.
Estimated Nutritional Data for This Cannoli Recipe
Now, I always say that when you are making something this wonderfully traditional, you shouldn’t worry too much about the numbers swirling around the kitchen! We are making treats here, not diet food! However, I know some of you like to keep track, so I have pulled together some general estimates for one single cannoli based on the ingredients we used when portioning this recipe out for 12 servings. Remember, this is just guidance, and using store-bought shortcuts or adding extra pistachios will change these figures!
- Serving Size: 1 cannoli
- Calories: Approximately 350
- Total Fat: Around 18g
- Saturated Fat: About 10g
- Carbohydrates: Estimated at 40g
- Protein: Roughly 10g
These are just ball-park figures, dear ones. The fat content is what you expect when you are deep-frying pastry dough, but that filling is made from lovely whole milk ricotta, which offers a nice bit of protein. Enjoy it without guilt; memories are nutritious for the soul!
Share Your Homemade Cannoli Recipe Experience
Oh, I just can’t wait to hear how this cannoli recipe turned out in your kitchen! Did those shells get perfectly bubbly? Did the filling set up just right? Please leave me a rating below and tell me all about your experience. I love seeing your triumphs! If you made these delicious Italian pastries for a party, feel free to zip over to my contact page and send me a picture. Happy baking, sweet friends!
PrintAuthentic Homemade Cannoli Recipe with Crispy Shells and Creamy Ricotta Filling

Make traditional Italian cannoli from scratch. This recipe guides you through creating perfectly crispy, fried shells and filling them with a smooth, sweet ricotta cream, perfect for any gathering.
- Prep Time: 45 min
- Cook Time: 20 min
- Total Time: 125 min
- Yield: 12 servings 1x
- Category: Dessert
- Method: Frying
- Cuisine: Italian
- Diet: Vegetarian
Ingredients
- 2 cups all-purpose flour
- 1 tablespoon granulated sugar
- 1/2 teaspoon salt
- 1/4 cup unsalted butter, cold and cubed
- 1 large egg yolk
- 1/2 cup dry white wine (or water)
- 1 tablespoon white vinegar
- Vegetable oil or shortening, for frying
- 1 pound whole milk ricotta cheese, drained overnight
- 1 cup powdered sugar, sifted
- 1 teaspoon vanilla extract
- 1/4 teaspoon ground cinnamon
- 1/4 cup mini chocolate chips (optional, for filling)
- Powdered sugar, for dusting
Instructions
- Prepare the Dough: In a large bowl, whisk together the flour, granulated sugar, and salt. Cut in the cold butter using a pastry blender or your fingers until the mixture resembles coarse crumbs.
- Add Wet Ingredients: In a small bowl, whisk the egg yolk, white wine, and vinegar. Pour this mixture into the flour mixture and mix until a shaggy dough forms. Knead briefly on a lightly floured surface until smooth, about 2 minutes. Do not overwork the dough.
- Chill the Dough: Wrap the dough tightly in plastic wrap and refrigerate for at least 1 hour.
- Make the Filling: Place the well-drained ricotta cheese in a bowl. Add the sifted powdered sugar, vanilla extract, and cinnamon. Beat with an electric mixer until the mixture is completely smooth and creamy. Fold in the chocolate chips, if using. Cover and chill the filling for at least 1 hour.
- Shape the Shells: On a lightly floured surface, roll the dough very thin, about 1/16 inch thick. Use a 3-inch round or square cutter to cut out circles or squares.
- Form the Tubes: Wrap each dough piece around a metal cannoli tube, overlapping the edges slightly. Brush the overlapping seam with a little water to seal it securely.
- Fry the Shells: Heat 2-3 inches of oil in a deep, heavy-bottomed pot to 375°F (190°C). Carefully place 2-3 shells at a time into the hot oil, using tongs to keep them submerged and straight. Fry for 1-2 minutes per side until golden brown and bubbly.
- Drain the Shells: Remove the shells with tongs and immediately place them on a paper towel-lined plate to drain excess oil. While still warm, carefully slide the metal tubes out of the shells. Let the shells cool completely.
- Fill and Serve: Just before serving, use a piping bag or a small spoon to fill the cooled shells with the chilled ricotta filling. Dust the ends with powdered sugar. Do not fill too far in advance, as the shells will soften.
Notes
- Drain your ricotta cheese for at least 4 hours, or preferably overnight in the refrigerator using a fine-mesh sieve lined with cheesecloth. This step is key to a thick, creamy filling.
- If you do not have cannoli tubes, you can use thick metal dowels or even tightly rolled, heavy-duty aluminum foil shaped into tubes.
- For extra crunch, you can dip the ends of the filled cannoli into finely chopped pistachios or mini chocolate chips.
Nutrition
- Serving Size: 1 cannoli
- Calories: 350
- Sugar: 25
- Sodium: 150
- Fat: 18
- Saturated Fat: 10
- Unsaturated Fat: 8
- Trans Fat: 0
- Carbohydrates: 40
- Fiber: 1
- Protein: 10
- Cholesterol: 55