
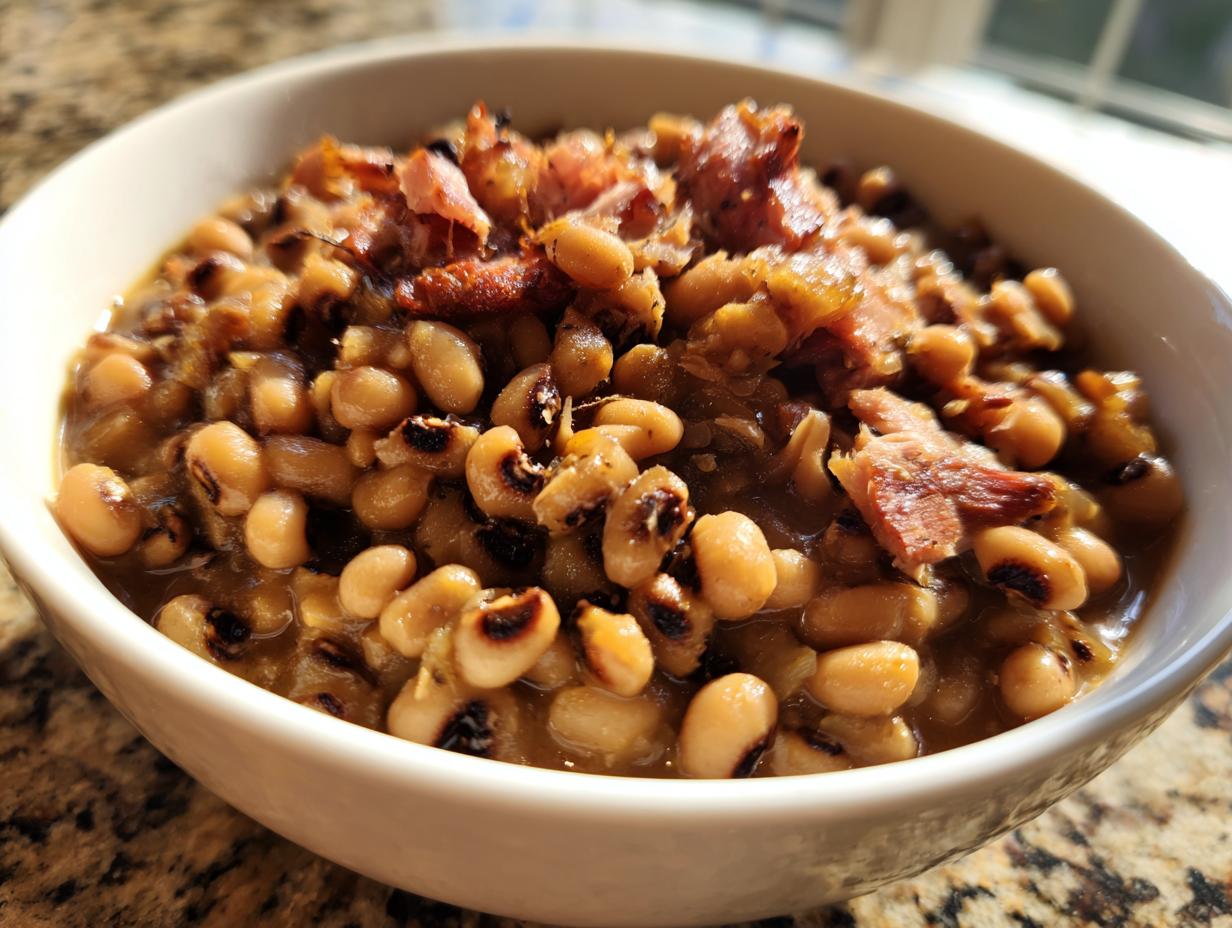
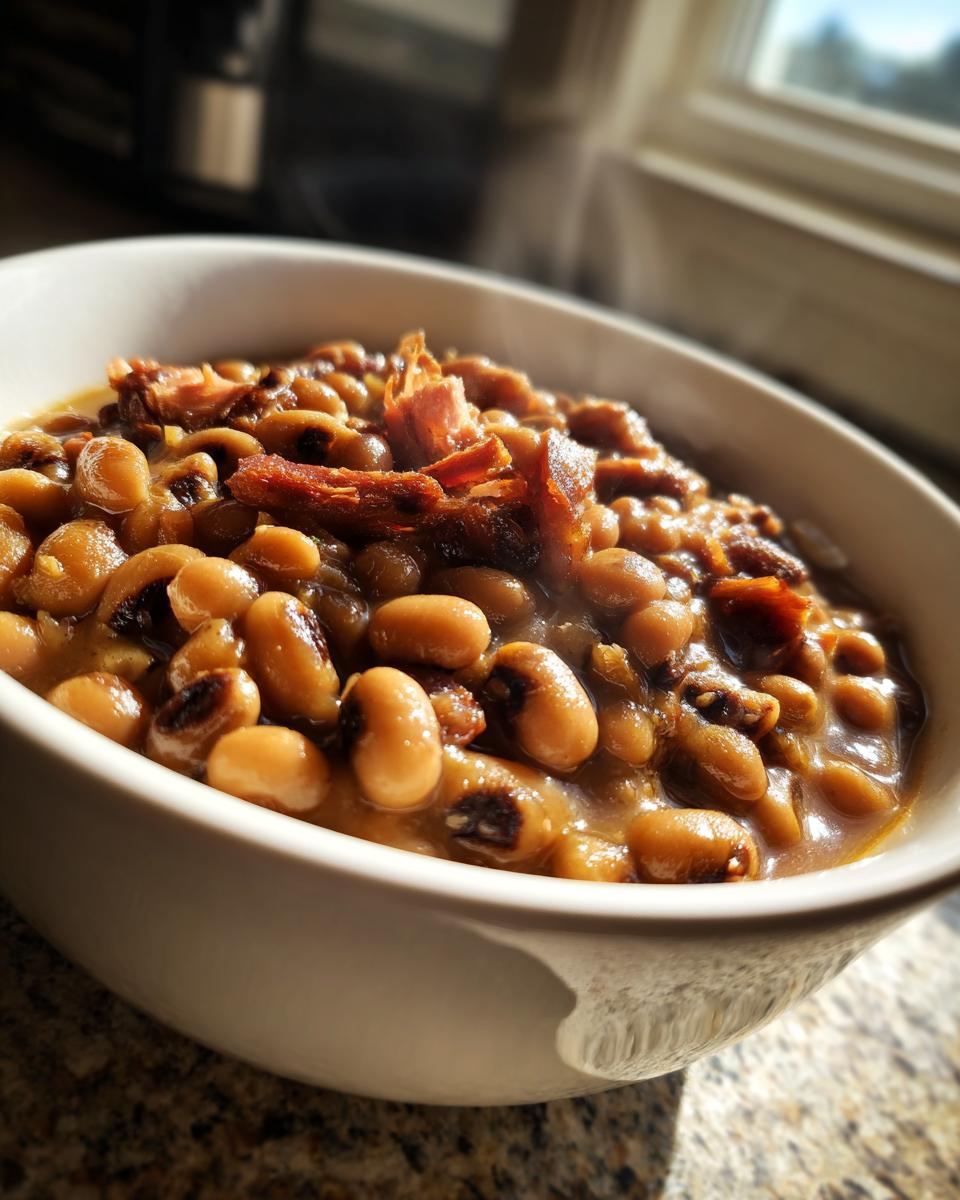
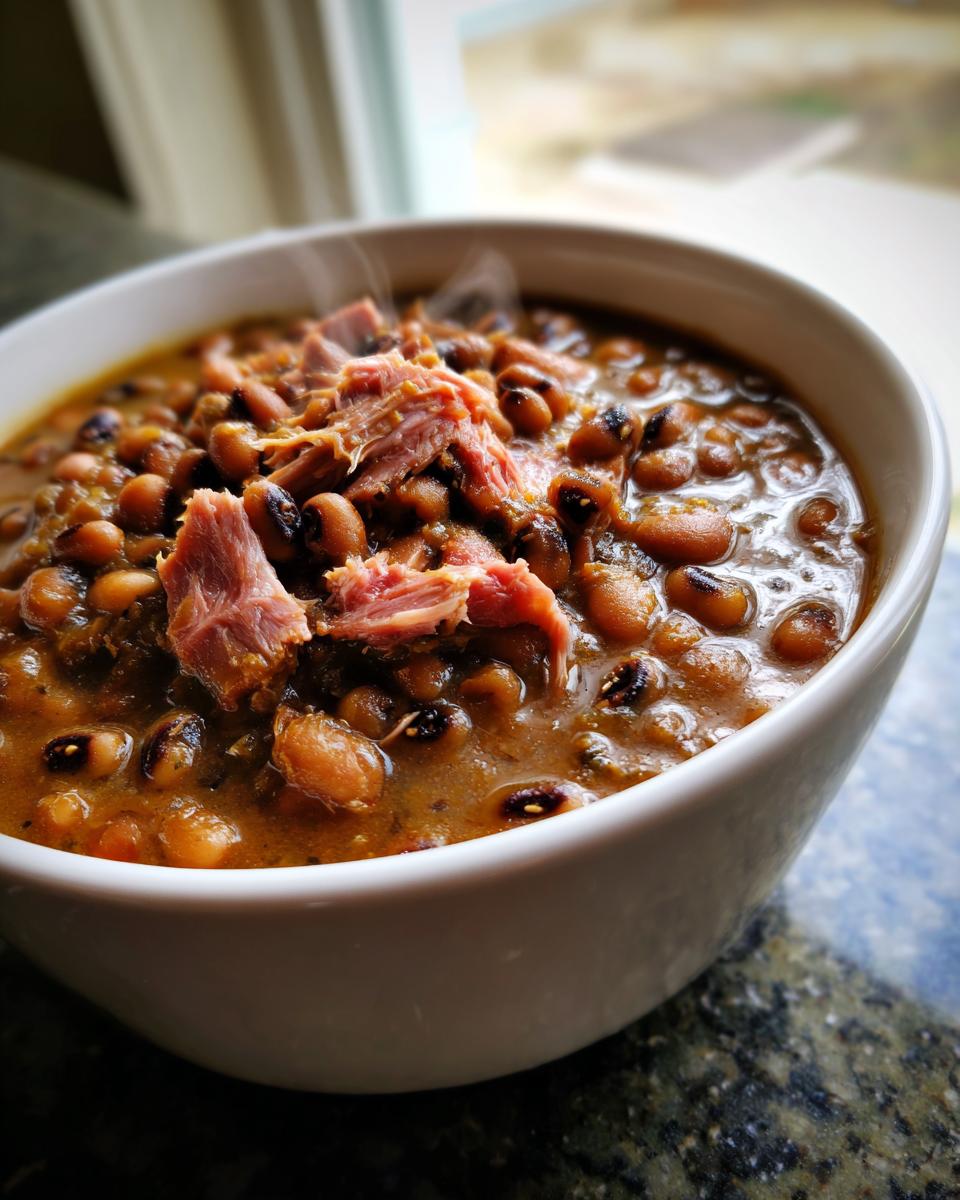
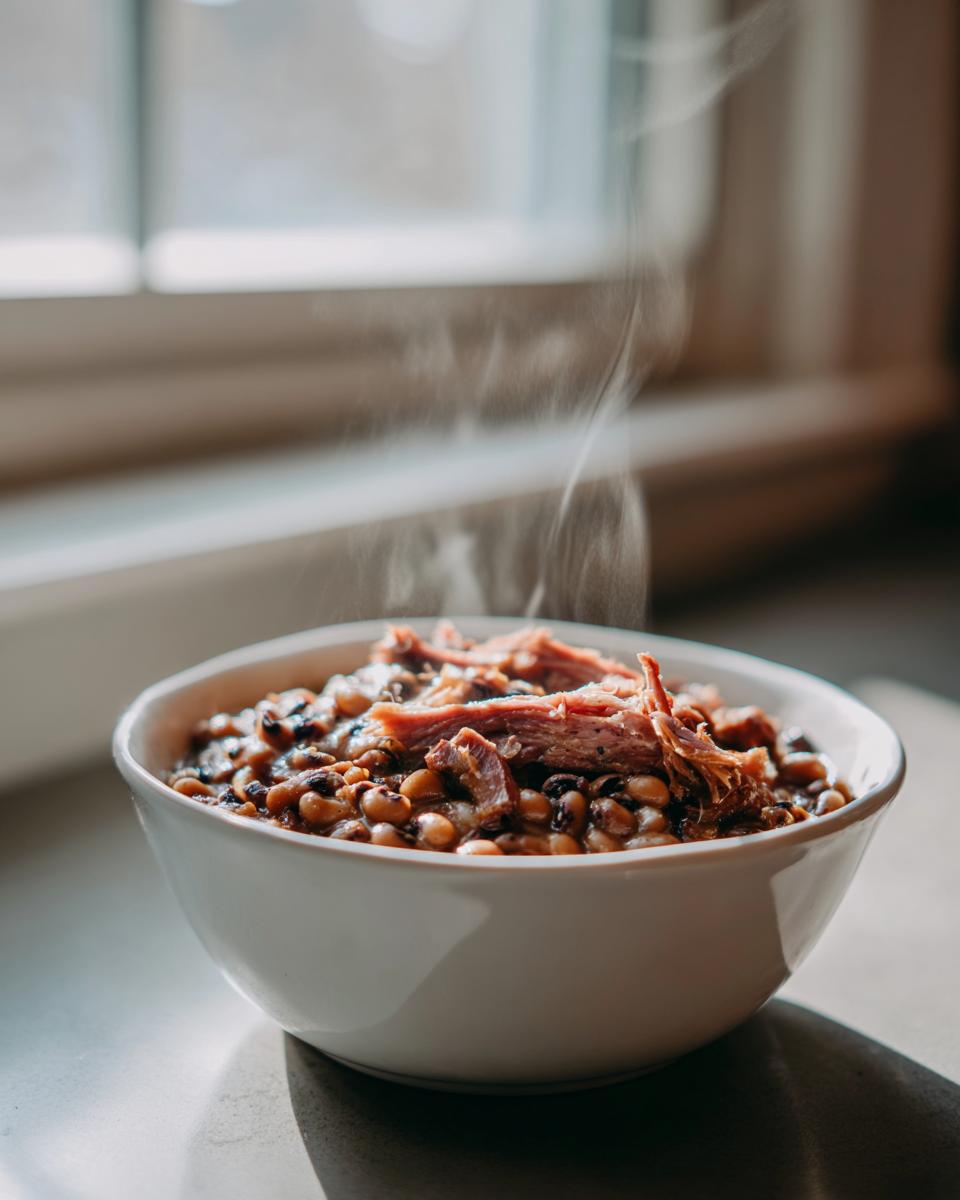
Oh, when I think about true Southern cooking, my mind immediately goes to comforting sides that tell a story. Food is how we show love down here, and there is no dish more comforting than perfectly cooked black eyed peas. This recipe, the one I’ve landed on after decades in the kitchen, is truly special because it nails that slow-simmered, smoky flavor we all crave. It’s hearty enough to be a main meal on rice, but it shines brightest as the ultimate Black Eyed Peas Side Dish. The best part? It works beautifully whether you use that smoky ham hock or switch gears entirely for a delicious plant-based version. Trust me, this creamy texture is what sets it apart, and it’s becoming a staple in our home year-round, not just for good luck on New Year’s Day! You can find my complete guide where I dive deep into this comfort meal right here: Southern Comfort Black Eyed Peas.
- Why This Creamy Southern Black Eyed Peas Recipe Stands Out
- Gathering Ingredients for Your Black Eyed Peas
- How To Cook Black Eyed Peas: Stovetop Instructions
- Instant Pot Black Eyed Peas Recipe Variation
- Tips for the Best Black Eyed Peas Side Dish
- Making Vegan Black Eyed Peas Recipe Variations
- Serving Suggestions for Traditional Southern Food
- Storage and Reheating Your Hearty Black Eyed Peas
- Frequently Asked Questions About Black Eyed Peas
- Share Your Creamy Black Eyed Peas Success
Why This Creamy Southern Black Eyed Peas Recipe Stands Out
Folks are always asking me what makes my recipe better than others, and honestly, it boils down to three things: unbelievable texture, deep smoky flavor, and how versatile it is! It’s not just for New Year’s Day anymore; this is comfort food ready any night.
- It makes the absolute best side dish, but is hearty enough to be a main event!
- That signature texture is perfectly creamy, not soupy or stiff.
- It embraces tradition with the ham bone but adapts easily for my vegetarian friends.
Achieving the Perfect Creamy Black Eyed Peas Texture
If you want that luscious mouthfeel instead of just standard beans swimming in broth, you have to cheat just a little bit! Near the end of cooking, scoop out maybe a quarter cup of the cooked peas. Mash them really well right on the side of your pot with the back of a spoon. Stir that paste right back in. It thickens the whole pot beautifully without any flour or cornstarch!
Flavor Depth: Smoky Black Eyed Peas with Ham Bone Adaptation
You simply cannot replicate the deep, true Southern flavor without some kind of pork product involved during the long simmer. I love using a smoked turkey leg—it gives that amazing background smokiness. If you’re making Smoky Black Eyed Peas with Ham Bone, this is where that traditional flavor comes from. It seasons the entire liquid as everything cooks down slowly.
Gathering Ingredients for Your Black Eyed Peas
Getting started is easy, but picking the right stuff makes all the difference in treating these like Traditional Southern Food. You’ll need a pound of dried black eyed peas, and please, always take a moment to rinse them well and pick through them for any tiny pebbles you might find! Then you need your smoky element—either a smoked turkey leg or a ham hock—but don’t worry if you’re skipping meat! We’ve got a spot later for the vegetarian version substitutions. Don’t forget the savory base: onion, tons of garlic, and those key spices like thyme and smoked paprika that give that signature Southern color and depth.
Ingredient Notes and Substitutions for Black Eyed Peas Cooking Tips
When it comes to the liquid, using broth instead of plain water really boosts the savory flavor of your Hearty Black Eyed Peas right from the start. If you are making the vegetarian version, remember to sub in vegetable broth and add just a tiny bit of liquid smoke to mimic that rich meat flavor we talked about. Oh, and I always add a splash of apple cider vinegar right at the very end. It’s like a tiny burst of sunshine that really brightens up all those smoky, deep flavors!
How To Cook Black Eyed Peas: Stovetop Instructions
Okay, let’s get these beauties cooking! This is where a little patience pays off big time. First, toss your rinsed black eyed peas, your broth or water, and that ham hock or turkey leg into a nice heavy pot—a Dutch oven is perfect for this simmer. Bring it up to a rolling boil, then immediately drop that heat way down low so it just bubbles gently. We need to simmer this for a full hour, and don’t forget to skim off any yucky foam that floats to the top in the beginning. That step keeps your final dish clean and pretty! We are cooking these low and slow, just like they taught us in the South.
While those are getting softened up, you make your flavor base. Because we want these peas rocking some serious flavor, we take a detour for step two! Learning How To Cook Black Eyed Peas perfectly means building layers of flavor. If you’ve never tried making something like my chicken pozole, you know I focus on building that flavor early on. We need to add those aromatics in their own pan first.
Preparing the Aromatics for Smoky Black Eyed Peas
In that skillet, melt down your oil or bacon grease over medium heat. Toss in your chopped onion and let it get soft—about five minutes. Then, here’s the important part: add the minced garlic, thyme, paprika, and a little pinch of cayenne if you like it spicy. You only want to cook that garlic for about one minute until you can really smell it. If you cook the garlic too long, it gets bitter, and we don’t want that!
Finishing and Seasoning Your Black Eyed Peas
Once the peas are super tender—usually around an hour and 45 minutes total—you pull out that big hunk of meat and the bay leaf. If you want, shred some of the meat off that bone and put it back in; I always do! The final touch, and this is non-negotiable for bright flavor, is stirring in that tablespoon of apple cider vinegar. It just wakes everything up. Then, give it a good stir, taste it, and adjust your salt and pepper until it tastes exactly like home. If it looks too soupy, just take the lid off and let it bubble down a bit longer. For more tips on timing and technique, check out what The Cookie Rookie does there—it’s good to see what other home cooks focus on!
Instant Pot Black Eyed Peas Recipe Variation
I know life gets fast sometimes, and if you need these black eyed peas done quicker than the two hours simmering time, you absolutely can lean on your Instant Pot! Using the pressure cooker is fantastic for getting that tender, creamy texture without babysitting the stovetop all afternoon. We use the same ingredients, of course, only you’ll skip Step 1 on the stove. You’ll want to add your peas, broth, aromatics, and meat—everything goes right into that pressure cooker insert.
Set it to High Pressure for exactly 20 minutes. Twenty minutes is the magic number for dried beans when you’re using an IP! After that time is up, you have to let it do a Natural Pressure Release for 15 minutes, which means you just leave it alone! Don’t touch that valve! That slow release is key to making sure the peas don’t burst or get mushy. Then vent any remaining steam. For more genius pressure cooking ideas, you can peek at my easy breakfast recipes, but for this, the timing is set! If you’re looking for more inspiration on using the Instant Pot for this dish, Palace Recipes has a great guide on getting that perfect Instant Pot creamy southern black eyed peas result.
Tips for the Best Black Eyed Peas Side Dish
Even though this recipe is pretty straightforward—I always say good food doesn’t need to be complicated!—there are a couple of teaching moments I learned from my mom that take this from good to great. Since I taught school for thirty years, I believe in giving clear instructions, so listen closely!
First, we talked about mashing those peas for creaminess; make SURE you do that step. It really transforms your Black Eyed Peas Side Dish into something spectacular.
Secondly, if you are skipping the meat entirely for a vegetarian batch, you need to be careful with salt. Meat naturally seasons the water, but if you only have broth or water, you need to add a little salt much earlier on, or they end up tasting flat. It takes patience, like waiting for your potatoes to bake just right for my potatoes au gratin recipe, but it’s worth the wait!
Making Vegan Black Eyed Peas Recipe Variations
I absolutely want everyone to enjoy these, which is why I made sure this recipe works wonderfully as a Vegan Black Eyed Peas Recipe too! You simply skip the ham hock or turkey leg entirely. Instead of those, you’ll want to use a good quality, flavorful vegetable broth to cook everything in. That’s your flavor base now!
To bring back that beautiful smoky note that the meat provided, lean on liquid smoke. Just a teaspoon mixed into the broth when you start will give you that deep, campfire flavor we love. Since you aren’t getting salt from the pork, be generous when tasting and seasoning towards the end. It’s so good, even my son doesn’t miss the ham bone, especially when I pair it with a bright veggie lentil salad on the side. If you want to read about another great Southern adaptation, check out this recipe from Recipes Universe!
Serving Suggestions for Traditional Southern Food
Now that you have these perfectly cooked, smoky black eyed peas, you need to know how to present them like a true Southern cook! The most classic way to serve these is right over a fluffy bed of plain white rice. The rice soaks up all that extra seasoned liquid—it’s the best part, hands down. It turns a simple side into a full, satisfying plate of warm comfort food.
But you can’t talk Southern food without mentioning greens! These pair absolutely beautifully for a meal of Black Eyed Peas and Greens. Think collards or mustard greens simmered with a little touch of vinegar. For holidays or big gatherings, I often set this out right beside my Southern Sweet Potato Casserole. And if you are looking for amazing inspiration on pairing greens, I always recommend checking out what Cooking With Emy does with that classic combination!
Storage and Reheating Your Hearty Black Eyed Peas
The great news about these flavorful black eyed peas is that they are even better the next day! I always make a big batch just so I have leftovers for lunch. You can keep them safely in an airtight container in the fridge for about four days—that’s plenty of time to enjoy them again! When it comes to reheating, I always suggest the stovetop, just like when I make my Mississippi Pot Roast.
Put them in a saucepan over medium-low heat. If they seem a little too thick after chilling, just splash in a little extra water or broth until they get back to that perfect creamy consistency. Don’t rush it in the microwave; slow and steady reheating keeps those beans soft and lovely!
Frequently Asked Questions About Black Eyed Peas
It’s funny how many questions pop up when you start cooking dried beans from scratch! It seems simple, but folks always want to make sure they get that perfect, non-tough result from their black eyed peas. Here are a few things I hear all the time in my inbox—feel free to reach out on my contact page if yours aren’t answered here!
Do I need to soak the black eyed peas before cooking?
Nope, you absolutely do not have to soak these! I don’t bother when I’m using the long, slow simmer method in the Dutch oven. The prolonged cooking time softens them up just fine. Soaking just cuts down the cooking time if you’re in a real rush.
What is the New Year’s Day black eyed peas tradition?
This is my favorite one! Eating New Year’s Day Black Eyed Peas is a very Southern tradition meant to bring you good luck and prosperity for the coming year. The peas represent coins, and often they are served with greens (representing paper money) and cornbread (representing gold!).
Another question I get a lot is about texture—why are they sometimes tough? That usually happens when salt is added too early, which can actually toughen the skins before they soften, so always remember to salt them later in the cooking process!
Share Your Creamy Black Eyed Peas Success
Now that you’ve made a big pot of what I hope are the most tender, creamy black eyed peas you’ve ever tasted, I really, truly want to hear about it! Cooking by Carla is all about building a community where we cheer each other on in the kitchen. Did you manage to get that perfect smoky flavor from the ham hock? Or maybe you went the vegetarian route with liquid smoke—how did that turn out for you?
Please take a moment and leave a rating right down below—five stars if you loved them! And please drop a comment telling me how you served them! Were they your New Year’s Day Black Eyed Peas staple, or did you just make them for a simple weeknight dinner? Knowing what works for you helps me teach the next person who comes along reading this recipe. Head over to my About Page anytime to see more of my philosophy on simple, honest cooking!
PrintCreamy Southern Black Eyed Peas with Smoked Turkey

Make tender, smoky Southern Black Eyed Peas from scratch. This recipe yields creamy comfort food perfect as a side dish or a main meal, adaptable for meat-eaters or vegetarians.
- Prep Time: 15 min
- Cook Time: 1 hour 45 min
- Total Time: 2 hours 0 min
- Yield: 6 servings 1x
- Category: Side Dish
- Method: Stovetop Simmering
- Cuisine: Southern American
- Diet: Low Fat
Ingredients
- 1 pound dried black eyed peas, rinsed and picked over
- 8 cups water or low-sodium chicken broth
- 1 smoked turkey leg or 1 ham hock (omit for vegetarian version)
- 1 large yellow onion, chopped
- 4 cloves garlic, minced
- 1 tablespoon olive oil or bacon grease
- 1 teaspoon smoked paprika
- 1/2 teaspoon dried thyme
- 1/4 teaspoon cayenne pepper (optional, for spice)
- 1 bay leaf
- Salt and black pepper to taste
- 1 tablespoon apple cider vinegar (added at the end)
- For Vegetarian Option: Substitute turkey/ham with 1 cup vegetable broth and 1 teaspoon liquid smoke
Instructions
- Place the rinsed black eyed peas and water or broth in a large pot or Dutch oven. Add the smoked turkey leg or ham hock. Bring to a boil, then reduce heat, cover, and simmer for 1 hour, skimming any foam that rises.
- While the peas simmer, prepare the aromatics. In a separate skillet, heat the olive oil or bacon grease over medium heat. Add the chopped onion and cook until softened, about 5 minutes.
- Add the minced garlic, smoked paprika, thyme, and cayenne pepper (if using) to the skillet. Cook for 1 minute until fragrant.
- Add the cooked onion mixture, bay leaf, and any reserved liquid from the skillet into the pot with the peas. Continue to simmer, partially covered, for another 45 minutes to 1 hour, or until the peas are tender and creamy. Stir occasionally to prevent sticking.
- Remove and discard the turkey leg/ham hock and bay leaf. Shred any usable meat from the bone and return it to the pot if desired.
- Stir in the apple cider vinegar. Taste and adjust seasoning with salt and pepper. If the mixture is too thin, remove the lid and simmer for 10-15 minutes to reduce. If it is too thick, add a splash of water or broth.
- Serve hot, traditionally over white rice, or as a hearty side dish.
Notes
- For quicker cooking, use an Instant Pot: Combine peas, broth/water, meat (if using), onion, garlic, and seasonings. Cook on High Pressure for 20 minutes, then allow a Natural Pressure Release for 15 minutes before venting.
- To achieve a creamier texture, mash about 1/4 cup of the cooked peas against the side of the pot and stir them back into the mixture.
- If you skip the meat, add a pinch of salt early on, as meat usually seasons the cooking liquid.
Nutrition
- Serving Size: 1 cup
- Calories: 280
- Sugar: 3
- Sodium: 450
- Fat: 6
- Saturated Fat: 2
- Unsaturated Fat: 4
- Trans Fat: 0
- Carbohydrates: 45
- Fiber: 12
- Protein: 15
- Cholesterol: 15