
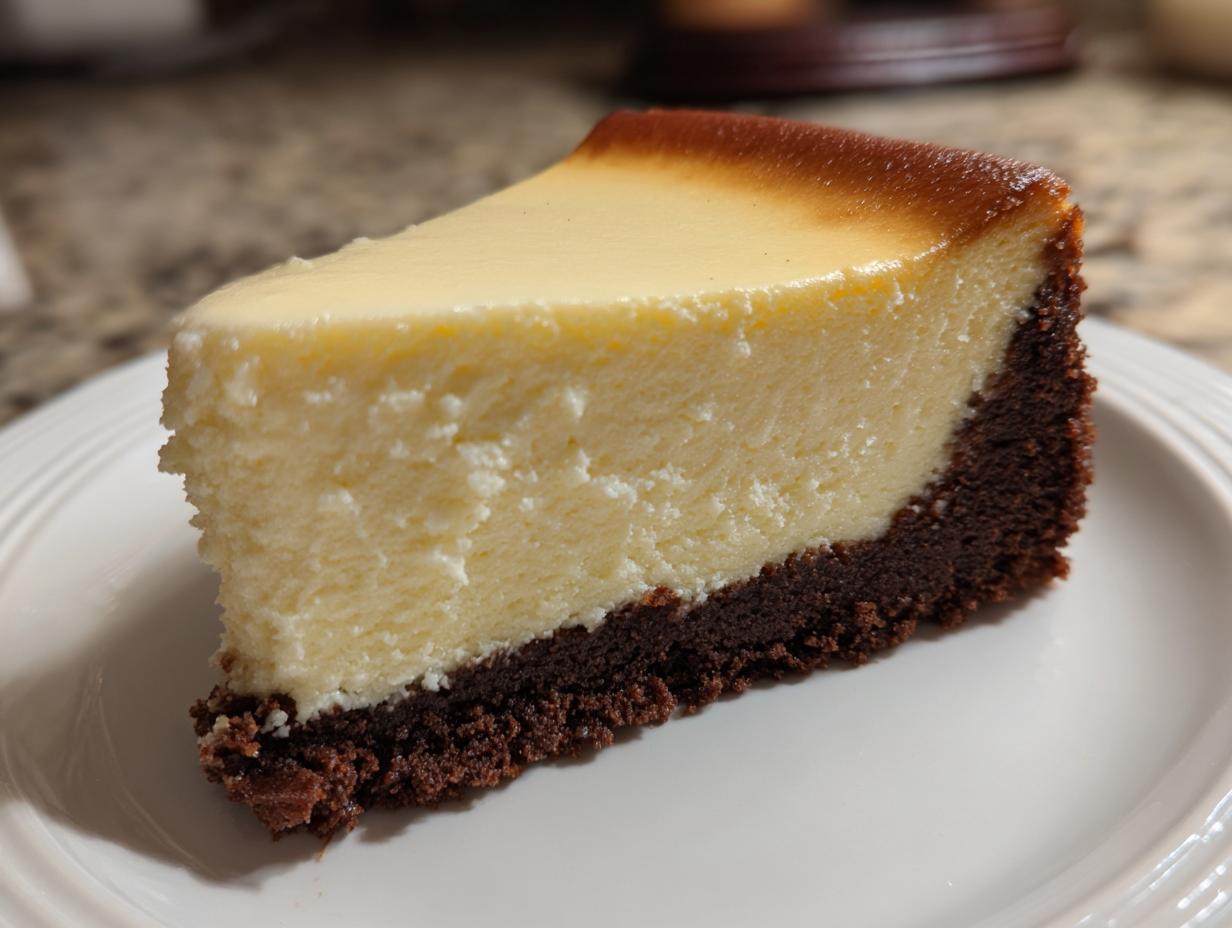
Oh, honey, let’s talk about the king of all desserts: that truly magnificent, impossibly rich, melt-in-your-mouth New York Cheesecake. It’s what everyone dreams about when they crave a celebration dessert. But I know what you’re thinking—the cracks! They haunt every baker attempting this majestic bake. Well, you can put those fears aside right now. I’ve taken everything I learned teaching school kids for thirty years and applied it to this recipe. We’re going to nail that signature creamy, dense texture together, and I promise you, this guide for the ultimate Classic New York Cheesecake will result in a perfectly smooth top every single time. Stick with me; we won’t let that beautiful dessert crack!
- Why This Is The Best New York Cheesecake Recipe You Will Ever Need
- Gathering Ingredients for Your New York Cheesecake
- Preparing the Buttery Graham Crust Cheesecake Base
- The How to Make Perfect Cheesecake Filling: Mixing Technique
- Baking Cheesecake Water Bath Tips for Your New York Cheesecake
- The Crucial Slow Cooling Process for Your Homemade New York Style Dessert
- Chilling and Serving Your Decadent Cheesecake Dessert
- Ingredient Notes and Substitutions for New York Cheesecake Recipe
- Frequently Asked Questions About Making Classic Baked Cheesecake
Why This Is The Best New York Cheesecake Recipe You Will Ever Need
When you tell folks you’re making a New York Cheesecake recipe, you’re promising something legendary. People expect that satisfying density, that rich flavor that screams luxury. This recipe delivers exactly that, and I’ve built in all my best tricks so you don’t have to worry about the usual pitfalls. Honestly, making a truly perfect cheesecake is more about knowing these specific techniques than just following measurements.
- It delivers that famous, beautiful density you only find in the best bakeries.
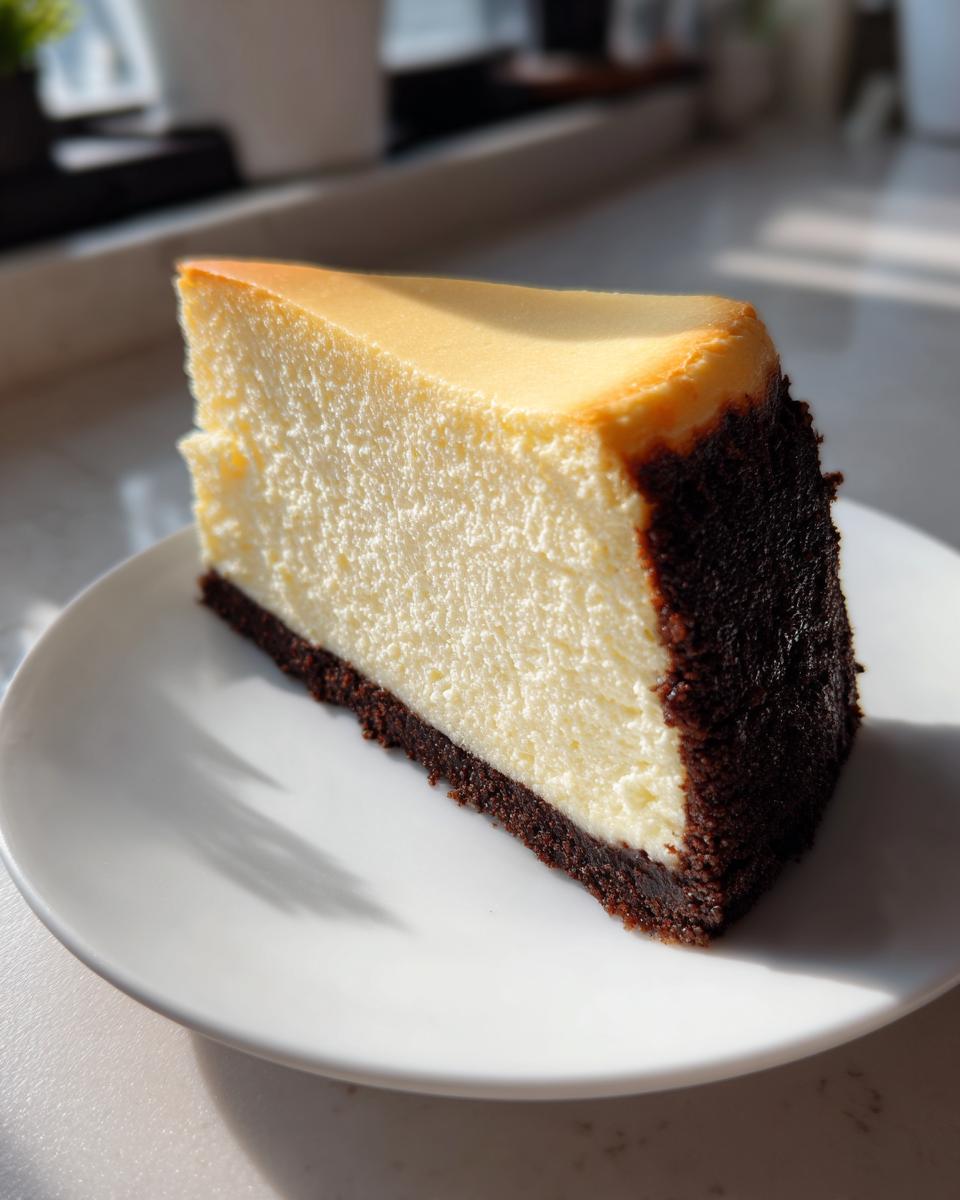
- We skip the airy, fluffy texture—we’re aiming for rich and substantial, just like the best cheesecake recipe should be!
- You get a wonderfully buttery graham crust that holds up perfectly under the heavy filling.
Achieving That Signature Creamy Dense Cheesecake Texture
The secret to that incredible, almost velvety structure lies in two places. First, we use four full packages of that necessary, full-fat cream cheese—no light versions allowed here! Second, and this is huge, we mix the filling *minimally*. Once those eggs go in, you just want them gently folded in. Those four eggs give the structure, but adding air is the enemy of density. We want rich, not fluffy!
No Crack Cheesecake Secrets Revealed
If the cracks worry you, sweet friend, you’re in the right place. We use two non-negotiable defenses. The first is wrapping that pan like it’s going swimming—it’s getting a gentle dip in a hot water bath! The second defense happens *after* the bake: we never pull it out cold. We let it cool down slowly, right inside the turned-off oven. These steps guard against thermal shock, which is what causes all those sad surface fissures.
Gathering Ingredients for Your New York Cheesecake
Good ingredients are the foundation of any timeless classic dessert, and this New York Cheesecake recipe is no exception. I call this an investment; you can’t skimp when you’re striving for that ultimate creamy experience. You need everything to be perfect before you even turn the mixer on! Seriously, make sure you plan ahead, especially for the dairy items. If you grab those four blocks of cream cheese right out of the fridge, you’ll end up with lumps, and we absolutely can’t have lumpy batter on our way to the ultimate creamy cheesecake.
Take a look at the list below. For the crust, we need the buttery crunch—which you can read more about in my flaky butter pie crust guide, though we’re using crumbs here—and for the filling, we rely on those rich dairy components. For the best results in this rich dessert recipe, please, please bring the cream cheese, eggs, and sour cream out at least two hours before you plan to start mixing! That little bit of prep work is half the battle won for the best Homemade New York Style dessert.
Here’s what you’ll need:
- Graham Cracker Crust: 1 1/2 cups graham cracker crumbs, 1/4 cup granulated sugar, and 6 tablespoons of unsalted butter, melted.
- For the Filling: Four (8 ounce) packages of full-fat cream cheese, 1 1/2 cups granulated sugar, 1 tablespoon vanilla extract, 1/4 teaspoon salt, 4 large eggs, and 1 cup of sour cream. Remember, all the dairy needs to be soft and totally room temperature!
Preparing the Buttery Graham Crust Cheesecake Base
Okay, before we even think about that rich filling, we have to set the stage with a sturdy, flavorful base. This buttery graham crust is what gives the New York Cheesecake that classic contrast in texture. Honestly, a great crust makes the whole decadent cheesecake dessert feel complete.
We’re using Step 1 from the instructions here. Grab your 9-inch springform pan—that’s key for getting it out later looking perfect! Mix those graham cracker crumbs, that 1/4 cup of sugar, and the melted butter right in a bowl until everything looks like wet sand. Don’t just sprinkle it in there—you need to press it down firmly across the bottom. I use the bottom of a measuring cup for this because I can really use my elbow grease to pack it tight. A loose crust will crumble when you slice it later, and we certainly don’t want that!
Once it’s packed down firmly, this simple step is essential: pop that whole pan into the refrigerator for 30 minutes. Chilling the crust helps it set up properly thanks to that melted butter solidifying in the cold. This short rest lets the crust firm up so it doesn’t absorb any sogginess when the wet filling goes on top, and it gives you a nice, clean border when you finally serve it up.
The How to Make Perfect Cheesecake Filling: Mixing Technique
Now comes the part where you channel your inner baker and really focus on technique. This is where we separate the merely good cheesecakes from the truly magnificent, ultimate creamy cheesecake wonders. Remember, we are aiming for that rich, dense standard of a genuine New York Cheesecake recipe, and air is our enemy right now. Any extra air you beat in will only try to escape during baking, creating those terrible surface gaps.
So, listen closely to the order! First, take your softened cream cheese and beat it alone until it’s perfectly smooth and creamy. I mean completely lump-free. Then, slowly add your sugar, vanilla, and salt. Beat this just until it’s combined—stop as soon as you don’t see white sugar streaks anymore. Don’t be tempted to let the mixer run!
Next, the eggs. This is very important for how to make perfect cheesecake: add them one at a time. Let the mixer just incorporate the first egg fully before adding the next. Overmixing there is when things go wrong! Finally, gently fold in that cup of room-temperature sour cream. When I say fold, I mean it—just enough to blend, and then you stop. Seriously, stop mixing when the batter looks smooth. Trust me; this lack of overmixing is a major part of our no crack cheesecake secrets!
Room Temperature Matters for Classic Baked Cheesecake
I cannot stress this enough: cold ingredients fight you every step of the way. If your cream cheese is cold, you have to overmix to get rid of the lumps, and that adds air. If your eggs are cold, they shock the cream cheese batter, creating little bits of curdling. We want a silky, homogenous batter for that flawless classic baked cheesecake finish, and the only way to get that gorgeous pourable consistency is warming everything up first. Take them out early; it’s worth the wait!
Baking Cheesecake Water Bath Tips for Your New York Cheesecake
This part sounds intimidating, I know! Everyone sees the water bath and thinks, “Oh dear, this is getting too complicated.” But honestly, once you see how simple this setup is, you’ll realize it’s the easiest insurance policy you could ever buy for your New York Cheesecake. The water bath, or bain-marie as the fancy folks call it, creates a steamy, humid environment. That steam prevents the outside edges from baking too fast and hardening before the middle sets, which is the main trigger for cracking.
So, what do we do? First up is protecting that beautiful graham crust! Take heavy-duty aluminum foil—and I mean thick stuff—and wrap your springform pan completely, bottom and all sides, being very thorough. We are making a little waterproof boat here, because we don’t want any of that hot bath water seeping into your crust. Trust me, soggy crust is a tragedy!
Next, get your larger roasting pan ready. Place that foil-wrapped springform pan right down in the center of the roasting pan. Now, preheat your oven to 325 degrees Fahrenheit—keep that temperature gentle. Once the oven is warming up, you’re going to carefully pour hot water—freshly boiled water is best—into the roasting pan. You don’t want the water to boil inside the oven, just start it hot! Pour it in slowly until it reaches about halfway up the sides of your cheesecake pan. This whole setup helps keep the baking temperature consistent and gentle, which is the key to that smooth, gorgeous top on your Classic baked cheesecake.
The Crucial Slow Cooling Process for Your Homemade New York Style Dessert
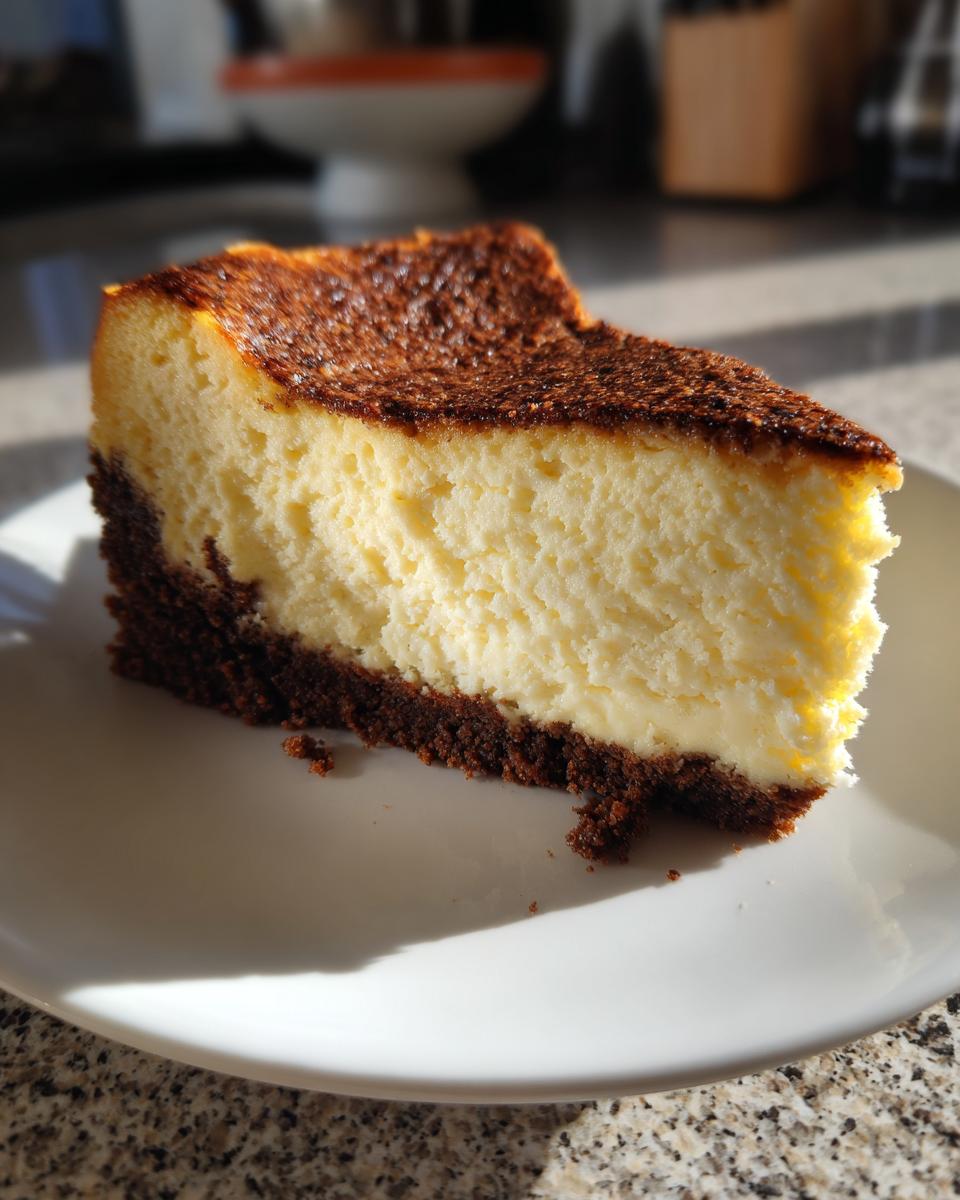
We’ve baked it beautiful! The edges look set, that lovely, small jiggle remains in the center—it’s time for the second most important step in achieving that flawless New York Cheesecake: the ridiculously slow cooldown. If you pull that hot decadent cheesecake dessert straight out of a 325-degree oven and set it on the counter, it’s going to have a thermal shock meltdown. That sudden temperature drop causes the filling to seize up too fast and pull away from the sides, resulting in cracks. We want gentle transitions, remember? Treat your baking like a careful lesson in patience!
This is where my teaching skills really come in handy because this is non-negotiable for anyone wanting a perfect result using this homemade New York Style dessert technique.
Once your 60 to 75 minutes are up, and the center 2 inches are still slightly jiggly—that’s your cue. Do *not* open the oven door immediately! Turn the oven completely off. Seriously, switch that dial all the way to zero. Now, take a wooden spoon, or even just a wad of paper towels, and prop the oven door open just a couple of inches. It just needs a slight gap!
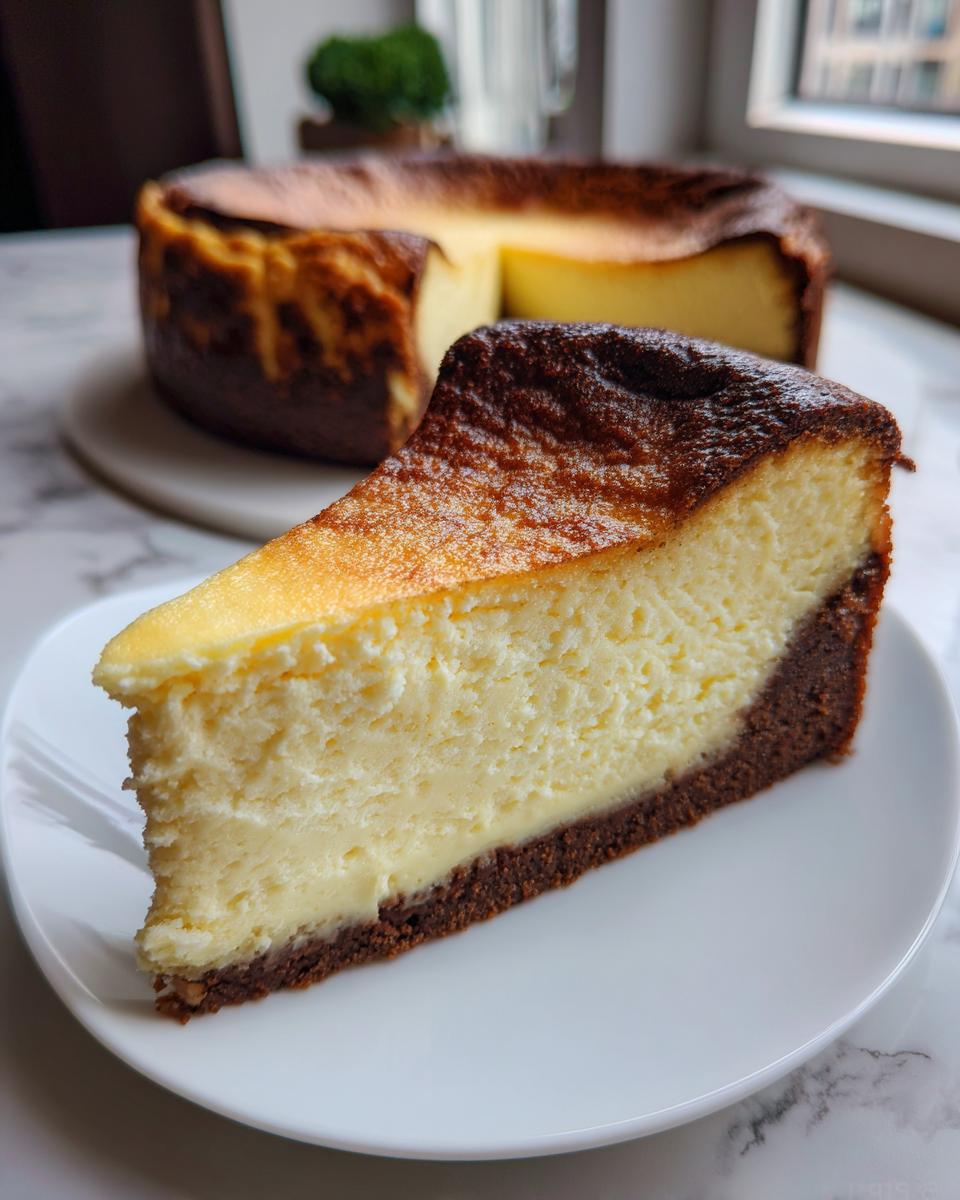
Leave the Classic baked cheesecake sitting right there in the cooling oven, steam bath and all, for a full hour. This gradual descent in temperature is the secret weapon that lets the physics of the cheesecake settle down gently. It keeps that surface smooth and even, which is the hallmark of true New York Cheesecake perfection. No rushing allowed here; an hour of waiting earns you a perfect dessert!
After that hour is up, you can finally breathe a sigh of relief. Carefully take the roasting pan out of the oven. Now, gently lift the foil-wrapped springform pan out of the hot water bath and peel off that aluminum foil wrapping. You can set the cheesecake on a wire rack to continue cooling down to room temperature before it heads off for its long chilling period. Trust your patience; this slow cooling ensures you get that impossibly smooth finish every time!
Chilling and Serving Your Decadent Cheesecake Dessert
Your beautiful New York Cheesecake has survived the heat, and now it needs a little quiet time to transform into the decadent dream it’s meant to be! We’re at steps 9 and 10 here, and while you might be tempted to grab a slice right now, please don’t. That soft, warm center needs to fully set up to achieve the proper, dense structure that makes this an NYC dessert classic.
After that hour of slow cooling inside the oven, you took it out to come to room temperature, right? Great! Now, it’s time for the refrigerator. This isn’t just for chilling; this is when the starches and fats fully solidify, giving you that truly rich and satisfying texture. You absolutely must chill this dessert for a minimum of six hours. I won’t even bother cutting it unless it has been in there overnight. Seriously, if you want that perfect slice of ultimate creamy cheesecake, plan one day ahead!
When the time finally comes—and I know the aroma is killing you—you need to know how to release it gracefully. That springform pan is essential, but getting the ring off without messing up the sides takes a little know-how. Before you try to unclasp it, take a very thin, small offset spatula or even a thin knife and carefully run it around the very edge where the cheesecake meets the pan side. This lets you know where the cake might be clinging slightly. Then, unlatch the springform ring and carefully lift it straight up. If you chilled it long enough, it should release cleanly, leaving you with that stunningly smooth side profile perfect for showcasing your New York Cheesecake.
Serve slices tall and proud, maybe with a little fresh berry compote if you’re feeling fancy, but honestly, this rich dessert recipe needs nothing else. Enjoy the fruits of your patience! Find more of my favorite rich dessert recipes right here on the blog!
Ingredient Notes and Substitutions for New York Cheesecake Recipe
Now we circle back to the ingredients themselves, because even the perfect technique can’t save a recipe if you grab the wrong stuff! As I mentioned earlier, when you are aiming for that truly authentic, almost regal texture of a proper New York Cheesecake, you have to follow the dairy rules. This isn’t the place to try reducing fat or cutting corners; this is about honoring what makes an NYC dessert classic so special!
My biggest non-negotiable? Full-fat cream cheese. You need those 8-ounce blocks of full-fat, brick-style cream cheese. If you try to swap in low-fat or whipped versions, you’re losing the structural integrity and the rich mouthfeel that defines this dessert. It’s the high fat content that creates that incredibly smooth, dense body. If you use anything else, you won’t get the same result, no matter how perfectly you manage the water bath. This is one of those recipes where quality in equals quality out.
For the sour cream, which adds that essential slight tanginess that cuts through all that richness, using room-temperature full-fat sour cream is best. Now, some folks ask if they can swap in Greek yogurt, and while you *can* technically substitute it in a pinch, I’d advise against it for this specific New York Cheesecake recipe. Greek yogurt tends to be much thicker and can behave differently when heated, potentially leading to a slightly grainy texture rather than the dreaminess we want. For the best flavor and texture comparison, check out some of the deeper dives into how bakers achieve that tall and creamy cheesecake texture!
Also, remember that note about vanilla and salt? Don’t skip the salt! Just a tiny pinch balances the overpowering sweetness from nearly three cups of sugar. It makes the entire creamy dense cheesecake taste complex instead of just sweet. It’s those little details that elevate a simple bake into something truly memorable!
Frequently Asked Questions About Making Classic Baked Cheesecake
I know you’ve been reading all my tips on the water bath and the slow cool, but sometimes you just have quick questions running through your head while the mixer is warming up! That’s totally normal. Making a Classic baked cheesecake is a commitment, and you want to feel confident about every step. Here are a few things I always hear folks asking about when they are tackling their first true New York Cheesecake recipe.
Can I skip the water bath entirely?
Oh, honey, I wish I could tell you that you can skip it! As a teacher, I have to be honest, though: if you want that incredibly smooth, dense texture and absolutely zero cracks for your Homemade New York Style dessert, you really, really shouldn’t skip the water bath (baking cheesecake water bath tips are right up there with oven temperature for importance!). The steam is crucial for keeping the temperature gentle so the protein structure in the dairy sets slowly and evenly. If you skip it, you risk a dry top and definite cracking. It’s just not worth the gamble when you’re trying to achieve that ultimate creamy cheesecake!
What’s the main difference between standard cheesecake and the New York style?
That’s such a good question, and it really gets down to richness and structure! A standard, lighter cheesecake often uses lighter sour cream or even yogurt and bakes quickly without that full water bath. They tend to be fluffier, almost like a mousse depending on the recipe. Our New York Cheesecake, on the other hand, relies on a massive amount of full-fat cream cheese, eggs, and sour cream, all baked low and slow to create that signature dense, almost velvety richness. It’s heavy, it’s decadent, and it definitely tastes like a NYC dessert classic!
Do I absolutely have to use a graham cracker crust?
Nope, you don’t *have* to, but if you want that authentic flavor combination that pairs so well with the tang of the filling, I highly recommend it. That crunchy, buttery graham crust cheesecake base is the perfect textural counterpoint to the smooth filling. If you’re leaning toward skipping it, you might end up with a delicious cake, but it won’t quite capture that classic feel. If you want to experiment, vanilla wafers or shortbread cookies work in a pinch, but the graham crackers are the traditional go-to for a reason!
Why did my filling separate slightly when I checked it?
If your filling is looking a little… curdled or separated, that usually means one of two things happened. Most likely, your dairy ingredients weren’t completely at room temperature, causing the batter to seize up when mixed. Or, you might have overmixed after adding the eggs. Remember what I said about only mixing until *just* combined? Any extra beating introduces air and can literally break the emulsion of the fats and liquids. For your next attempt at how to make perfect cheesecake, focus on gentle incorporation once those eggs are introduced!
PrintThe Ultimate Classic New York Cheesecake with Foolproof Water Bath Technique

Make the best New York Cheesecake at home. This recipe delivers a rich, creamy, and dense dessert with a buttery graham cracker crust, using a water bath method to prevent cracking for a flawless finish.
- Prep Time: 25 min
- Cook Time: 75 min
- Total Time: 9 hours 40 min
- Yield: 12 servings 1x
- Category: Dessert
- Method: Baking
- Cuisine: American
- Diet: Vegetarian
Ingredients
- 1 1/2 cups graham cracker crumbs
- 1/4 cup granulated sugar (for crust)
- 6 tablespoons unsalted butter, melted
- 4 (8 ounce) packages full-fat cream cheese, softened to room temperature
- 1 1/2 cups granulated sugar (for filling)
- 1 tablespoon vanilla extract
- 1/4 teaspoon salt
- 4 large eggs, room temperature
- 1 cup sour cream, room temperature
Instructions
- Prepare the crust: Combine graham cracker crumbs, 1/4 cup sugar, and melted butter. Press firmly into the bottom of a 9-inch springform pan. Chill the crust for 30 minutes while you prepare the filling.
- Preheat your oven to 325 degrees Fahrenheit. Wrap the outside of the springform pan tightly with heavy-duty aluminum foil, covering the bottom and sides completely to protect it from water.
- Prepare the water bath: Place the foil-wrapped springform pan inside a larger roasting pan.
- Make the filling: In a large bowl, beat the softened cream cheese with an electric mixer until completely smooth. Scrape down the sides.
- Gradually add the 1 1/2 cups of sugar, vanilla extract, and salt. Beat until just combined. Do not overmix.
- Add the eggs one at a time, beating only until each egg is incorporated. Mix in the sour cream until the batter is smooth. Overmixing adds air, which causes cracks.
- Pour the filling over the chilled crust.
- Carefully pour hot water into the roasting pan until the water reaches about halfway up the sides of the springform pan.
- Bake for 60 to 75 minutes. The edges should look set, but the center 2 inches should still jiggle slightly when gently nudged.
- Turn off the oven. Prop the oven door open slightly (about 2 inches) using a wooden spoon. Let the cheesecake cool slowly inside the turned-off oven for 1 hour. This slow cooling prevents cracking.
- Remove the cheesecake from the water bath and foil. Let it cool completely on a wire rack at room temperature.
- Chill the New York Cheesecake in the refrigerator for at least 6 hours, or preferably overnight, before serving. Remove the springform ring before slicing.
Notes
- Bring all dairy ingredients (cream cheese, eggs, sour cream) to room temperature before starting. This prevents lumps and ensures a creamy texture.
- Use full-fat cream cheese only for the authentic dense texture of a classic New York Cheesecake.
- For a foolproof, no-crack cheesecake, do not skip the slow cooling process inside the turned-off oven.
Nutrition
- Serving Size: 1 slice
- Calories: 450
- Sugar: 35g
- Sodium: 300mg
- Fat: 30g
- Saturated Fat: 18g
- Unsaturated Fat: 12g
- Trans Fat: 0.5g
- Carbohydrates: 38g
- Fiber: 1g
- Protein: 8g
- Cholesterol: 120mg