
There is just something truly special about taking simple flour and water and turning it into a bubbling, cheesy masterpiece right on your own kitchen counter. That’s the magic of a fantastic homemade pizza! As a former teacher and a mom who grew up rooted in the Midwest, I learned long ago that the best meals—the ones people remember—don’t require complicated tools, just reliable recipes and a lot of love. My goal here at Cooking by Carla is to give you that absolute bedrock recipe: a dependable, easy pizza dough that guarantees a satisfying crust for your family pizza night. Forget the takeout menus this week; we’re making the best homemade pizza from scratch!
- Why This Is The Best Homemade Pizza Recipe For Family Pizza Night
- Gathering Ingredients for Your Homemade Pizza
- Step-by-Step Instructions for Perfect Homemade Pizza
- Ingredient Notes and Variations for Homemade Pizza Recipes
- Best Pizza Toppings Ideas for Your Next Homemade Pizza
- Storage and Reheating Instructions for Homemade Pizza
- Frequently Asked Questions About Making Homemade Pizza
- Sharing Your Family Pizza Night Creations
Why This Is The Best Homemade Pizza Recipe For Family Pizza Night
When I developed this recipe, I wanted one that truly was fail-safe. I know you’re juggling school runs and after-school activities, so this version works perfectly for a quick weeknight pizza, but it’s patient enough for you to achieve that beautiful artisan pizza at home feeling if you have a few hours.
- You get a soft center with a wonderfully crisp outside.
- The dough handles easily—no sticking or snapping back!
- It’s the foundation for every great topping combination.
For more ideas on simplifying your schedule, check out my simple weeknight dinners collection.
The Secret to Chewy Pizza Dough
The real key to that satisfying mouthfeel is a combination of two things: properly waking up your yeast and giving the dough enough kneading time. When you mix those simple ingredients, you are developing the gluten structure. This structure is what creates that resilient, elastic quality, giving you the perfect chewy pizza dough that holds up beautifully to generous sauce and cheese.
Gathering Ingredients for Your Homemade Pizza
The foundation of any great meal is good ingredients, and pizza is no exception! Since we aren’t using a box mix here—we are making this from scratch pizza—let’s make sure our pantry is ready. I’ve listed out exactly what you need below. Trust me, when you use the right yeast and the right temperature of water, everything just clicks.
Ingredients for the Easy Pizza Dough Recipe
For this easy pizza dough recipe, you only need six kitchen staples. It’s amazing how far these basic things can go!
- 1 packet active dry yeast (that’s usually about 2 1/4 teaspoons—don’t skip checking the date on your yeast!)
- 1 teaspoon granulated sugar (This helps wake up that yeast!)
- 1 cup warm water (It absolutely must be between 105°F to 115°F. Too cold, the yeast sleeps; too hot, you kill it instantly.)
- 2 1/2 cups all-purpose flour, plus more for dusting the surface
- 2 tablespoons olive oil, plus a little extra oil for greasing the bowl
- 1 teaspoon salt
Components for Assembling Your Homemade Pizza
Once your dough has risen beautifully, you’ll transition to pulling the pie together. Remember, you can use any sauce or topping you love, but this is the standard setup:
- 1/2 cup simple homemade pizza sauce (Recipe notes have ideas if you want to switch this up!)
- 1 1/2 cups shredded mozzarella cheese (Use the full-fat kind if you can; it melts so much better.)
- Your favorite pizza toppings (Pepperoni is a classic, but think about mushrooms or bell peppers, too!)
Step-by-Step Instructions for Perfect Homemade Pizza
Now for the fun part! Turning that smooth, rested dough into a bubbling, cheesy masterpiece right on your own kitchen counter. That’s the magic of a fantastic homemade pizza! As a former teacher and a mom who grew up rooted in the Midwest, I learned long ago that the best meals—the ones people remember—don’t require complicated tools, just reliable recipes and a lot of love. My goal here at Cooking by Carla is to give you that absolute bedrock recipe: a dependable, easy dough that guarantees a satisfying crust for your family pizza night. Forget the takeout menus this week; we’re making the best pizza from scratch!
Activating Yeast and Mixing the Dough
First things first, we wake everything up! In a small bowl, dissolve that teaspoon of sugar into your warm water. Then, sprinkle the dry yeast right on top. Wait about five to ten minutes. If nothing happens, your water was either too cold or too hot, and you’ll need to start that step over. You are looking for foam! Once it’s bubbly and smells slightly earthy, pour that yeast mixture into your large bowl containing the flour and salt. Use a sturdy wooden spoon and mix it well until you don’t see any dry flour spots and a shaggy dough forms. Easy peasy!
Kneading and Allowing the Chewy Pizza Dough to Rise
This step is where we build structure, so don’t rush it! Turn that shaggy mess onto a lightly floured surface. Get your hands in there and knead the dough for a solid five to seven minutes. You’re looking for it to feel smooth and elastic—it shouldn’t stick aggressively to your hands anymore. Once it’s handled perfectly, take a clean bowl and rub a little olive oil around the inside. Place your dough ball in, turn it over so it’s lightly coated, cover it up with plastic wrap, and let it sit somewhere warm. It needs a good hour, maybe an hour and a half, to double in size. This slow rise is what gives you that wonderful chewy pizza dough center that holds up so well.
Preparing the Oven and Shaping for Crispy Crust Pizza
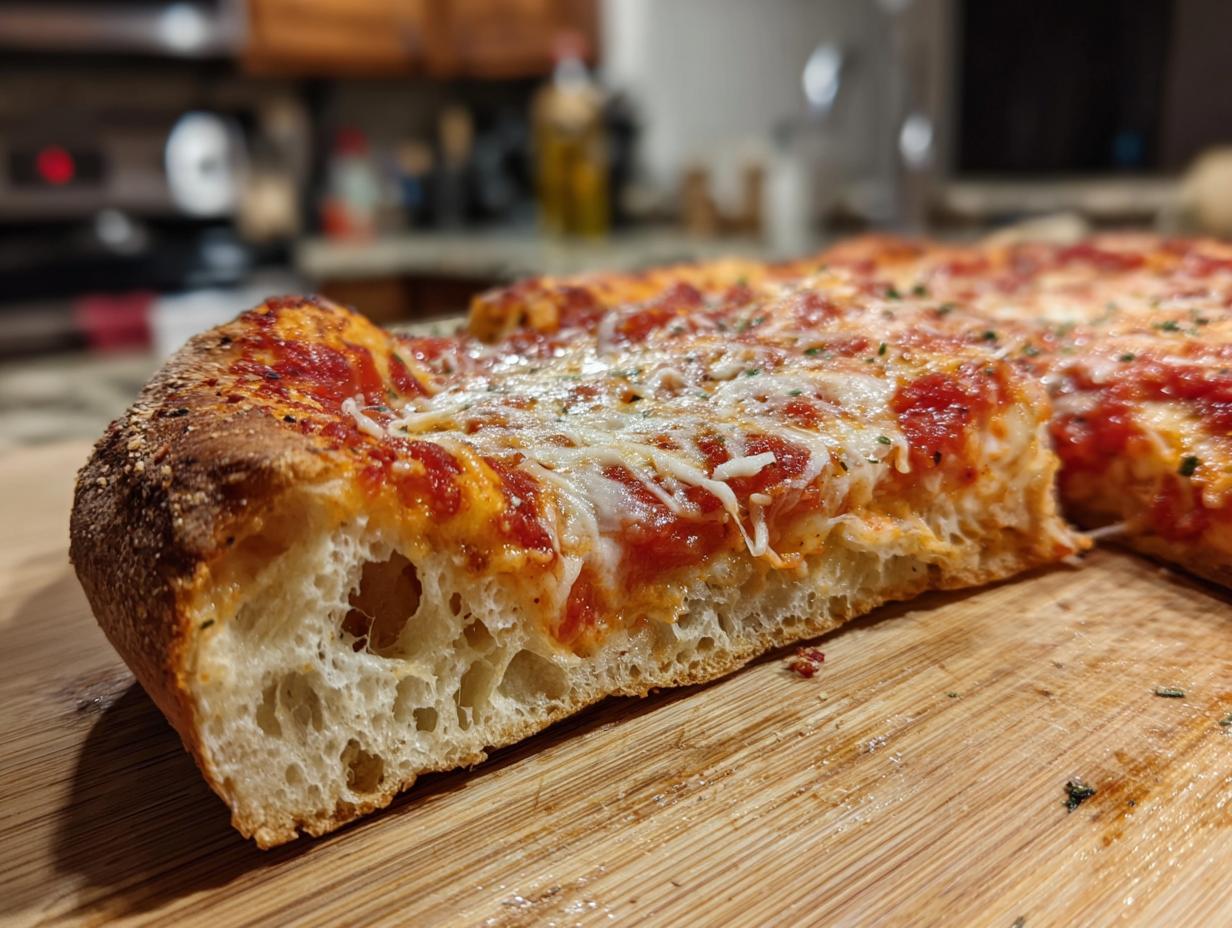
About thirty minutes before your dough is ready to punch down, you need to heat up your oven. Crank that temperature up high—we’re aiming for 475°F (245°C). If you have a pizza stone, slide it in now to get screaming hot. If you don’t, an upside-down baking sheet works wonderfully too, which is key to achieving that crispy crust pizza base. Once the oven is hot, gently punch the dough down to release the air. Now, gently stretch or roll that dough out into a 12-inch circle or whatever shape works for your pan. If you’re trying a Sheet Pan Pizza Idea, just make sure you coat that pan well!
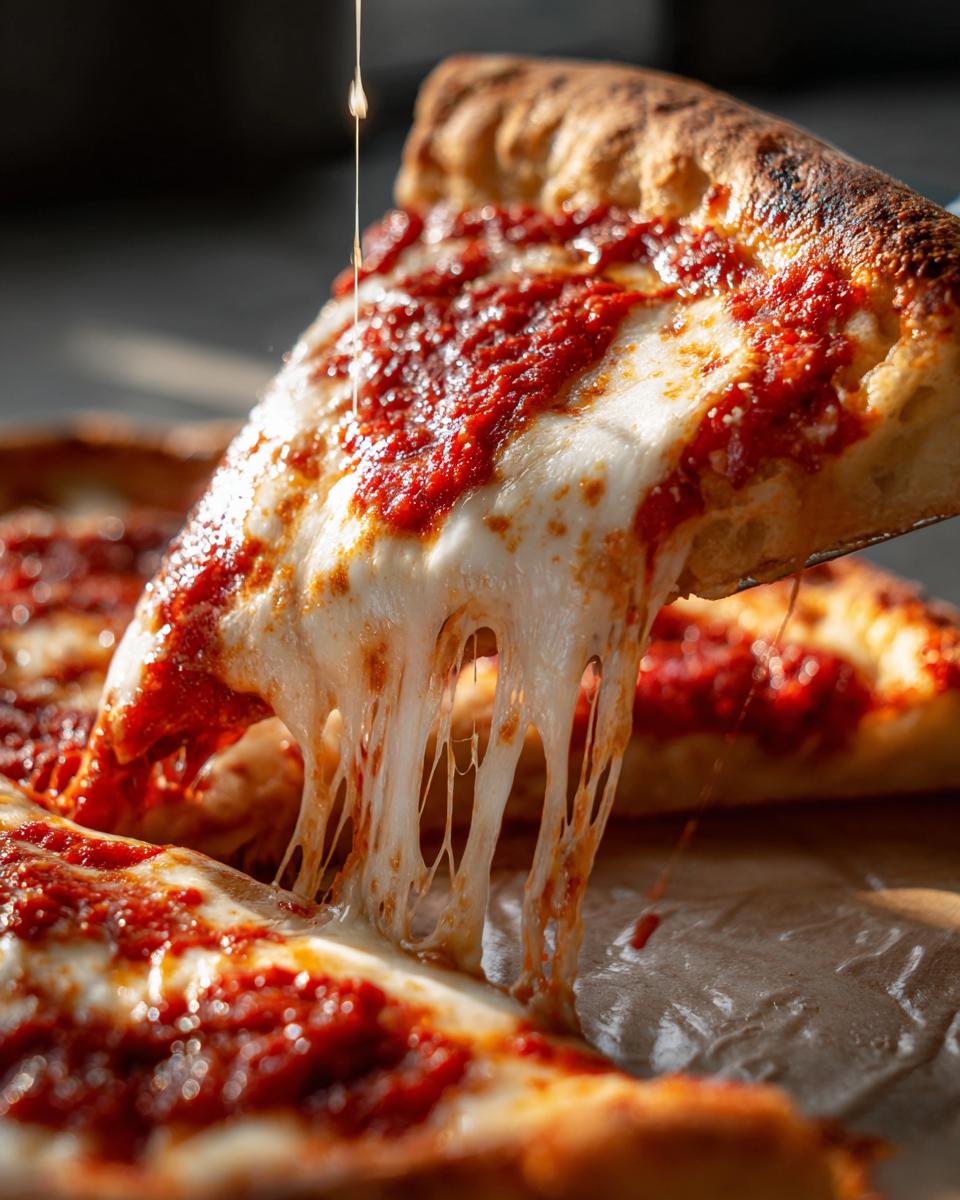
Assembling and Baking Your Homemade Pizza
Layering is crucial! Transfer your shaped dough onto a sheet of parchment paper—this makes sliding it onto that hot stone much less stressful for you. Spread your homemade pizza sauce evenly, making sure to leave that 1-inch border for the crust. Top generously with mozzarella and whatever toppings call your name. Slide the whole thing—parchment and all—right onto that preheated surface. Bake it for 10 to 15 minutes. Look for that crust to turn golden and the cheese to be bubbling happily. Once it comes out, let it rest for five minutes before slicing. That little cool-down period keeps all the gorgeous molten cheese right where it belongs!
Ingredient Notes and Variations for Homemade Pizza Recipes
I always tell folks, my main goal is for you to have fantastic homemade pizza, even if life gets busy! The base recipe is great for a typical evening, but sometimes you want to elevate it just a bit, or maybe you’re strapped for time and need a super quick weeknight pizza fix. The beauty of this dough is how versatile it is. We can use some simple tricks to change the texture or even completely change the sauce profile!
Making an Artisan Pizza at Home with Cold Proofing
If you have a little foresight—maybe you planned this pizza day yesterday—you can really step up your game and achieve that beautiful, deeply flavored crust you see in fancy restaurants. This requires making the dough, going through the initial knead, and then—here’s the magic—instead of letting it rise on the counter, you put that oiled ball of dough into the fridge! If you let it cold-proof for 12 to 24 hours, the slow fermentation develops incredible depth of flavor we just can’t get when we rush things.
When you pull that chilled dough out to let it warm up before shaping, you’ll notice it’s got a complex chewiness that really screams artisan pizza at home. It doesn’t technically make it harder; it just demands that planning ahead, which I know isn’t always easy!
Ideas for Homemade Pizza Sauce Substitutions
While I love a classic tomato sauce, sometimes you just need a change of scenery, especially if you are leaning toward different toppings like chicken or greens. The instructions noted that you could easily skip the tomato sauce we used and swap it for something much creamier.
For a fantastic change of pace, try using a simple White Garlic Pizza Sauce. It’s so easy: just whisk together some olive oil, a few cloves of finely minced garlic (use fresh, please!), and a generous topping of grated Parmesan cheese until it’s a light paste. You spread that on your shaped dough instead of tomato, and suddenly, even a basic cheese pizza feels fancy. If you’re looking for inspiration for creamy sauces, you might enjoy my notes on making a great Alfredo sauce, adaptable for pizza or pasta; you can check out that recipe here!
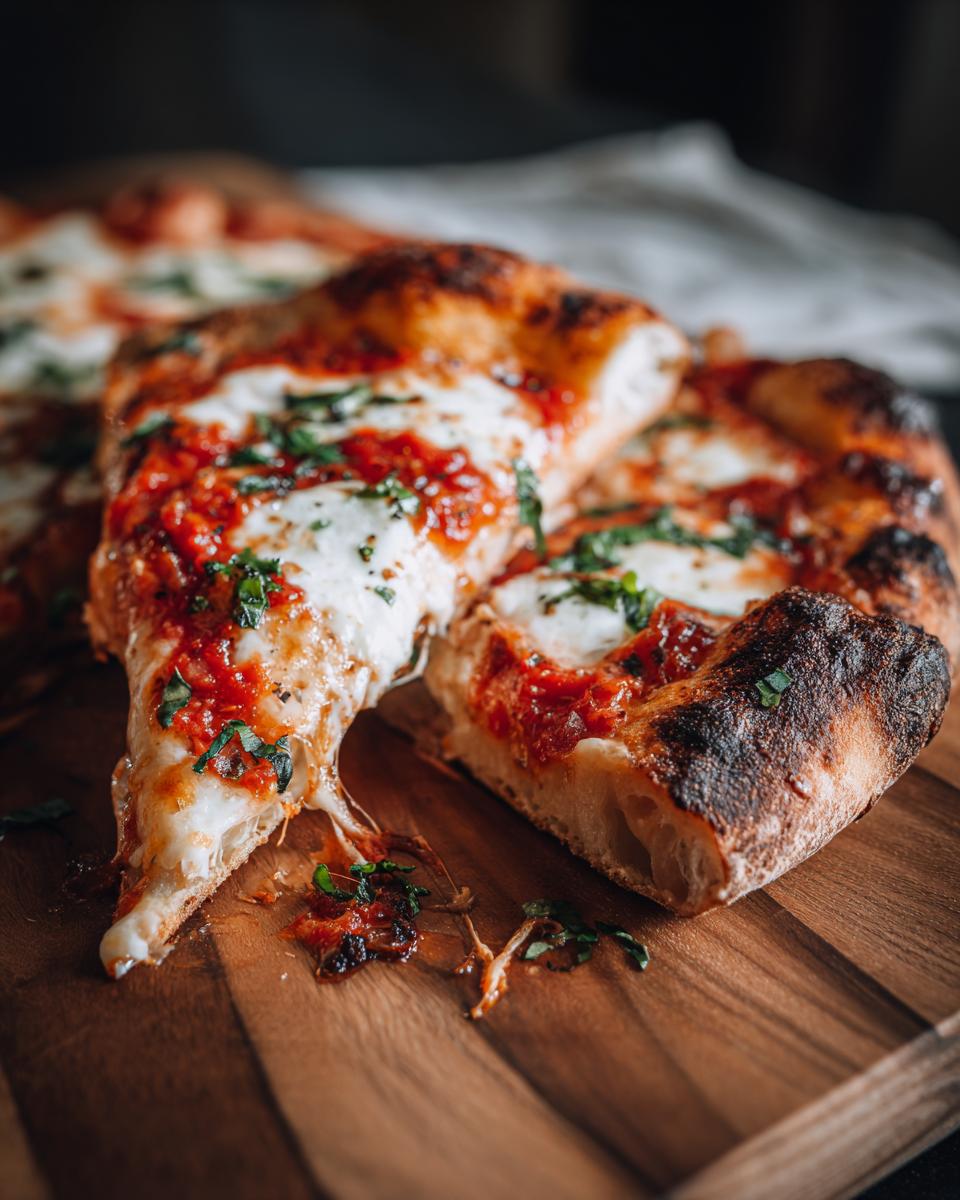
Best Pizza Toppings Ideas for Your Next Homemade Pizza
We’ve got the foundation down—the best pizza crust that’s sturdy enough for anything you throw at it. That means it’s time for the really fun part: making choices! Forget just sticking to pepperoni and mushrooms if you don’t want to. People look up so many creative homemade pizza recipes, and I want you to feel confident tackling them all. Since our dough is so reliable, let’s talk about some of those show-stopping topping combinations that people absolutely love making at home.
Try a BBQ Chicken Pizza Recipe
If you haven’t had a truly great homemade BBQ Chicken Pizza, you are missing out! It’s that perfect blend of sweet, smoky, and savory that just sings against salty cheese. To make this work best, you need to ditch the simple tomato sauce entirely. Instead, brush your stretched dough with your favorite BBQ sauce right up to the edge. Then, top it with shredded cooked chicken, maybe some thinly sliced red onion, and your mozzarella. It’s an absolute winner for family dinner!
If you want a recipe that breaks down exactly how to get that perfect flavor balance for this popular flavor profile, you can look at a fantastic guide for a Homemade BBQ Chicken Pizza with Caramelized Onions and Fresh Cilantro. It’s definitely worth the prep!
Ricotta and Specialty Toppings
Sometimes, the best pizza is one that leans into savory textures rather than standard sauce. If you’re looking for something truly gourmet, try using dollops of creamy ricotta cheese instead of spreading the cheese everywhere. That soft, fresh cheese gets wonderfully mild and creamy when baked. It pairs beautifully with salty prosciutto or a little fresh basil sprinkled on after baking.

And hey, if you have super adventurous eaters, don’t be afraid to go wild! People have amazing success making Taco Pizza—where you use seasoned ground beef, a little salsa, and then top it with cheese. You add the cold toppings like lettuce and sour cream *after* it comes out of the oven. It might sound wild, but it totally works on this sturdy crust!
Storage and Reheating Instructions for Homemade Pizza
Oh, the glorious leftovers! If, by some miracle, you have any homemade pizza left after your family pizza night, you absolutely have to know how to handle it the next day. Nothing is sadder than cold, soggy pizza the morning after, right? The microwave is your enemy here, unless you like your crust becoming soft and rubbery—which I certainly don’t!
For storing, make sure the pizza has cooled down completely first. If you wrap it while it’s warm, you trap steam, and that steam turns into sogginess. I always stack the slices separated by a little square of wax paper. That keeps the cheese from melting onto the next slice. Then, wrap the stack tightly in plastic wrap or place it in an airtight container. It stays perfectly good in the fridge for about three days.
The Best Way to Reheat for a Crispy Crust Pizza
When it comes time to enjoy it again, we are going for restoration, not just warming up! You want that satisfying crunch back in the crust. Forget the microwave; we are using dry heat. My absolute favorite trick for reviving that crispy crust pizza texture is using a skillet on the stovetop. Yes, the stovetop!
Here’s the secret: Place the cold slice directly into a dry, non-stick skillet over medium-low heat. Turn the heat up slowly. Let the bottom crust crisp up for about three to four minutes. Once the bottom is perfectly crunchy, add just one tiny drop of water to the pan—away from the pizza itself—and immediately cover the pan with a lid for sixty seconds. That trapped steam gently melts the cheese perfectly without making the crust soft again. It comes out tasting almost as good as fresh!
The Oven Method for Larger Batches
If you have more than just a couple of slices, the oven is your friend. Preheat your oven to 350°F (175°C). Spread the leftover slices directly onto a baking sheet. Don’t cover them! Bake them for about eight to ten minutes. This method works great because the dry, moderate heat warms the toppings through while the bottom of the crust gets a chance to dry out and get a nice little crisp back into it. It’s a very simple fix for getting the best pizza crust flavor back.
Frequently Asked Questions About Making Homemade Pizza
It’s natural to have questions when you’re moving from store-bought to from scratch pizza! Believe me, thirty years of teaching taught me patience, and I love walking you through the tricky spots. Here are the questions I get most often about making this the perfect homemade pizza for your family.
Can I make this No Fail Pizza Dough ahead of time?
Oh, yes, you absolutely can! In fact, I highly recommend it if you are planning ahead of time. Remember when we talked about cold proofing to achieve that incredible artisan pizza at home texture? That technique is the secret to making this No Fail Pizza Dough work for you later in the week. After you knead it and before you let it rise on the counter, just pop that oiled dough ball into an airtight container in the refrigerator. It will hang out happily for a full day, developing deep, complex flavor. Just remember to pull it out about an hour before you plan to bake so it can warm up before stretching.
What is the best way to get a Crispy Crust Pizza without a pizza stone?
Don’t worry if you don’t own a dedicated pizza stone! We all had to start somewhere, and you can still achieve that beautiful, crackly bottom for a truly crispy crust pizza. My best trick is to use a heavy-duty baking sheet—the thicker, the better. Turn that baking sheet upside down and preheat it in the oven while you are letting your dough rise. When it’s time to bake, transfer your assembled pizza *onto the hot, inverted sheet* using parchment paper or a dusted pizza peel. That blast of direct, screaming-hot metal mimics the pizza stone perfectly and keeps the bottom from getting soggy. It’s a wonderful way to ensure a great result for your next pizza night!
How important is the water temperature when waking up the yeast?
This is so important, my friends! If the water is too cold (below 100°F), the yeast falls asleep and your dough won’t rise at all—guess what? No rise means no texture, and you’ll end up with a very flat, dense bread instead of that wonderful chewy pizza dough. If it’s too hot (over 120°F), you actually kill the vital yeast organisms! You want the sweet spot, 105°F to 115°F. If you don’t have a thermometer, test it on the inside of your wrist; it should feel comfortably warm, not hot. This simple first step determines if you have a successful easy pizza dough recipe or a big flop!
Can I use bread flour instead of all-purpose flour?
You certainly can, especially if you are aiming for that ultra-chewy experience! Bread flour has a higher protein content than the all-purpose flour I listed, which means it develops stronger gluten bonds when kneaded. For this homemade pizza dough, if you swap in bread flour, reduce the amount by about 1/4 cup to start, as bread flour absorbs liquid a little differently. You might find you only need 2 1/4 cups total. If you want a slightly softer, more traditional crust, stick with AP flour, but bread flour is fantastic for a chewier result!
Sharing Your Family Pizza Night Creations
I truly hope this simple, reliable recipe helps you create tons of delicious memories around your table. My greatest joy, both as a former teacher and now as a grandma, is seeing people connect over food, and nothing brings folks together quite like a big, freshly baked homemade pizza!
Once you’ve had a chance to try this dough and top it with your absolute favorite ingredients—whether it’s a classic cheese pie or a bold BBQ Chicken creation—I would just love to hear what you thought. Did you try the cold-proof method? How did your crust turn out? Good food tastes even better when it’s shared!
If you want to show off your masterpiece, or if you have a question that didn’t quite get answered in our FAQs, please don’t hesitate to reach out. You can always send a note my way through the contact page. Happy baking, and enjoy that wonderful pizza night!
PrintThe Best Easy Homemade Pizza Recipe for Family Night

Make a delicious, classic homemade pizza from scratch. This recipe focuses on a reliable, easy pizza dough that yields a satisfying crust perfect for your favorite toppings.
- Prep Time: 20 min
- Cook Time: 15 min
- Total Time: 1 hour 45 min
- Yield: 1 large pizza (4 servings) 1x
- Category: Dinner
- Method: Baking
- Cuisine: American
- Diet: Vegetarian
Ingredients
- 1 packet active dry yeast (about 2 1/4 teaspoons)
- 1 teaspoon granulated sugar
- 1 cup warm water (105°F to 115°F)
- 2 1/2 cups all-purpose flour, plus more for dusting
- 2 tablespoons olive oil, plus more for the bowl
- 1 teaspoon salt
- 1/2 cup simple homemade pizza sauce
- 1 1/2 cups shredded mozzarella cheese
- Your favorite pizza toppings (e.g., pepperoni, mushrooms)
Instructions
- Activate the yeast: In a small bowl, dissolve the sugar in the warm water. Sprinkle the yeast over the top and let it sit for 5 to 10 minutes until foamy.
- Mix the dough: In a large bowl, whisk together the flour and salt. Pour in the yeast mixture and the 2 tablespoons of olive oil. Mix with a wooden spoon until a shaggy dough forms.
- Knead the dough: Turn the dough out onto a lightly floured surface. Knead for 5 to 7 minutes until the dough is smooth and elastic.
- First rise: Lightly grease a clean bowl with olive oil. Place the dough in the bowl, turning to coat. Cover the bowl with plastic wrap or a clean kitchen towel. Let the dough rise in a warm place for 1 to 1.5 hours, or until doubled in size.
- Preheat and prepare: About 30 minutes before the dough is ready, place a pizza stone or baking sheet in your oven and preheat to 475°F (245°C). This helps achieve a crispy crust pizza.
- Shape the dough: Gently punch down the risen dough. On a lightly floured surface, stretch or roll the dough into a 12-inch circle or desired shape for your sheet pan pizza idea.
- Assemble the pizza: Transfer the dough to a piece of parchment paper or a lightly oiled pizza peel. Spread the homemade pizza sauce evenly over the dough, leaving a 1-inch border. Sprinkle with mozzarella cheese and add your chosen toppings.
- Bake: Carefully slide the pizza (with the parchment paper, if using) onto the preheated stone or baking sheet in the oven. Bake for 10 to 15 minutes, or until the crust is golden brown and the cheese is bubbly.
- Cool and serve: Remove the pizza from the oven. Let it cool for 5 minutes before slicing. Enjoy your homemade pizza!
Notes
- For a chewier pizza dough, allow the dough to cold-proof in the refrigerator for 12 to 24 hours after the initial rise.
- If you prefer a white garlic pizza sauce, substitute the tomato sauce with a simple mixture of olive oil, minced garlic, and grated Parmesan cheese.
- To make this a quick weeknight pizza, use store-bought dough, but follow the shaping and baking instructions.
Nutrition
- Serving Size: 1 slice
- Calories: 300
- Sugar: 3
- Sodium: 450
- Fat: 10
- Saturated Fat: 4
- Unsaturated Fat: 6
- Trans Fat: 0
- Carbohydrates: 40
- Fiber: 2
- Protein: 14
- Cholesterol: 15