
Oh, you know those nights, right? You get that deep craving for something warm, savory, and totally comforting, something that tastes just like your favorite Tex-Mex takeout, but then you remember: deep-frying. Sticky counters, endless oil changes… no thanks! Well, don’t you worry your lovely head about it, because I’ve got the perfect fix. I developed these Crispy Baked Beef and Cheese Chimichangas while I was teaching third grade and then raising my own little ones. They are dependable, they come together in barely 35 minutes total—a lifesaver on a Tuesday! Best of all, we get that wonderful, golden crunch you expect from a classic, but without all the added fuss and extra grease. These are truly my go-to when I want a satisfying weeknight Mexican meal.
- Why You Will Love These Baked Chimichangas
- Gathering Ingredients for Your Beef and Cheese Chimichangas
- Simple Chimichanga Instructions: Making Homemade Chimichangas
- Tips for Success with Baked Chimichangas
- Variations: Chicken Chimichangas and Air Fryer Chimichangas
- Make-Ahead and Freezer Friendly Chimichangas
- Serving Suggestions for Your Cheesy Chimichangas
- Storage and Reheating Instructions for Leftover Chimichangas
- Frequently Asked Questions About Easy Chimichanga Recipe
- Sharing Your Homemade Chimichangas
Why You Will Love These Baked Chimichangas
When I developed this recipe, I wasn’t just aiming for tasty; I was aiming for doable! As a grandmother, I know that busy schedules still require delicious dinners. These Easy Chimichanga Recipe fit the bill perfectly for a true Quick Tex Mex Dinner.
-
Quick Prep for Weeknight Success
You won’t believe it, but you go from starting ingredients in the pan to everything ready for the oven in about 15 minutes! Seriously, having these on the table in just 35 minutes total means we can actually sit down together.
-
Crispy Chimichanga Texture Without the Oil
This is my favorite magic trick! We skip the deep fryer completely. Baking them with just a tiny brush of olive oil gives you that satisfying crunch every time you bite into a Crispy Chimichanga. They are definitely Healthier Chimichangas, but they taste like they took way more effort.
-
Freezer Friendly for Future Meals
I always make an extra batch just to tuck away. These roll up beautifully and freeze wonderfully, making them perfect Freezer Friendly Mexican Food for those days you have no time to cook but still want something homemade.
Gathering Ingredients for Your Beef and Cheese Chimichangas
When I’m putting together a new recipe, I always make sure to list out exactly what you need so there are no surprises halfway through. Getting the filling right is the secret here, especially with the cheese blend and that savory seasoned beef. I want you to have all the components ready to go so the assembly part moves quickly, just like when I whip up my tasty cheesy taco potatoes! Here is what you’ll need to pull together these wonderful Homemade Chimichangas.
Tortillas and Oil
You definitely need eight large flour tortillas for this batch—they need to be large enough to hold a good amount of filling! Remember, these need to be pliable so they don’t tear when you roll them up. Don’t forget the one tablespoon of olive oil; that’s what we brush on top to get that golden-brown finish in the oven.
The Best Chimichanga Filling Components
For the heart of your chimichangas, grab one pound of ground beef and one small onion, which you’ll want to chop up finely. You’ll also grab a standard packet (about 1 ounce) of your favorite taco seasoning and one cup of water. The most important part here, and I learned this the hard way when I had too much grease in my mixture, is to drain off every last bit of fat after you brown that beef!
Cheese Blend and Optional Beans
Now, for the gooey factor! We use a mix for the best melt and flavor: one cup of nice sharp shredded cheddar cheese and one cup of shredded Monterey Jack cheese. If you want to add extra creaminess, half a cup of refried beans is totally optional but highly recommended for that classic flavor!
Simple Chimichanga Instructions: Making Homemade Chimichangas
Alright, let’s get cooking! Making these Homemade Chimichangas is truly straightforward, which is why I love them so much for busy evenings. We’re skipping the old-fashioned deep-fry method that makes a huge mess and relying on the oven to give us that beautiful, Crispy Chimichanga shell. Pay attention to draining that fat, and you’ll be amazed at how light these feel compared to the restaurant versions. This is How to Make Chimichangas the easy way, trust me!
Preparing the Filling for Your Chimichangas
You start this process right on the stovetop. Get your ground beef and chopped onion sizzling away together in a skillet over medium heat until that meat is nicely browned—you don’t want any pink left! Once it’s browned, drain off every drop of excess fat; this keeps our final product from feeling greasy later. Then, stir in your taco seasoning and one cup of water. Let that mixture bubble happily for about five minutes until most of that liquid has been absorbed back into the beef. Take it off the heat once it’s done simmering.

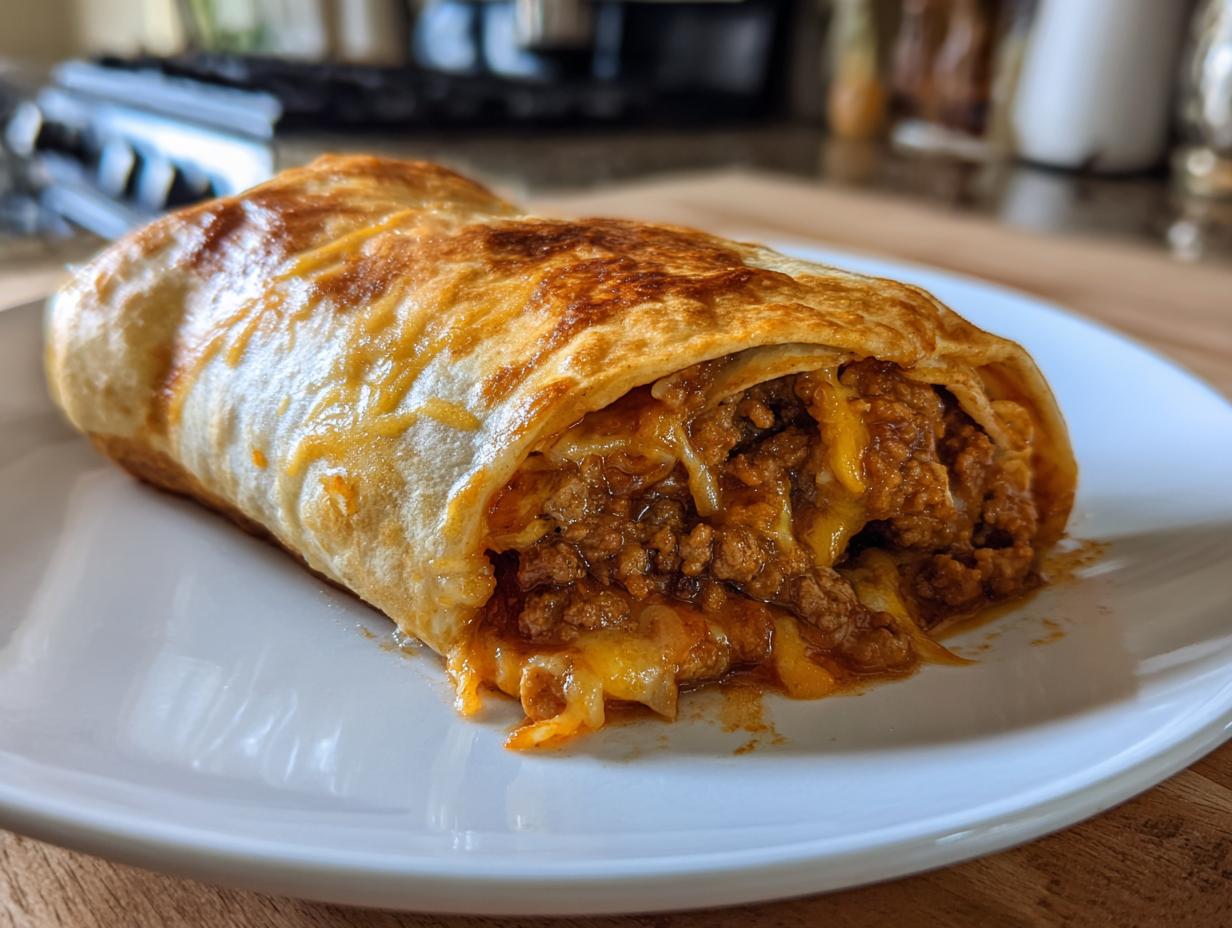
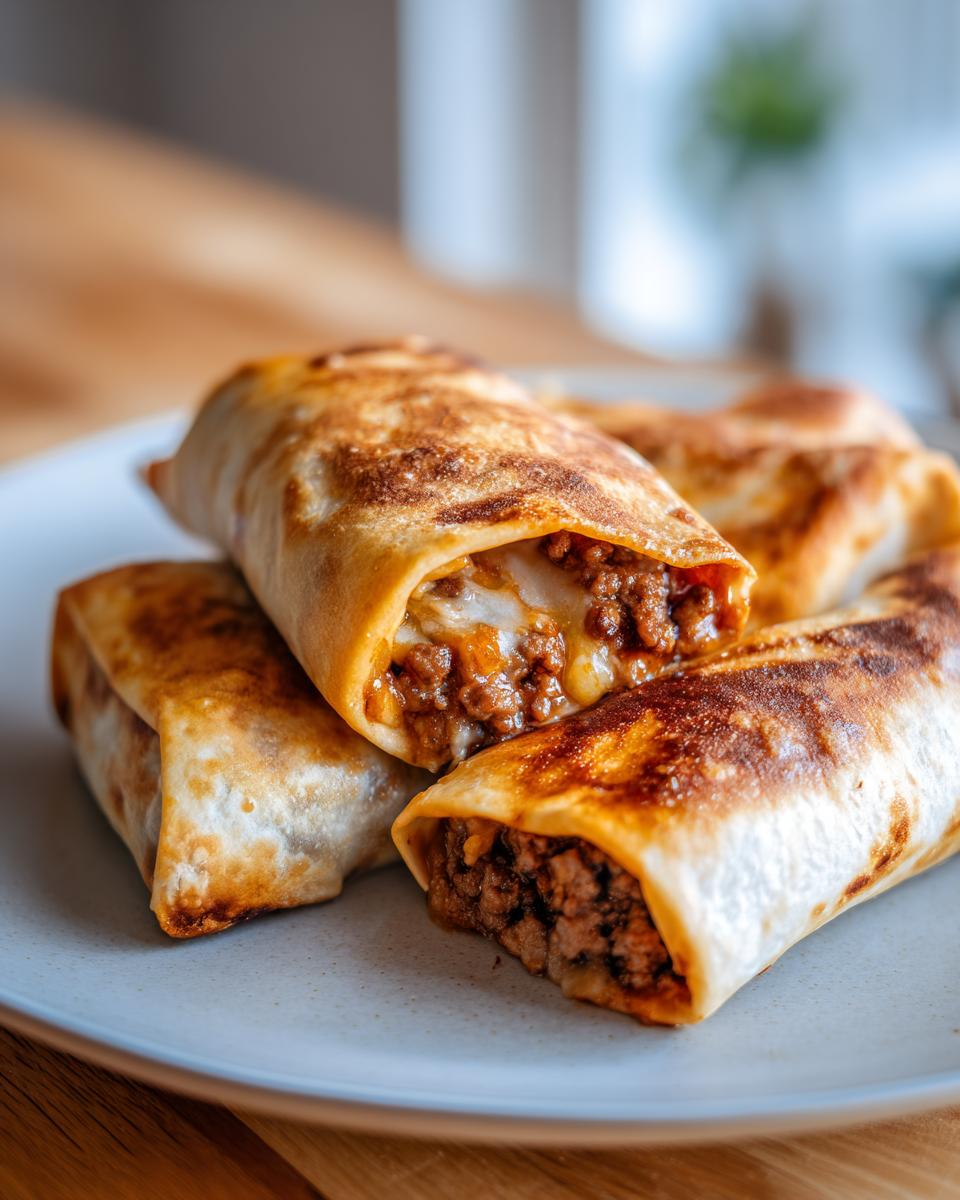
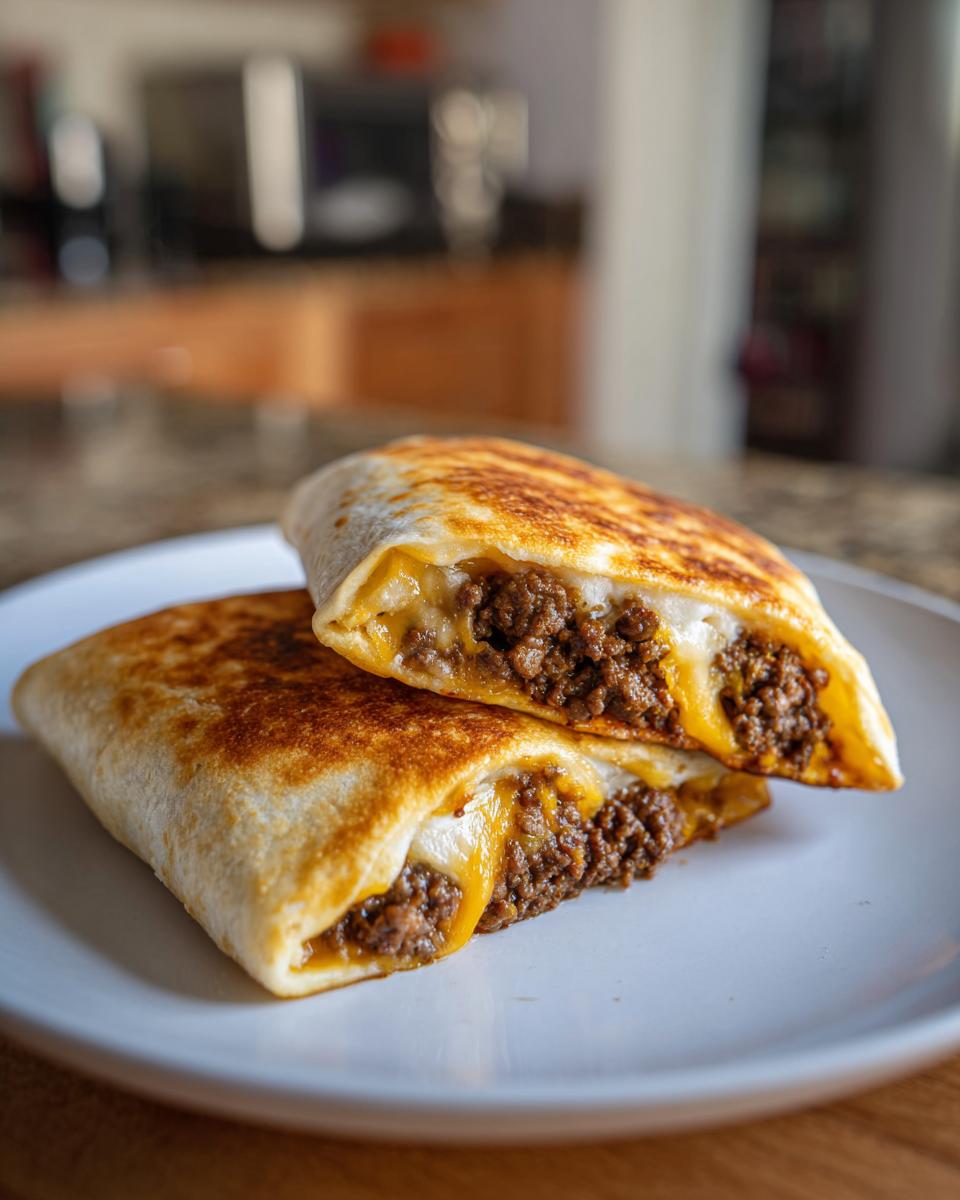
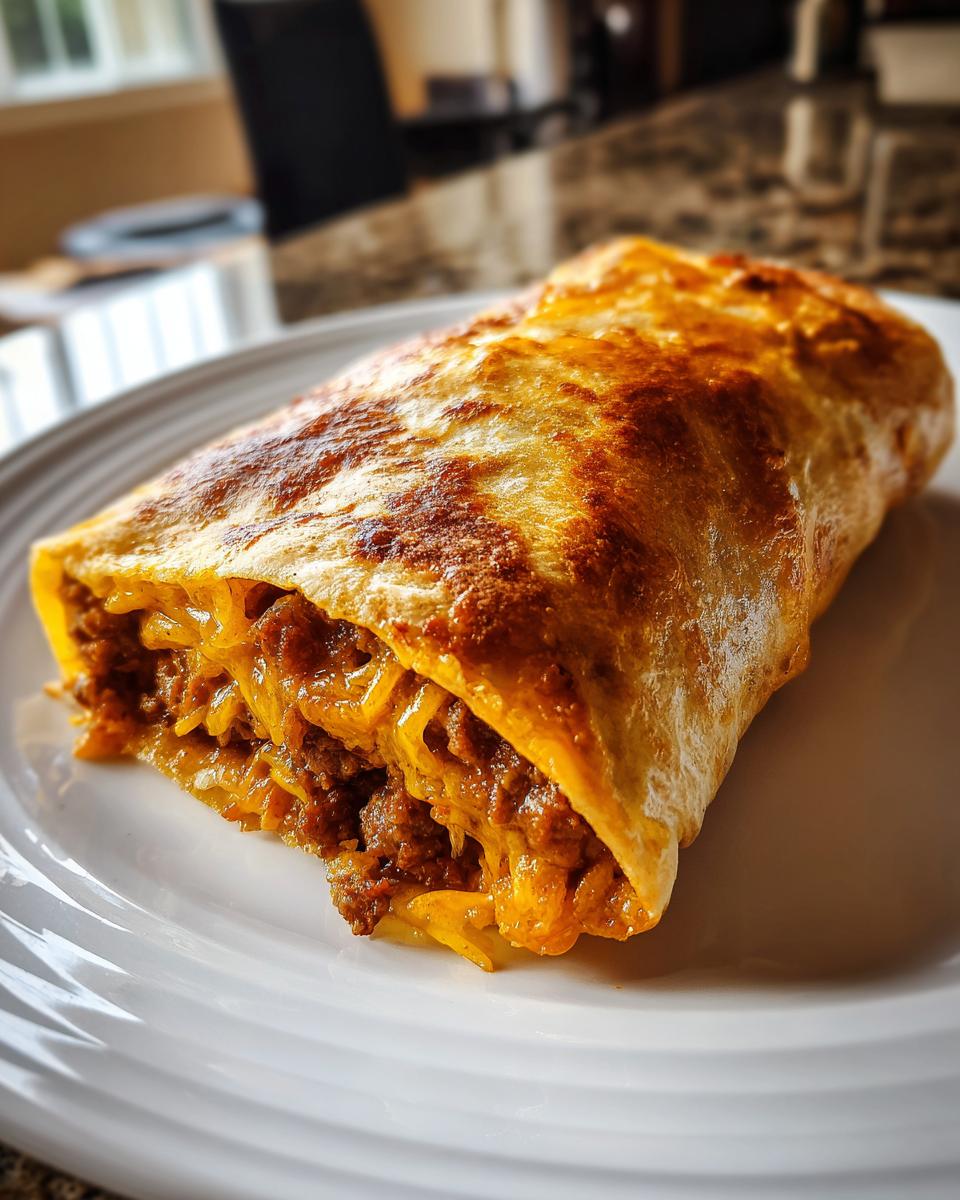
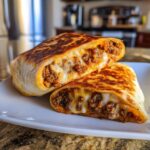
Assembling Your Crispy Chimichangas
This is where you need the warm tortillas—go ahead and microwave them for about 15 seconds just to make them wonderfully pliable. Lay one flat. If you are using those refried beans, spread a thin ribbon right down the center. Next, scoop on about a quarter cup of that seasoned beef mixture, and then sprinkle generously with your cheddar and Jack cheese blend. Now, the folding technique is crucial! Fold the shorter sides of the tortilla inward over the filling first. Then, starting from the bottom edge, roll it up tightly, just like a snug sleeping bag! Make sure you place it seam-side down on your baking sheet to keep everything tucked in tight.
Baking for Golden Perfection
Remember that olive oil we talked about? Now’s the time! Lightly brush the tops of your neatly rolled Chimichangas with the oil; this is the secret to getting that signature golden color. Preheat your oven to 400°F (200°C). Pop them in the oven and bake them for 15 to 20 minutes total. But here’s the secret to even crispiness: flip them over halfway through. When they come out, the tortillas will be beautifully golden brown and perfectly crunchy!
Tips for Success with Baked Chimichangas
I’ve learned a few things over the years stepping away from the deep fryer—mostly that technique matters just as much as the filling when you’re baking these. Since we want that satisfying texture, pay close attention to these two steps. Following these little bits of advice will make sure your Beef Chimichangas turn out perfectly golden and won’t split open halfway through baking. This is the kind of practical wisdom I used to share with my classroom, and it’s just as useful as telling them how to make my easy chicken gravy recipe without drippings!
Pliability is Key for Rolling
Oh, please don’t skip warming up those tortillas! If you try to roll a cold flour tortilla, it will absolutely crack on you right when you’re rolling it tightly, and then you’ll have filling spilling out everywhere—a real mess when you’re hoping for a Quick Tex Mex Dinner! Trust me when I say a quick 15-second zip in the microwave is all it takes. That little bit of warmth makes the flour flexible enough to fold and roll up snugly around your hot filling without any drama. It’s the easiest step, but it prevents the biggest headache when preparing Homemade Chimichangas.
Achieving Maximum Crunch
Remember how we said we are skipping all that oil? Well, we still need a little fat right on the surface to help that tortilla turn golden brown and crispy in the oven. Be sure you are brushing that olive oil evenly across the entire top surface of each rolled chimichanga. Don’t miss any spots, or you’ll end up with a doughy patch later! Also, when you place them on your baking sheet, make sure the rack isn’t too close to the top heating element, but also not squatting on the very bottom rack. Positioning the rack in the middle of the oven ensures that heat circulates all around them, giving you that even, gorgeous crisp we are aiming for.
Variations: Chicken Chimichangas and Air Fryer Chimichangas
One of the parts I love about sharing these recipes is showing you how versatile they are! While these Beef Chimichangas are my family favorite, I know folks might have different needs—maybe it’s Tuesday and you only have leftover shredded meat, or perhaps you just got a new air fryer and you want to give it a whirl! Don’t hesitate to switch things up; that’s what home cooking is all about. We can easily pivot this basic structure to make Chicken Chimichangas or use a faster cooking method.
Making Chicken Chimichangas
If you are looking to switch out the beef, using chicken is incredibly simple. Just skip the ground beef and onion cooking step entirely! Instead, measure out about 1.5 cups of cooked, shredded chicken. I often use leftover roasted chicken or even rotisserie chicken for this. You’ll mix that shredded chicken right into the simmering seasoning and water mixture until it’s hot and fully coated, or you can stir it in after the seasoning has cooked down a bit. It adds a different flavor profile but keeps that amazing cheesy center. It’s a great way to use up any leftovers from my easy baked ranch chicken!
Cooking Air Fryer Chimichangas
Now, if you want even faster cleanup than baking, pull out that air fryer! These work beautifully in there, giving you that ‘fried’ crunch fast. After you assemble those rolls—remember, seam-side down—you absolutely must spray them generously all over with cooking spray. I skip the olive oil brush for this method. Set your air fryer temperature to 375°F (190°C). Cook them for about 8 to 10 minutes total, but you have to flip them halfway through to make sure they get golden brown on both sides. They come out perfectly Crispy, and honestly, the cleanup is even easier!
Make-Ahead and Freezer Friendly Chimichangas
One of the best secrets I can share about these recipes, especially when you’re making something as delicious as these cheesy Chimichangas, is planning ahead! I always try to double the batch because, let’s be honest, finding time to cook on a Friday after a long week is rough. Thankfully, these roll up beautifully and freeze even better. They become incredible Freezer Friendly Mexican Food that you can pull out anytime you need a quick, satisfying meal. It’s like having takeout ready in your freezer, but made with real ingredients by your own hand. Think of how handy this will be when you pull one out next time you are craving something quick and easy!
Freezing Instructions for Future Chimichangas
If you decide to make a double batch, you’ll want to assemble the rolls completely following the instructions above—make sure the seams are sealed tight! Once they are rolled and sitting seam-side down on a baking sheet, flash-freeze them for about an hour, just until they are firm. Once they are solid, take them off the tray and wrap each one individually. I wrap mine tightly first in plastic wrap, and then I tuck them into a large freezer-safe zip-top bag. They keep wonderfully this way for up to three months!
When you pull these frozen Chimichangas out when you need them for dinner, don’t bother thawing them! Just pop them directly onto your 400°F (200°C) baking sheet. Because they are frozen solid, they will need a bit longer in the oven than the regular recipe—plan for about 25 to 30 minutes total. Just like before, you’ll want to brush them lightly with oil and flip them halfway through, but that extra time ensures the internal cheese melts perfectly and the tortilla gets that gorgeous, Crispy Chimichanga shell we love so much! You can easily pair these up with some fixings from my easy chicken pozole recipe when you serve them!
Serving Suggestions for Your Cheesy Chimichangas
Now listen, once those Cheesy Chimichangas come rolling out of the oven, golden brown and smelling like a fiesta, you can absolutely just eat them straight! But, if you want to make it a real meal, or just give those crunchy bites a little extra something something, you need some classic Tex-Mex cool-down toppings. That’s the fun part of keeping things simple with the filling—you can go wild with the toppings!
I always have these few things ready on the counter when the baking pan comes out. It brightens up the richness of the beef and cheese wonderfully. I use these toppings the same way I use them when I serve up my famous Mexican street corn dip!
Toppings for the Perfect Bite
You really want that contrast between the hot, salty crunch and something cool and creamy. My standard issue toppings are truly the best lineup:
- Sour Cream: Just a dollop goes a long way to cut the spice.
- Salsa: Use your favorite! I prefer a chunky fresh pico de gallo when I have time to chop it up, but any good flavorful salsa works great to add moisture.
- Guacamole or Sliced Avocado: Nothing tastes better with seasoned beef than creamy avocado. It adds those good fats right back into the meal!
Sometimes, if the kids are being picky, a little drizzle of nacho cheese sauce seems to make everything disappear faster. But for me, it has to be the fresh, cool toppings to balance out the warmth of that great cheesy filling!
Storage and Reheating Instructions for Leftover Chimichangas
If you’re anything like me, you might have a few of these glorious, cheesy Chimichangas left over just because I always make a double batch for the freezer! That’s the beauty of this recipe; it tastes just as good the next day, provided you treat it right. The number one rule when preserving them is avoiding the microwave if you want to keep that lovely crunch. Nobody wants a floppy, sad chimichanga, right? We worked hard for that golden, Crispy Chimichanga shell, and we need to guard it carefully!
Reheating to Restore Crispness
To bring these back to life and keep them crunchy, you absolutely must use dry heat—that means the oven or the air fryer. The microwave just steams the tortilla, and that’s a recipe for disappointment, trust me! If you’re just reheating one or two, the air fryer is your best friend for speed. Place your leftover Chimichangas in the air fryer basket, making sure they aren’t overlapping much. Set it to about 350°F (175°C) and cook for about 4 to 6 minutes, checking them around the four-minute mark. They heat up fast and crisp right back up!
If you have a bigger batch, then the oven is the way to go. Preheat your oven to 375°F (190°C). Lay those leftovers out on a sheet pan, maybe even pop a little piece of parchment down if you want to be extra careful. Bake them for about 8 to 10 minutes. That gentle heat warms the beef filling all the way through while crisping that tortilla shell back up again, ready for you to enjoy them with some fresh toppings, just like my ideas for quick, healthy lunch ideas the next day!
Frequently Asked Questions About Easy Chimichanga Recipe
It’s funny how many questions pop up once you start baking instead of frying! People always want to know if they can substitute ingredients or if this Easy Chimichanga Recipe holds up to their usual habits. I’m happy to clear up some of the things I hear most often when folks try making my Beef Chimichangas or any variation of this dish. It’s all about making sure the method works for *your* kitchen! If you ever have questions not listed here, feel free to reach out via my contact page!
Can I use corn tortillas instead of flour for these Chimichangas?
Oh, honey, I wouldn’t recommend it for this specific recipe. Corn tortillas are just beautiful for tacos or enchiladas, but when you try to fold and roll them tightly the way we do for a chimichanga, they start cracking right away, especially since we aren’t deep-frying them in oil to make them pliable enough. If you want that sealed, crunchy bite that makes a great Homemade Chimichanga, you really need the flexibility of those large flour tortillas for rolling and baking.
What is the difference between a burrito and a chimichanga?
That’s a great question that gets folks confused sometimes! Honestly, the filling ingredients are often 90% the same—it’s all about the final step. A burrito is usually served soft, just wrapped up. A Chimichanga Recipe is essentially a burrito that has been fully cooked—traditionally deep-fried until super crispy, or, in our case, baked until golden brown and crunchy. So think of these as your healthier, oven-crisped fried burritos!
What kind of cheese is best for Beef Chimichangas?
The blend we use in the recipe—that mix of cheddar for flavor and Monterey Jack for that glorious melt—is what I rely on every time. It gives you that beautiful pull when you cut into your Beef Chimichangas! If you want to jazz things up a bit, feel free to swap out the Jack cheese for Pepper Jack. It adds a little gentle heat that is just fantastic with the taco seasoning without overwhelming the rest of the flavor. Just make sure whatever you buy is labeled as “shredded” and not “pre-shredded with anti-clumping agents,” if you can help it!
Sharing Your Homemade Chimichangas
Well, we made it! These Homemade Chimichangas are ready to be devoured, and honestly, that’s the best part of cooking for people you love. Seeing smiles when they bite into that crispy shell is what makes all the work worthwhile, even if the work this time was super easy!
Now that you’ve made a batch of these wonderful Crispy Chimichangas, I’d just love to hear how they turned out for you! Did you try the air fryer variation I mentioned? Did you keep it simple or load it up with toppings? Did the kids devour them? Leave me a comment down below—I read every single one, and I love knowing my recipes are working in your kitchens, just like they work in mine. If you found this recipe helpful, please leave a rating above so other home cooks can find this handy Quick Tex Mex Dinner idea!
PrintCrispy Baked Beef and Cheese Chimichangas
Make satisfying, crispy beef and cheese chimichangas using your oven instead of deep frying. This recipe offers a lighter, quick Tex Mex dinner that is freezer friendly.
- Prep Time: 15 min
- Cook Time: 20 min
- Total Time: 35 min
- Yield: 8 servings 1x
- Category: Dinner
- Method: Baking
- Cuisine: Tex Mex
- Diet: Vegetarian
Ingredients
- 8 large flour tortillas
- 1 tablespoon olive oil
- 1 pound ground beef
- 1 small onion, chopped
- 1 packet (1 ounce) taco seasoning mix
- 1 cup water
- 1 cup shredded cheddar cheese
- 1 cup shredded Monterey Jack cheese
- 1/2 cup refried beans (optional)
Instructions
- Preheat your oven to 400°F (200°C). Lightly grease a baking sheet.
- In a skillet over medium heat, cook the ground beef and chopped onion until the beef is browned. Drain any excess fat.
- Stir in the taco seasoning and water. Bring to a simmer and cook for 5 minutes, allowing the liquid to mostly absorb. Remove from heat.
- Warm the tortillas briefly in the microwave to make them pliable.
- Lay a tortilla flat. Spread a thin layer of refried beans (if using) down the center. Top with about 1/4 cup of the seasoned beef mixture. Sprinkle with a mix of cheddar and Monterey Jack cheese.
- Fold the sides of the tortilla inward over the filling. Then, tightly roll the tortilla up from the bottom to create a sealed burrito shape. Place seam-side down on the prepared baking sheet. Repeat with the remaining tortillas and filling.
- Brush the tops of the rolled chimichangas lightly with olive oil for crisping.
- Bake for 15 to 20 minutes, flipping halfway through, until the tortillas are golden brown and crispy.
- Serve immediately with your favorite toppings like sour cream, salsa, or guacamole.
Notes
- To make these freezer friendly, assemble the chimichangas completely, wrap them individually in plastic wrap, and freeze. When ready to cook, bake from frozen at 400°F (200°C) for about 25-30 minutes, brushing with oil halfway through.
- For an air fryer method, spray the assembled chimichangas with cooking spray and cook at 375°F (190°C) for 8-10 minutes, flipping halfway, until golden and crispy.
- You can substitute ground turkey or shredded cooked chicken for the ground beef to make a different variation of this quick Tex Mex dinner.
Nutrition
- Serving Size: 1 chimichanga
- Calories: 380
- Sugar: 3
- Sodium: 550
- Fat: 18
- Saturated Fat: 8
- Unsaturated Fat: 10
- Trans Fat: 0.5
- Carbohydrates: 35
- Fiber: 2
- Protein: 20
- Cholesterol: 65