
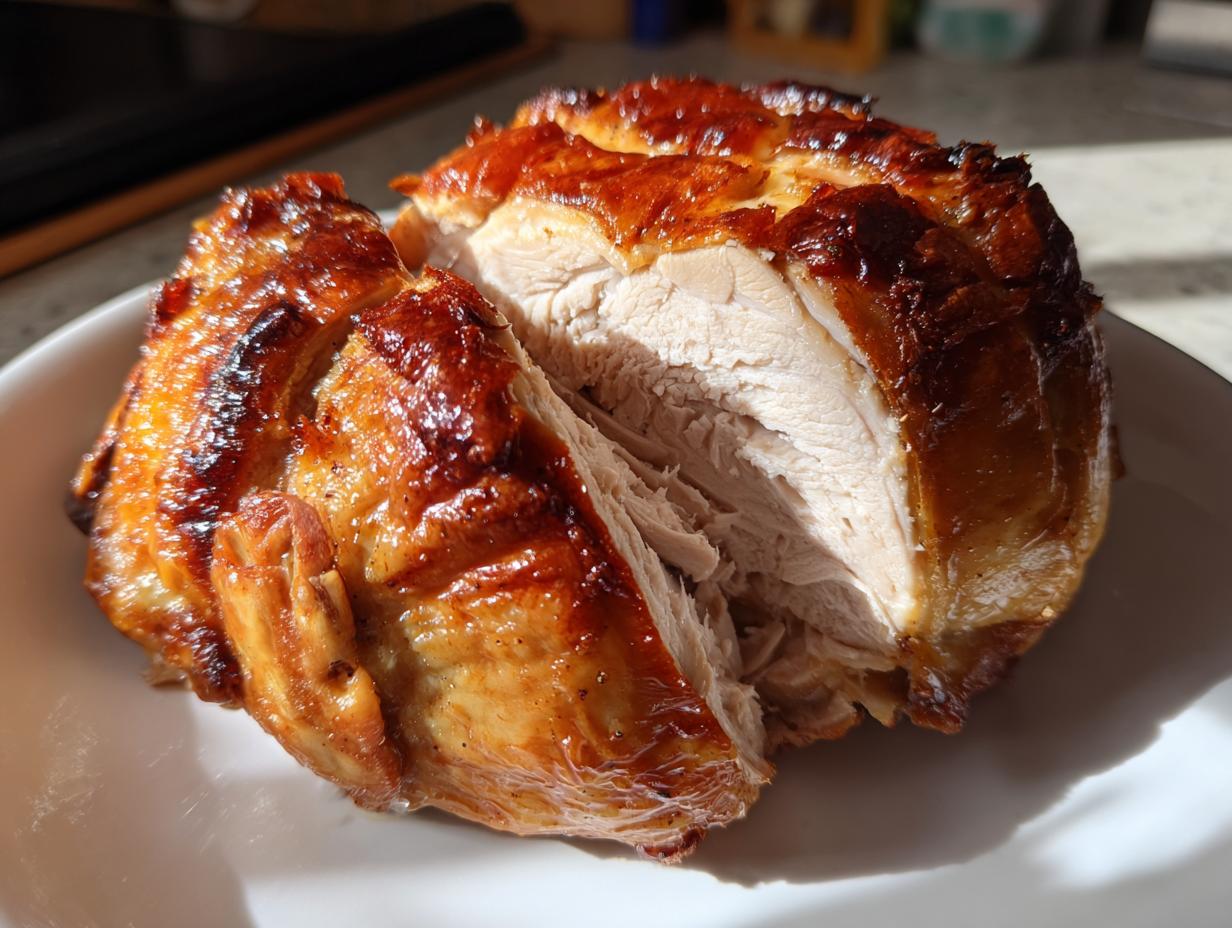
Oh, honey, if there is one cooking fear that stops good home cooks in their tracks, it’s drying out a whole chicken. I’ve seen it happen! You put in all that effort, the skin looks golden, and then you carve into it, and—disaster—the meat is tough and flavorless. It breaks my heart! But you don’t have to worry about that ever again. After thirty years of teaching patience and clarity in the classroom, I’ve brought that same approach to the kitchen, and my recipe for the ultimate juicy roast chicken with crispy herb butter skin is here to prove it. This roasted chicken is dependable and absolutely foolproof; it’s the centerpiece you can count on, whether it’s for a weeknight surprise or your big Sunday dinner.
- Why This Classic Roast Chicken Recipe is Your New Go-To
- Ingredients for a Flavorful Roast Chicken
- Essential Equipment for Your Oven Roasted Chicken
- Step-by-Step Instructions for Perfect Roasted Chicken
- Tips for the Crispiest Skin Chicken
- Making the Most of Your Roasted Chicken Leftovers
- Variations on the Classic Roast Chicken Recipe
- Frequently Asked Questions About Oven Roasted Chicken
- Estimated Nutritional Information for this Roasted Chicken
- Share Your Perfect Roasted Chicken Experience
- Estimated Nutritional Information for this Roasted Chicken
- Share Your Perfect Roasted Chicken Experience
Why This Classic Roast Chicken Recipe is Your New Go-To
I know what you’re thinking: another roast chicken recipe? But trust me, this one finally solves the age-old dilemma of dry breast meat versus perfectly colored skin. I developed this method to be as straightforward as possible, which is why it’s rapidly becoming my favorite classic roast chicken offering here at Cooking by Carla. It’s designed for you, the everyday cook who wants impressive results without spending the whole day fussing.
- It guarantees an incredibly juicy whole chicken, every single time, thanks to our butter barrier.
- The two-step temperature process ensures that gorgeous, golden, crackly crispy skin chicken finish you dream about.
- It’s honestly the easiest roast chicken for how amazing it tastes—I promise you won’t need a complicated marinade.
Achieving the Best Roast Chicken Results
The main reason I share this recipe so often is that it removes all the guesswork. If you follow these simple steps—especially drying the skin out first—you’ll have a beginner roast chicken that looks and tastes like you spent hours working on it. It’s truly foolproof! If you are looking for even more ways to lock in flavor before roasting, I always suggest checking out my thoughts on the best chicken marinade for juicy meat, though for this specific recipe, we keep it simple!
Ingredients for a Flavorful Roast Chicken
When we talk about this being a reliable flavorful roast chicken, it’s because the ingredients are simple but perfectly matched. Remember, good food doesn’t need complexity, just good technique! I always tell folks you don’t need a ton of fancy stuff, just what’s listed here for our herb butter magic. Gather these items up, and we’re ready to prep. Precision matters here, so please measure out that butter and don’t skimp on using fresh herbs if you can help it! They really sing when they roast.
- 1 whole chicken (about 4-5 pounds), giblets removed
- 3 tablespoons unsalted butter, softened
- 1 tablespoon fresh rosemary, chopped
- 1 tablespoon fresh thyme leaves
- 3 cloves garlic, minced
- 1 teaspoon salt
- 1/2 teaspoon black pepper
- 1 lemon, halved
- 1 small onion, quartered
Essential Equipment for Your Oven Roasted Chicken
Now, before you even think about mixing up that wonderful garlic butter, let’s talk tools! Having the right setup makes this whole process feel less like cooking and more like presenting an award-winning centerpiece. This recipe for a whole roasted chicken works best when you respect the physics of the oven, and that starts with having these few simple pieces ready to go. You don’t need a fancy rotisserie machine, but a couple of items are non-negotiable for safety and texture!
If you’re gathering everything before you start, you’ll be much happier when the moment comes to put it all together. We’re aiming for efficiency here, teaching you the basics so you can become confident in your roasting skills quickly!
- Paper Towels: I keep a whole roll handy! You absolutely must pat the skin bone-dry. This is the secret marriage of patience and technique, and it needs plenty of paper towels, trust me.
- A Sturdy Roasting Pan or Oven-Safe Skillet: You need something that can happily hold a 4-pound bird and catch all those delicious juices we’ll be basting with later. A simple sheet pan works in a pinch, but a dedicated roasting pan lifts the chicken slightly, which helps the air circulate underneath.
- Small Bowl and Fork: Just for mixing up that glorious herb garlic butter. No need to dirty the big mixer for this little job!
- Reliable Meat Thermometer: This is the most important piece of equipment, hands down. Forget guesswork! If you want a truly juicy whole chicken, you have to check the internal temperature. It’s the modern way to make sure you never, ever overcook your bird.
Step-by-Step Instructions for Perfect Roasted Chicken
Alright, let’s get cooking! This is where the magic happens, and I promise, if you take your time and listen to the bird—yes, listen to it—you’ll end up with the most tender, flavorful oven roasted chicken you’ve ever made. My teaching background really kicks in here; we’re moving slowly and deliberately so that we don’t ruin that beautiful skin we’re about to create. Don’t rush the room temperature step, and please, grab that thermometer!
Preparing the Herb Butter and Chicken
First things first, take that chicken out of the fridge for a full hour before you plan to cook it. Letting it come up close to room temperature helps it cook more evenly, which is critical for that juicy whole chicken result. While it’s warming up, let’s make the star of the show: our herb butter. In that small bowl, mash together the softened butter with your chopped rosemary, thyme, minced garlic, salt, and pepper. It should look like thick, fragrant green paste. This is going to be the seasoning layer that locks in moisture.
Now, for the tricky bit: gently work your fingers under the skin covering the breasts and thighs. Be patient, you don’t want to rip the skin off! Once you’ve made those little tunnels, push about half of that beautiful compound butter right underneath the skin, massaging it directly onto the meat. That’s where the flavor goes deep! Then, take the remaining butter and just rub it all over the outside of the skin. Don’t miss a spot! Finally, slice your lemon in half and stuff it, along with the onion quarters, right into the cavity. This steams the inside gently, adding brightness as it cooks. For the next step, I highly recommend following the advice from others who achieve great results, like the folks over at Kristine’s Kitchen for their simple approach!
The Two-Temperature Roasting Method for Juicy Whole Chicken
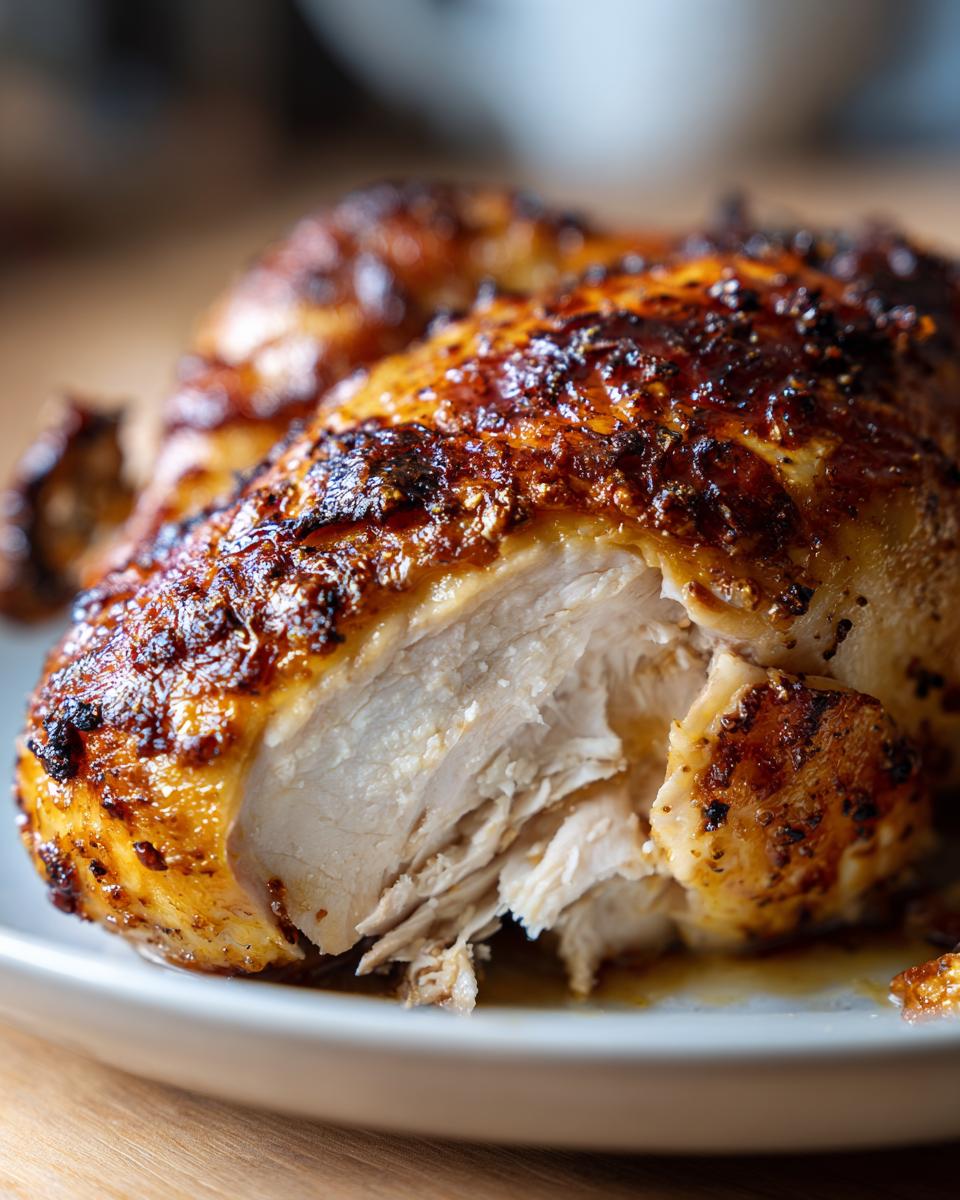
We are tackling this herb roasted chicken in two phases. First, we need to shock the skin into crisping up! Set your oven to a hot 425 degrees F. Place your prepared chicken in the roasting pan, breast-side up, and let it roast for just 15 minutes. This high heat is essential for starting that golden color.
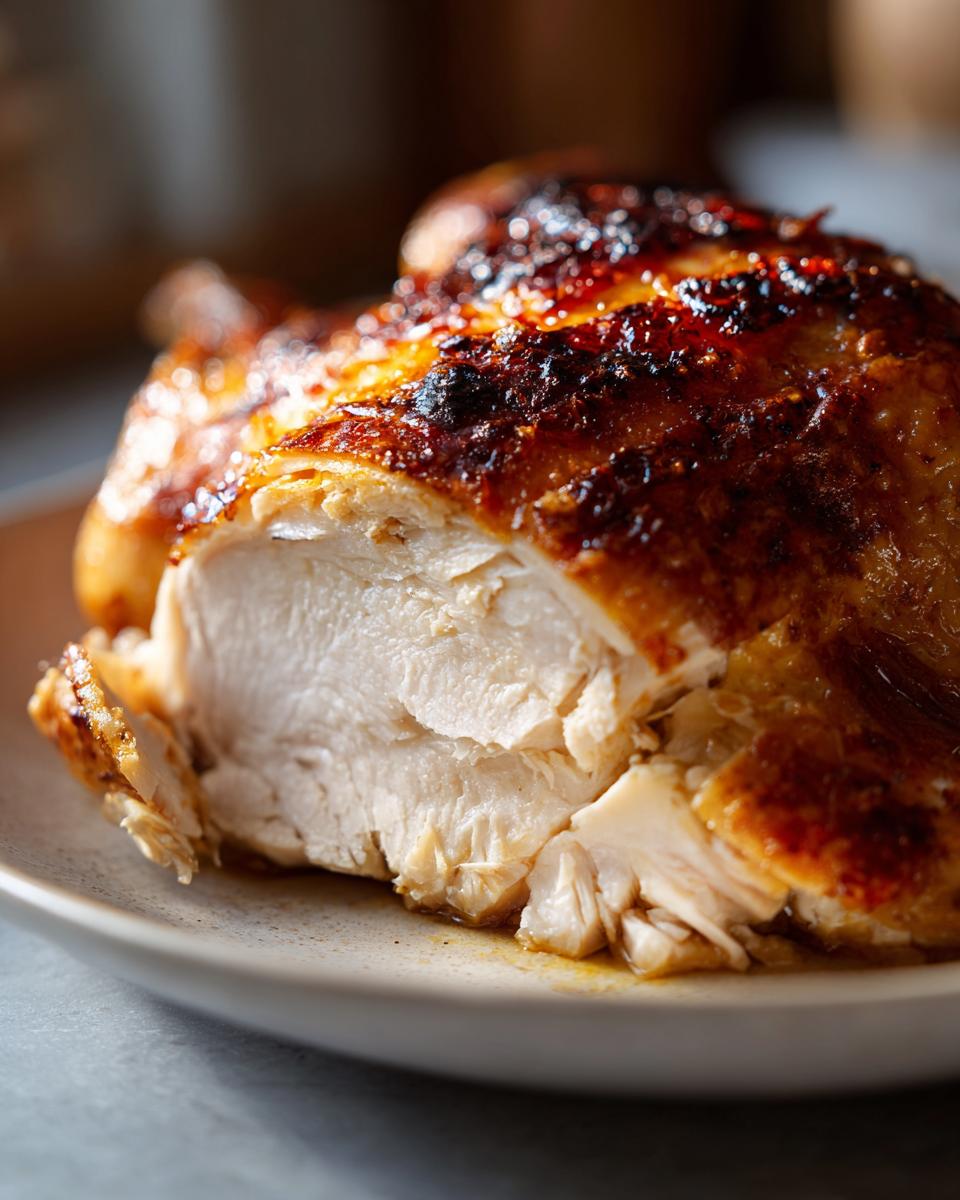
After those first 15 minutes, without fail, reduce your oven temperature down to 375 degrees F. Now we settle in for the long haul—about 60 to 75 minutes longer. About halfway through this second roasting period, open the oven and use a spoon to baste the chicken with any juices that have collected in the bottom of the pan. Remember, never rely on time alone! Stick that thermometer into the thickest part of the thigh, making sure you are avoiding the bone. When it hits 165 degrees F, it’s done.
Here is my absolute non-negotiable piece of advice, something I learned from years of cooking for my own family: Rest the bird! Once it’s out, tent it loosely with foil—not tight, just a tent—and forget about it for a full 15 minutes before you even think about carving. That resting time lets all those beautiful juices settle back into the meat instead of pouring out all over your cutting board. You can use those incredible drippings to whip up an easy homemade chicken gravy if you’re feeling up to it!
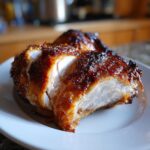
Tips for the Crispiest Skin Chicken
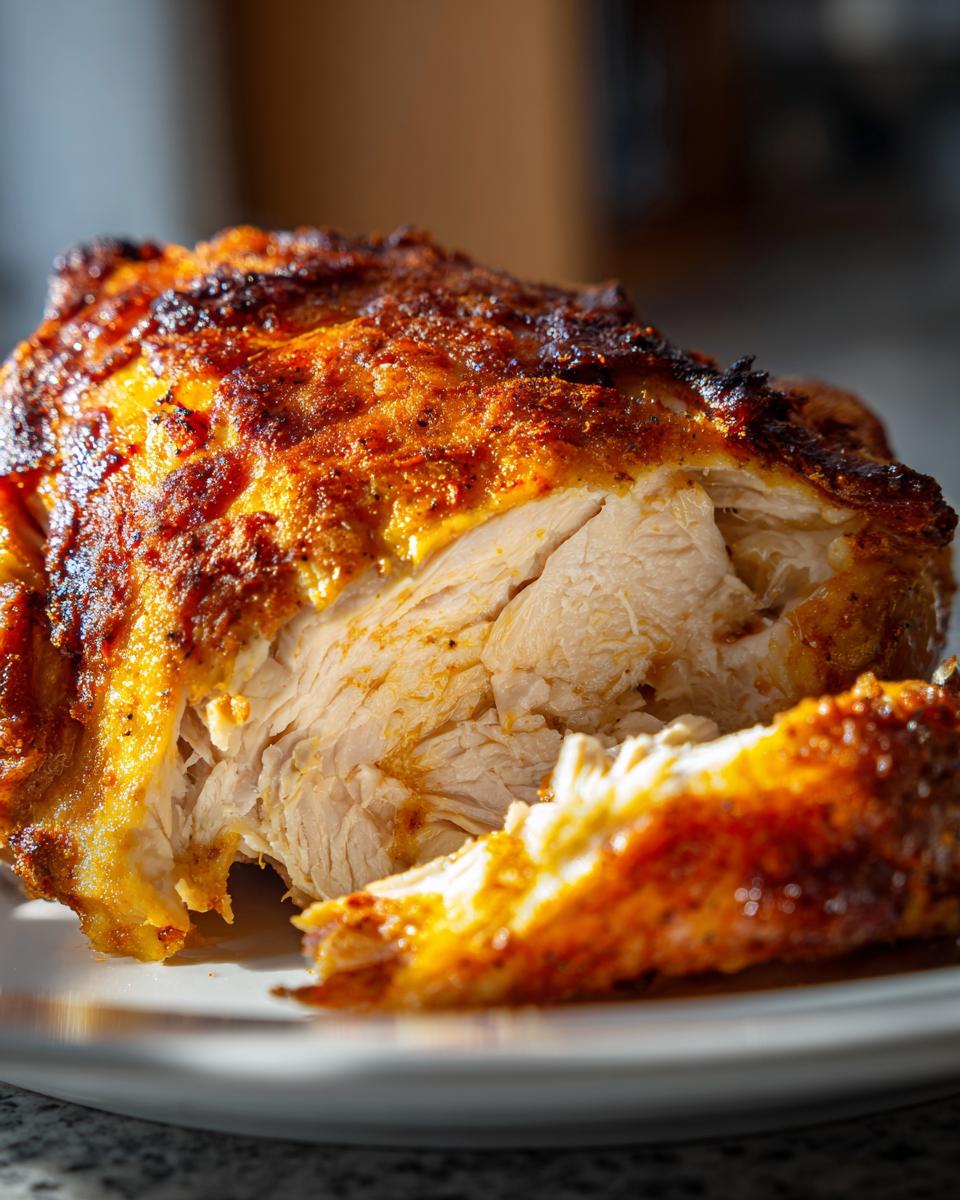
If you ask me what makes a proper roasted chicken truly shine, it’s that skin! It needs to crackle a little when you press on it, not feel soft or rubbery. I think people get so focused on keeping the inside juicy—which is important, don’t get me wrong—that they forget about the delicious outside layer we get to eat! We’ve already set ourselves up for success with that initial blast of high heat, but if you want truly show-stopping results, here are the tricks I’ve picked up over the decades.
For the ultimate crispy skin chicken, you essentially need two things: absolutely dry surface area and unobstructed heat circulation. When poultry skin has moisture, it steams itself instead of crisping. We want that sizzle!
The Overnight Chill: My Secret for Extra Crispiness
If you are planning ahead, this tip comes straight from my most experienced friends who swear by it. After you have patted the chicken totally dry, mix up your salt and pepper—just the seasonings, not the butter yet—and rub it all over the bird. Then, place the whole chicken uncovered on a rack set over a baking sheet and put it in the refrigerator. Yes, uncovered! That dry, cold air works wonders overnight. By morning, the skin will look tight and almost paper-thin. That is the ideal canvas for achieving chicken with crispy skin that knocks your socks off.
Dealing with Quick Browning
Sometimes, even with careful temperature management, if your oven runs a little hot or your chicken is perfectly positioned, the skin might start to get very dark before the inside finishes cooking. If you see that happening, don’t panic, and definitely don’t pull it out early! Just grab a small piece of aluminum foil and loosely tent the breast area. Think of it like a little hat to shield that tender spot from the direct heat. This allows the lower part of the bird to catch up in terms of cooking time while protecting that gorgeous brown crust you’ve already built up. It’s a simple fix, just like those folks over at Sister’s Cooking explain for preserving that color.
And just one last reminder: when you are basting during the lower-temperature roast, try to drizzle the juices over the thighs and back more than the breast. The breast skin already has the herb butter coating, and excessive basting there can sometimes keep it from crisping up perfectly. Focus that goodness lower down where the meat tends to be a bit leaner!
Making the Most of Your Roasted Chicken Leftovers
When you’ve made a perfect roasted chicken, you’re not just making dinner; you’re setting yourself up for an amazing weeknight chicken dinner the next night! I try to cook a slightly bigger bird just so I have leftovers—it feels like a little gift to my future self. But the key to enjoying those leftovers is storing them properly so they don’t turn dry and sad.
First, make sure you let the chicken cool down enough so you aren’t trapping steam inside the container. When you do store it, always put the meat in an airtight container. I prefer glass ones myself. You want to keep it refrigerated within two hours of carving, and it should be perfectly good to eat for about three to four days.
The Gentle Art of Reheating Juicy Meat
The absolute worst thing you can do is blast leftover chicken in the microwave until it’s piping hot all the way through. That guarantees rubbery meat! When I reheat slices of my flavorful roast chicken, I always aim for moisture. The oven is my preferred method for reheating larger pieces, even though it takes a little longer.
If you’re reheating a couple of slices, place them in a shallow baking dish, put just a teaspoon or two of broth or water underneath them—not too much!—and then cover the dish tightly with foil. Pop that into an oven that’s only set to 300 degrees F for about 10 to 15 minutes. That low, slow heat warms the chicken through gently while the bit of moisture underneath steams it slightly, keeping it tender. You still get that wonderful savory flavor without sacrificing the juiciness we worked so hard to achieve!
Simple Ways to Use Up Leftover Chicken
Once you’ve eaten the classic slices plain, it’s time to get creative! Leftovers shouldn’t feel like boring re-runs. If you have enough meat left, I highly recommend using it in a soup. If you make my creamy chicken and wild rice soup, you can toss those leftover roasted pieces right in during the last half hour, and they soak up all that wonderful creamy broth. It’s comfort food perfection!
For lighter fare, shredded chicken is fantastic mixed with a little mayo, celery, and mustard for a quick sandwich. Or, honestly, my grandkids just love chopping it up and tossing it onto a quick green salad the next day. It’s versatile, it’s quick, and it means you don’t waste a single delicious bit of that wonderful bird!
Variations on the Classic Roast Chicken Recipe
While I believe this classic roast chicken method is nearly perfect as written—especially with that garlic herb butter—I understand that sometimes you want to switch things up a little, especially if you are roasting a bird every week for a weeknight chicken dinner! That’s the beauty of home cooking; you can tailor the flavors to what you have on hand or what your family is craving. These small twists keep the roasting technique the same, so you still get that juicy meat and crispy skin we obsessed over, but the flavor profile changes slightly.
Don’t be afraid to swap out one aromatic for another; the base structure of our perfect oven roasted chicken is so strong it can handle almost anything you throw at it. If you find yourself making roast chicken often, having a couple of these variations up your sleeve is a great idea!
Swapping Citrus for Brightness
I used lemon in the recipe because it’s bright and classic, and the acidity helps tenderize the meat just a touch from the inside out. But if you’ve tried that already, try swapping the lemon for a navel orange! An orange imparts a lovely, subtle sweetness that pairs unbelievably well with the savory rosemary and thyme we used in the butter. It gives the whole bird a slightly warmer, almost autumnal flavor, even if it’s the middle of summer. Just halve the orange and stuff it in the cavity just like you would the lemon.
Herb Combinations Beyond Rosemary and Thyme
Rosemary and thyme are my bedrock herbs, but if you want a different aromatic vibe, sage is a wonderful substitute, especially as we move into fall and winter. If you use sage, you might want to add a pinch of dried rubbed sage to your butter mixture, as fresh sage can sometimes be a bit overpowering if you use too much. Another favorite combination of mine, especially if you want a little kick, is to swap out half the herbs for about a teaspoon of dried oregano and a quarter teaspoon of dried crushed red pepper flakes. That variation turns into a lovely, savory garlic butter chicken that is fantastic with mashed potatoes.
If you are looking for inspiration on how to use up any remaining meat from a larger bird, remember that shredded leftover meat is perfect when tossed into a hearty creamy white chicken chili—it saves you so much time when you need dinner fast!
Frequently Asked Questions About Oven Roasted Chicken
It’s perfectly natural to have questions when you’re tackling a whole bird! Cooking a whole roasted chicken seems intimidating from the outside, but I promise you, once you understand the basic principles, it becomes second nature. I’ve gathered some of the questions I get asked most often by my students and now, by all of you wonderful home cooks joining my community. Having answers ready means you can whip up this easy roast chicken recipe whenever the craving strikes!
Do I really need to use a meat thermometer for this recipe?
Oh, absolutely, yes! If I could only teach one thing about cooking poultry for a juicy whole chicken, it would be the thermometer. Forget those old methods of checking the juices or wiggling the leg bone—they just aren’t reliable enough. Sticking that thermometer into the thickest part of the thigh (but not touching the bone!) is the only way to guarantee it hits that safe 165°F internal temperature without drying out the breast meat. It takes all the stress out of the process, I promise!
What happens if I skip the initial high-heat blast at 425 degrees F?
Well, you’ll still end up with a perfectly cooked bird internally, but you will miss out on that glorious, shatteringly crisp skin! That first 15 minutes at a high temperature is crucial for rendering out some of the fat just under the skin and priming it to become golden brown. If you only use 375 degrees F the entire time, the skin has a much higher chance of staying pale or slightly rubbery. If you’re in a rush, you *could* skip it if you absolutely must, but you won’t get the signature crispy skin chicken finish we are aiming for.
Can I stuff the chicken cavity with a bread stuffing mix?
That’s a classic approach! Many folks love it, especially if this is meant to be a big Sunday dinner recipe. But for this specific recipe—where we are aiming for maximum juiciness in the meat—I prefer to use the cavity only for simple aromatics like the lemon and onion halves we used here. When you pack the cavity with stuffing, it takes much, much longer for the heat to penetrate to the center of the bird, which often means the parts closest to the stuffing get overcooked while you wait for the center to be safe.
If you want stuffing, it’s safer and often better to bake your bread stuffing separately in a casserole dish. If you absolutely must stuff the bird, remember you’ll need to extend the cooking time quite a bit, and you should check the internal temperature of the stuffing itself—it needs to reach 165°F, too! If you want to explore more ways to use chicken pieces, you might look at how I use leftovers in my recipe for chicken and dumplings.
Can this herb roasted chicken recipe be done on a grill or smoker?
That’s a fun thought! While this recipe template is optimized for the consistent, dry heat of the oven, you certainly can adapt it for a smoker or a grill set up for indirect heat. The biggest difference is that smoking or grilling tends to dry the exterior out faster, so you might need to rely heavily on that herb butter or even add a bit more liquid to the roasting pan to keep things moist. If you’re new to outdoor cooking, I always suggest checking out detailed guides specifically for the smoker, like those found at The Luna Kitchen, to ensure you manage your temperatures correctly.
Estimated Nutritional Information for this Roasted Chicken
As I always tell my class, cooking at home gives you complete control over what goes into your food, which is wonderful! This recipe relies on whole foods and lean protein. Since we are making this roasted chicken from scratch, you know exactly how much salt and fat went in, unlike many store-bought options. Keep in mind that these numbers are just estimates based on a standard 4-pound bird, and they will certainly change depending on how much butter you rub on the outside and how much skin you eat, bless your heart!
Here is a general breakdown based on a single serving size, which we estimate at one breast portion:
- Serving Size: 1 breast portion
- Calories: 350
- Sugar: 0
- Sodium: 350 (This varies wildly based on your added salt!)
- Fat: 18
- Saturated Fat: 7
- Unsaturated Fat: 11
- Trans Fat: 0
- Carbohydrates: 0
- Fiber: 0
- Protein: 45
- Cholesterol: 140
Please remember these are purely estimates. If you are tracking specific dietary needs, I always encourage you to use the actual weight of your chicken and the precise brand measurements of your butter and salt for true accuracy!
Share Your Perfect Roasted Chicken Experience
My greatest joy is hearing that one of my reliable recipes worked perfectly for you and brought joy to your table! This is why I shared all the details about how to achieve that crispy skin chicken—I want you to feel that success when you carve into that bird.
Did you find this easy roast chicken recipe to be a winner? If you tried the overnight drying tip or the two-temperature roast, let me know how it went in the comments below! I read every single one. If you had a great result, please consider leaving a five-star rating right underneath this post—it helps other home cooks find my dependable recipes, and seeing those stars just fills my heart. If you have any questions or want to share a photo of your beautiful, juicy creation, don’t hesitate to reach out via my contact page!
PrintThe Best Oven Roasted Chicken for Juicy Meat and Crispy Skin
Follow this simple, classic roast chicken recipe to achieve incredibly juicy meat and perfectly golden, crispy skin every time. This oven roasted chicken is a dependable centerpiece for your Sunday dinner or weeknight meal.
- Prep Time: 15 min
- Cook Time: 1 hr 30 min
- Total Time: 1 hour 45 min
- Yield: 4 servings 1x
- Category: Dinner
- Method: Roasting
- Cuisine: American
- Diet: Low Fat
Ingredients
- 1 whole chicken (about 4–5 pounds), giblets removed
- 3 tablespoons unsalted butter, softened
- 1 tablespoon fresh rosemary, chopped
- 1 tablespoon fresh thyme leaves
- 3 cloves garlic, minced
- 1 teaspoon salt
- 1/2 teaspoon black pepper
- 1 lemon, halved
- 1 small onion, quartered
Instructions
- Remove the chicken from the refrigerator 1 hour before roasting to allow it to come closer to room temperature. Preheat your oven to 425 degrees F.
- Pat the entire surface of the chicken very dry using paper towels. This step is key for crispy skin.
- In a small bowl, mix the softened butter, chopped rosemary, thyme, minced garlic, salt, and pepper until combined into a compound butter.
- Gently loosen the skin over the chicken breasts and thighs. Rub about half of the herb butter directly onto the meat under the skin. Rub the remaining butter all over the outside of the chicken skin.
- Place the lemon halves and onion quarters inside the chicken cavity.
- Place the chicken breast-side up in a roasting pan or a large oven-safe skillet.
- Roast at 425 degrees F for 15 minutes to start crisping the skin.
- Reduce the oven temperature to 375 degrees F. Continue roasting for about 60 to 75 minutes more, or until a meat thermometer inserted into the thickest part of the thigh (not touching bone) reads 165 degrees F. Baste the chicken with pan juices halfway through the lower temperature roasting time.
- Remove the chicken from the oven. Tent loosely with foil and let it rest on a cutting board for 15 minutes before carving. This resting period keeps the meat juicy.
- Use the pan drippings to make gravy, if desired. Carve and serve your flavorful roast chicken.
Notes
- For extra crispy skin, place the patted-dry chicken uncovered in the refrigerator overnight before roasting.
- If the chicken skin begins to brown too quickly, loosely tent the breast area with foil during the lower temperature roasting phase.
- Use a reliable meat thermometer; this is the best way to guarantee juicy meat without overcooking.
Nutrition
- Serving Size: 1 breast portion
- Calories: 350
- Sugar: 0
- Sodium: 350
- Fat: 18
- Saturated Fat: 7
- Unsaturated Fat: 11
- Trans Fat: 0
- Carbohydrates: 0
- Fiber: 0
- Protein: 45
- Cholesterol: 140