
Oh, there is just nothing in the world like that satisfying, loud CRUNCH of a truly fresh pickle! When I was growing up in the Midwest, preserving the summer bounty meant dedicating entire weekends to canning, but that’s just not practical anymore for most of us. That’s why I absolutely adore this method for making refrigerator pickles. Forget the boiling water baths and the loud clanking jars; this is the easiest, no-cook way to get sharp, tangy, crunchy pickles on your table in less than a day. I learned quickly that when you have access to wonderful fresh cucumbers, you want a quick way to keep that garden flavor all year round. Trust me, once you try these simple dill spears, you won’t ever look back at the jarred green things in the grocery aisle again.
- Why Our Easy Refrigerator Pickles Recipe Stands Out
- Gathering Ingredients for Perfect Refrigerator Pickles
- The Simple, No Cook Pickle Recipe Steps for Refrigerator Pickles
- Expert Tips for Making the Crispiest Refrigerator Pickles
- How Long Do Refrigerator Pickles Last?
- Serving Suggestions for Your Quick Refrigerator Pickles
- Frequently Asked Questions About Refrigerator Pickles
- Understanding the Nutrition of Fresh Cucumber Pickles
- Share Your Homemade Refrigerator Pickles Experience
Why Our Easy Refrigerator Pickles Recipe Stands Out
When I share a recipe, it has to pass the busy family test. These quick refrigerator pickles are truly set apart because they deliver big flavor without the big time commitment. You don’t need any special canning gear at all!
- Speed is Key: They are ready for snacking within 24 hours.
- Unbeatable Crunch: Using that initial salt soak keeps these ultra-crispy refrigerator pickles.
- Simple Brine: This approach uses a nearly no cook pickle recipe method, keeping the process incredibly smooth. They are such a superior side dish pickles alternative!
Gathering Ingredients for Perfect Refrigerator Pickles
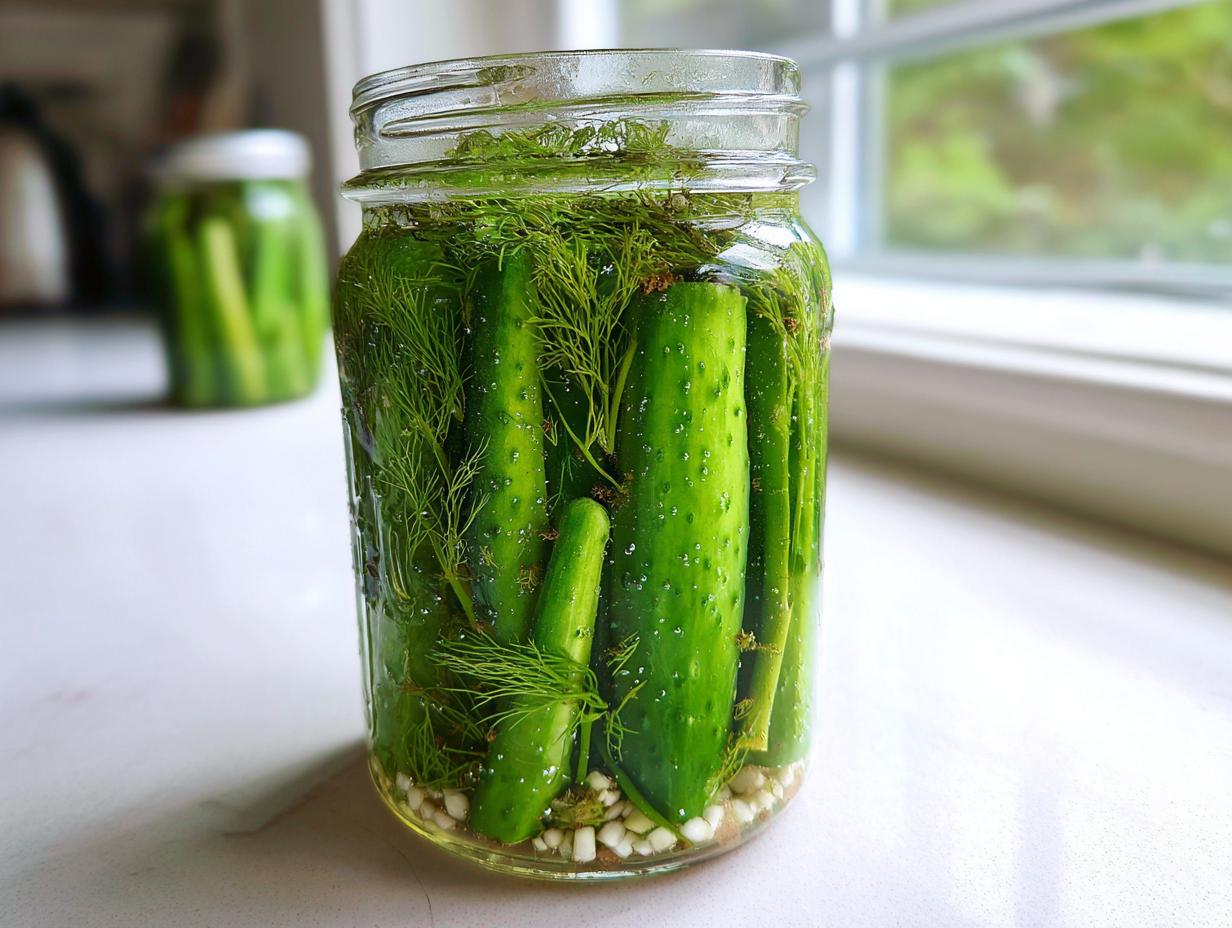
The beauty of these easy homemade pickles lies in how simple the ingredient list is. We aren’t breaking out exotic spices here; we are focusing on what makes a cucumber taste like it just came out of the garden. You’ll need about three pounds of good pickling cucumbers—Kirby works wonderfully—and you must wash and slice them first, either into spears or chips, depending on how you like to snack.
For the brine, grab four cups of cold water and a quarter cup of pickling salt for our initial soak. Then, you need two cups of white vinegar—don’t settle for anything less than 5% acidity! I also always include two tablespoons of sugar, four cloves of garlic that you’ll want to smash a bit, two heads of fresh dill, and one teaspoon of those black peppercorns. See? Straightforward and delicious!
The Simple, No Cook Pickle Recipe Steps for Refrigerator Pickles
Alright, let’s get down to business. This is where the magic happens, and honestly, it’s so easy you’ll wonder why you didn’t start making your own refrigerator pickles ages ago. We’re using a two-step brine system here, which is the secret sauce for getting those incredibly crunchy homemade pickles without needing that scary canner.
Preparing Cucumbers and Initial Salt Soak
First things first: you need to pack those cucumbers in nice and tight into your clean jars. Make sure they are spears or chips, whatever you prefer for your sandwich topping pickles. Now, for the critical texture step! Whisk together your cold water and pickling salt until every speck dissolves. Pour that salty water right over your packed cucumbers, making sure they are completely covered. Let them sit on the counter—no chilling yet!—for exactly 30 minutes. This initial soak is crucial because it pulls out excess moisture, which keeps your final product snappy and firm. After 30 minutes, drain that salt water away and give the cucumbers a quick rinse, then discard the water completely.
Creating and Cooling the Vinegar Brine for Refrigerator Pickles
Next, we make the flavor brine, and this is the only part that sees the stove, but trust me, we aren’t *cooking* pickles here. In a small pot, combine your white vinegar, sugar, and just one cup of fresh water. You only need to heat this gently until that sugar melts away. That’s it! Take it off the heat right away. It is absolutely essential that you let this vinegar brine cool down before you pour it over the cucumbers. If you add hot brine, you are essentially steaming your cucumbers, and we want them crisp, not sad and spongy!
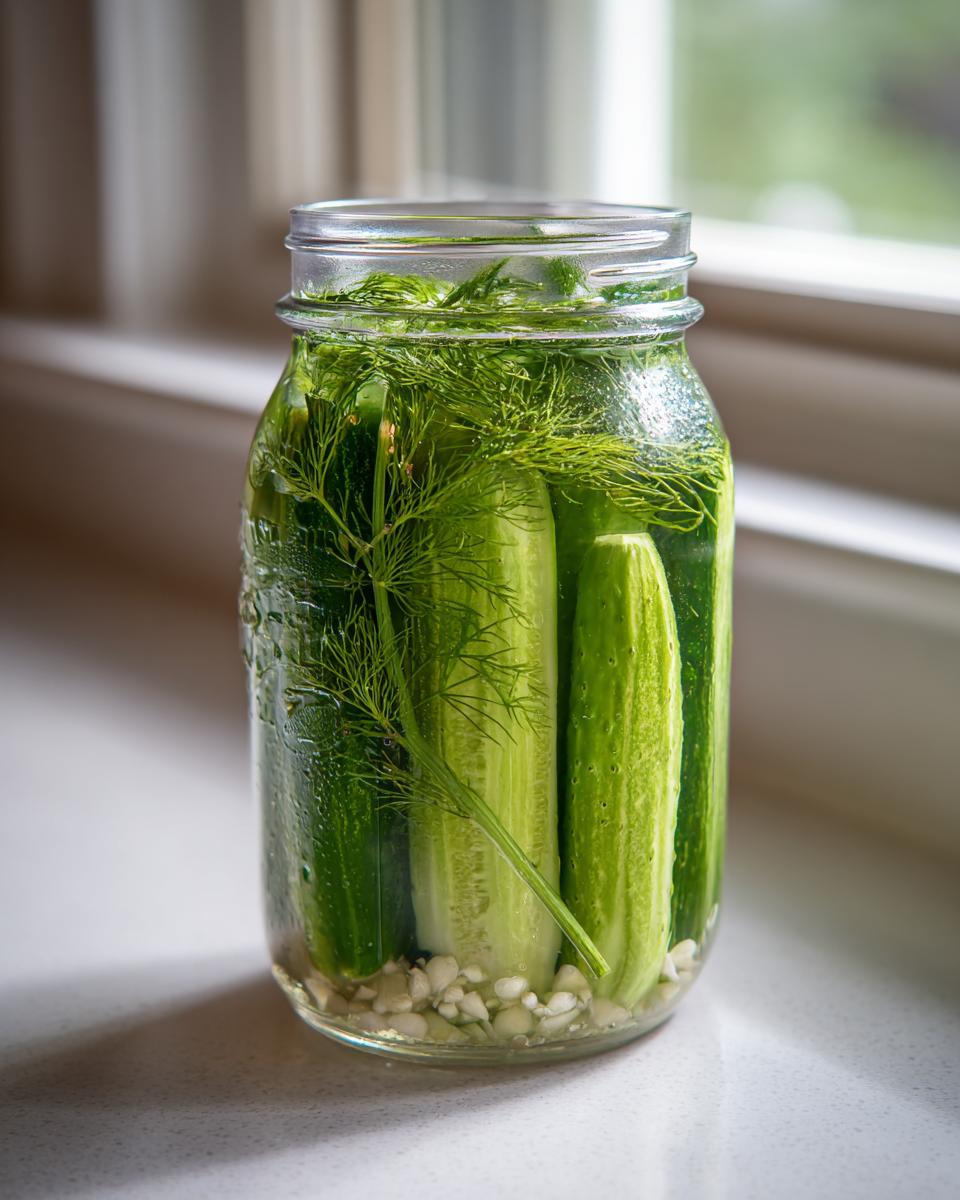
Assembling and Sealing Your Refrigerator Dill Pickles
Once your vinegar mixture is cooled down a bit—just warm to the touch, not hot—it’s time to layer in the flavor! Drop your smashed garlic cloves, your fresh dill, and the peppercorns right into the jars over the rinsed cucumbers. Then, carefully pour that cooled brine over everything, leaving just a half-inch of space at the top. Give the jars a little tap on the counter; this helps release any stubborn air bubbles that might have gotten trapped. Screw the lids on tight, let them sit on the counter to finish cooling, and then, they go straight into the fridge! You can whip up a batch of amazing homemade mayonnaise to go right alongside them while you wait. If you want more speedy tips for your no cook pickle recipe adventures, check out this great advice in this quick guide.
Expert Tips for Making the Crispiest Refrigerator Pickles
Now that we’ve mastered the basic steps for these wonderful refrigerator dill pickles, let me share a few bits of wisdom I’ve picked up over the years. If you’re really chasing that absolute, rock-hard crunch, you can try adding half a teaspoon of pickling lime into that very first salt soak, but you absolutely must rinse those cucumbers extremely well afterward—like, three or four times under cold running water! I rarely do it myself unless the cucumbers seem a little softer than I like.
My biggest piece of advice is always about the cucumbers themselves. Nothing beats a cucumber that looks like it was picked this morning. If they look dull or limp at the store, even our soaking tricks will only do so much. You want them firm when you squeeze them!
Also, don’t forget these are versatile! If you want to switch gears from dill, this is the perfect base for bread and butter refrigerator pickles. Just skip the dill and peppercorns and toss in a half cup of thinly sliced onion and some celery seed into each jar instead. For more tips on keeping things crunchy, I love reading what other folks are doing, like this Claussen copycat guide I found online.
And hey, if you love pickles, you absolutely must try my recipe for crispy fried pickles sometime—they are addicting!
How Long Do Refrigerator Pickles Last?
This is usually the question I get right after people ask how to keep them crunchy! The best part of a no cook pickle recipe is that you don’t have to wait forever to taste the results, but you do have to be patient for the best flavor.
Technically, you can eat them after about 24 hours in the fridge. You’ll notice they’ve taken on the flavor of the dill and garlic, but honestly? They are still a little bit bright and sharp then. If you can hold out, I find that 48 hours is when these beauties really hit their stride. That’s when all those tangy, salty, and herbal notes have married perfectly inside that brine.
Because we aren’t canning these, they need to stay cold to stay safe and crunchy. Always keep your jars sealed tightly in the refrigerator. For the absolute best crunch and freshest taste, you want to enjoy these within about three weeks. After that, they start getting just a little too soft for my liking, but they are still perfectly fine to eat if you’re quick about it!
Serving Suggestions for Your Quick Refrigerator Pickles
Now that you have jars full of these tangy green jewels, the real fun begins! While they are fantastic right out of the jar for a crunchy snack—and don’t forget that the pickle juice makes a mighty fine base for cleaning, too!—they really shine when paired with richer foods. We love having them ready as a sharp side dish to balance out heavier meals like meatloaf, or use the chips as your new favorite sandwich topping.
Their bright acidity cuts through fat beautifully. So, pile them high on burgers! I always make sure I have a batch ready when I’m whipping up my famous burger sauce; the pickles and the sauce combined are just heavenly. They elevate everything!
Frequently Asked Questions About Refrigerator Pickles
It’s natural to have a few questions when you venture into making your own pickles at home! I’ve gathered a few things readers ask me all the time about their refrigerator pickles batches. Don’t worry if you mess up the first time; that’s just part of learning to cook! We want you to have success so you can enjoy these as a great quick refrigerator pickles treat.
Can I use regular cucumbers instead of pickling cucumbers for refrigerator pickles?
You certainly can! I often use whatever looks best at the farmer’s market, and sometimes that’s a standard slicing cucumber. The main difference is that dedicated pickling cucumbers, like Kirbys, have fewer seeds and thicker skin, which helps them stay super crisp. If you use a regular cucumber, they might soften up just a tiny bit faster in the brine, so I always suggest trying to eat those sweeter versions first.
Is this truly a no cook pickle recipe?
That’s such a good question, and it trips people up sometimes! For the no cook pickle recipe folks looking for zero heat, this recipe is *almost* there. We don’t do the water bath canning, which is the biggest headache avoided. However, we do heat a small amount of liquid just to make sure the sugar dissolves fully into the vinegar brine before it hits the cold cucumbers. It takes about three minutes on the stove instead of twenty, and it’s much easier!
Why are my refrigerator pickles not crunchy?
Oh, that’s the saddest thing, isn’t it? The main culprits are almost always the cucumbers or the initial salt soak. If your cucumbers were soft when you bought them, they will never get truly crunchy. For next time, make sure you are using the freshest, firmest ones you can find. Also, don’t skip tasting that salt water after you mix it—if it’s not properly salty, the cucumbers won’t release enough water during that first 30-minute soak, leading to a mushy result. These are still great for healthy homemade snacks, but for maximum crunch, pay attention to those first steps! Remember, these homemade pickles are all about keeping that fresh snap.
Understanding the Nutrition of Fresh Cucumber Pickles
I always hear folks ask if pickles can be a healthy choice, and I’m happy to share a little detail about what’s in these wonderful jars. Since we aren’t deep-frying these, they are certainly lighter than many prepared snacks! Based on the amounts used for this batch, here is an estimate for four spears.
- Serving Size: 4 spears
- Calories: 15
- Sugar: 2g
- Sodium: 350mg
- Fat: 0.1g
Now, just remember what I always teach my grandkids about recipes: these numbers are estimates! The actual values truly depend on the size of your cucumbers and exactly how much salt water clings to them when you serve them up. But overall, they are a fantastic, tangy addition to any meal.
Share Your Homemade Refrigerator Pickles Experience
Now that you have the secrets to perfect, crisp refrigerator pickles, I truly hope you give this recipe a whirl. There is such satisfaction in opening your fridge and grabbing a jar of something you made yourself! I always love hearing how neighbors adapt my tried-and-true methods.
If you make a batch of these quick refrigerator pickles—maybe you use them on burgers or just eat them standing over the sink like I do sometimes—please come back and leave a rating for me! Seeing those stars pop up lets me know the recipe is working for home cooks across the country. If you tried a variation, like making a batch of those bread and butter refrigerator pickles, let me know how that turned out in the comments below. We are all learning together in the kitchen!
If you have any questions that I might have missed about the process, or if you just want to share a farming story with me, please don’t hesitate to reach out on my contact page. Happy pickling, friends!
PrintEasy Refrigerator Dill Pickles (No-Cook Method)
Make crispy, tangy refrigerator dill pickles using this simple, no-cook recipe. These fresh cucumber pickles are ready fast and taste better than store-bought versions, perfect for sandwiches or snacks.
- Prep Time: 20 min
- Cook Time: 5 min
- Total Time: 25 min
- Yield: 2 quarts 1x
- Category: Side Dish
- Method: No Cook Brining
- Cuisine: American
- Diet: Vegetarian
Ingredients
- 3 pounds pickling cucumbers (Kirby or similar), washed and sliced into spears or chips
- 1/4 cup pickling salt
- 4 cups cold water
- 2 cups white vinegar (5% acidity)
- 2 tablespoons granulated sugar
- 4 cloves garlic, peeled and smashed
- 2 heads fresh dill (or 4 teaspoons dried dill seed)
- 1 teaspoon black peppercorns
Instructions
- Prepare the cucumbers: Slice the cucumbers into spears or chips. Pack them tightly into two clean, wide-mouth quart-sized mason jars, leaving about 1 inch of headspace at the top.
- Make the brine: In a medium bowl, whisk together the cold water and pickling salt until the salt dissolves completely. This is your initial soak.
- Pour the salt water brine over the packed cucumbers in the jars, ensuring they are fully submerged. Let the cucumbers sit on the counter at room temperature for 30 minutes.
- Drain the salt water from the jars. Rinse the cucumbers briefly under cold water. Discard the salt water.
- Prepare the final brine: In a small saucepan, combine the white vinegar, sugar, and 1 cup of fresh water. Heat this mixture just until the sugar dissolves. Remove from heat and let it cool for 10 minutes.
- Assemble the jars: To each jar, add 2 smashed garlic cloves, 1 head of fresh dill (or 2 teaspoons of dill seed), and 1/2 teaspoon of peppercorns.
- Pour the cooled vinegar brine over the cucumbers in the jars, leaving about 1/2 inch headspace. Tap the jars gently to release any trapped air bubbles.
- Seal the jars with lids and rings. Let the jars cool completely on the counter.
- Place the jars in the refrigerator. Your refrigerator pickles will be ready to eat in 24 hours, but the flavor improves after 48 hours. They keep well for up to three weeks in the fridge.
Notes
- For extra crispiness, you can add 1/2 teaspoon of pickling lime to the initial salt soak, but you must rinse the cucumbers very thoroughly afterward.
- If you prefer Bread and Butter Refrigerator Pickles, substitute the dill and peppercorns with 1/2 cup thinly sliced onion and 1/2 teaspoon of celery seed in each jar.
- These quick refrigerator pickles are best eaten within three weeks for peak crunch.
Nutrition
- Serving Size: 4 spears
- Calories: 15
- Sugar: 2
- Sodium: 350
- Fat: 0.1
- Saturated Fat: 0
- Unsaturated Fat: 0
- Trans Fat: 0
- Carbohydrates: 3
- Fiber: 0.5
- Protein: 0.3
- Cholesterol: 0