
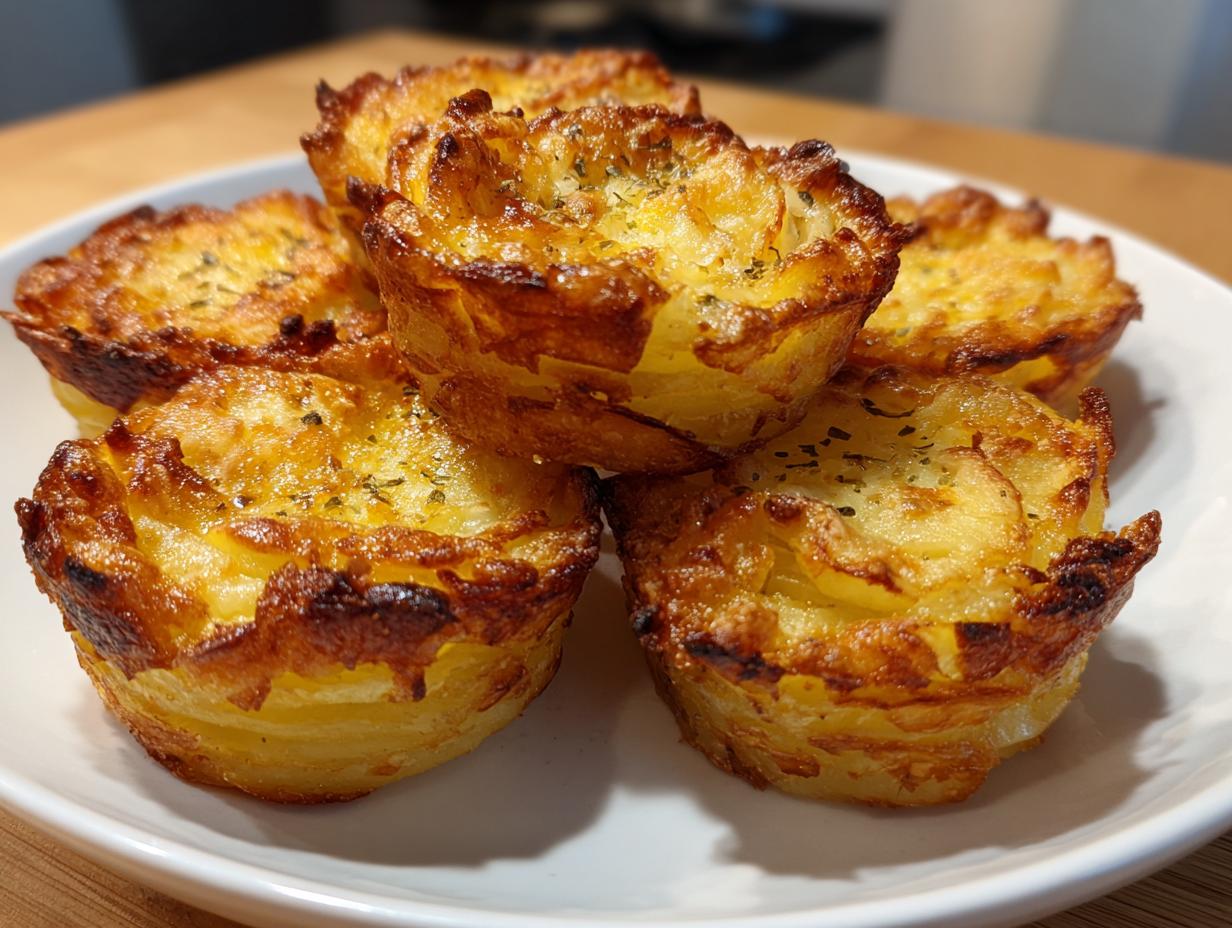
We all have those dishes we save for special occasions because they look so fancy, right? Well, I want to let you in on a secret that changes that whole idea. You don’t need hours in the kitchen or fancy equipment to make something truly impressive; you just need the right technique. Today, we’re making incredible potato stacks. They look like something you’d only see at a five-star restaurant, perfect for holidays or when you just want to treat your family, but trust me, they are straightforward. After thirty years of teaching, I know how to break down steps so everyone—no matter your skill level—can master them. These layered beauties use simple ingredients to create that gourmet look effortlessly.

- Why You Will Make These Crispy Parmesan Potato Stacks Again and Again
- Gathering Ingredients for Perfect Potato Stacks Recipe
- Step-by-Step Guide to Making Muffin Tin Potato Stacks
- Tips for Achieving Golden Brown Potatoes and Crispy Edges
- Serving Suggestions for Your Elegant Potato Sides
- Storage and Reheating Instructions for Cheesy Potato Bites
- Frequently Asked Questions About Parmesan Potato Stacks
- Variations on the Classic Potato Stacks Recipe
- Sharing Your Cooking by Carla Creations
Why You Will Make These Crispy Parmesan Potato Stacks Again and Again
When you make these potato stacks for the first time, I guarantee they become a staple. Here’s what makes them so special for my family’s dinner table:
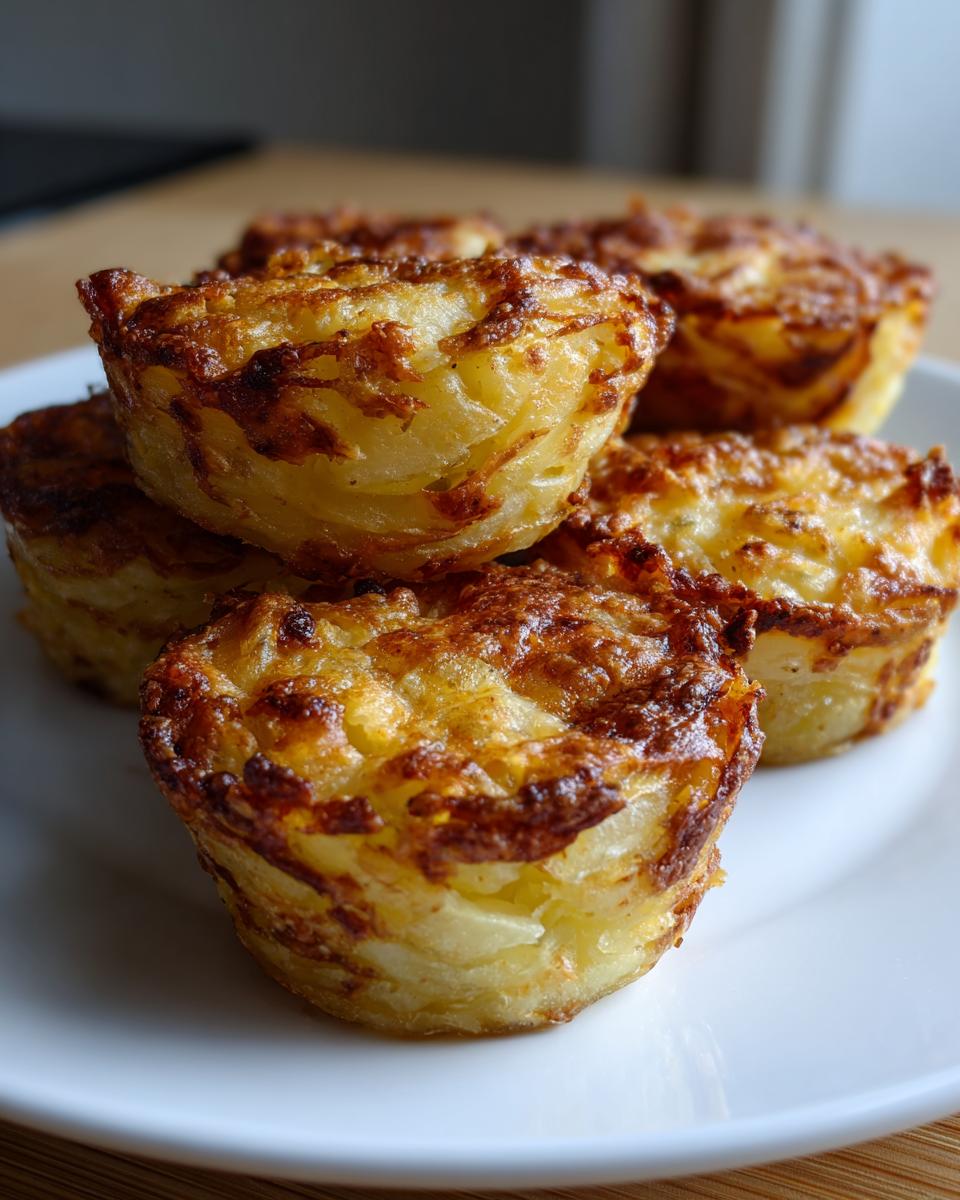
- They deliver that irresistible contrast: edges baked until golden brown and perfectly crispy, meeting a tender, almost creamy center.
- The muffin tin takes all the guesswork out of presentation; they look professional but require zero fuss.
- We use basic ingredients—butter, garlic, and Parmesan—made magical through the layering technique.
- They are versatile! Wonderful for a busy weeknight or as an elegant potato side dish for company.
Gathering Ingredients for Perfect Potato Stacks Recipe
Before we even think about preheating the oven, we need to talk about what goes into these beautiful potato stacks. When something looks this gourmet, people assume it calls for specialty items, but it’s really just about selecting the right components and treating the potatoes with respect. For this recipe, you’ll need about five pounds of middle-sized Yukon Gold potatoes. I really want you to stick with the Yukon Golds; they have less starch than Russets and hold their shape so beautifully while baking. This means you get those lovely, creamy interiors without the whole stack falling apart on you.
Once the potatoes are peeled—and yes, we do peel them for this presentation—the next crucial step is the way you slice them. You’ll need melted butter to coat everything, along with our flavor powerhouse: grated Parmesan cheese mixed with garlic powder, onion powder, paprika, salt, and just a touch of white pepper. Remember, every slice needs to be bathed in that buttery, cheesy coating, so don’t skimp on the tossing!
Potato Selection and Preparation Notes
Let’s focus on those five pounds of Yukon Gold potatoes for a minute, because this is where the structure of your side dish—and ultimately, the success of that crispy edge—is determined. I’ve tried other types, but Yukon Golds seem engineered for this exact purpose: they soften perfectly inside but don’t turn to mush. If you don’t have a mandoline slicer, don’t worry; my mother never owned one! The main thing, and I cannot stress this enough, is uniformity. You are aiming for slices that are about 1/8-inch thick. If they are too thick, they won’t layer well, and the edges won’t crisp up evenly; if they are too thin, they might burn before the inside is cooked through. A consistent slice ensures that when you bake them, you get those gorgeous, golden brown potatoes texture all around.
Step-by-Step Guide to Making Muffin Tin Potato Stacks
Alright, now that we have our potatoes perfectly thin and our flavor coating ready to go, it’s time for the fun part—building these stunning potato stacks! Remember, I used to teach second grade, so I make sure every step is clear. Think of this like building perfect little edible towers in a muffin tin. Get your oven preheated to 400 degrees Fahrenheit first, and make sure you’ve lightly greased all 12 cups in that tin. We do not want them sticking! If you love this kind of layered comfort, you might also want to check out my recipe for Potatoes au Gratin—it uses a similar layering principle!
Preparing the Flavor Coating for Your Potato Stacks
First things first, melt your butter. In a big bowl—you need room to toss things without making a mess—pour in that lovely melted butter. Now, measure out your Parmesan cheese, garlic powder, onion powder, paprika, salt, and white pepper. I like to mix the dry spices together right in the measuring cup first, just to make sure that garlic powder gets evenly distributed everywhere before it hits the potatoes.
Add your pre-sliced potatoes to the butter and toss them gently. I use my clean hands for this part because it’s the best way to make sure every single thinly sliced potato gets coated. Once everything is glistening with butter, sprinkle over that cheese and spice mixture. Toss, toss, toss! You want every piece shimmering with that cheesy deliciousness. This coating is what guarantees a rich flavor in every bite.
Assembling and Baking the Layered Potato Side Dish
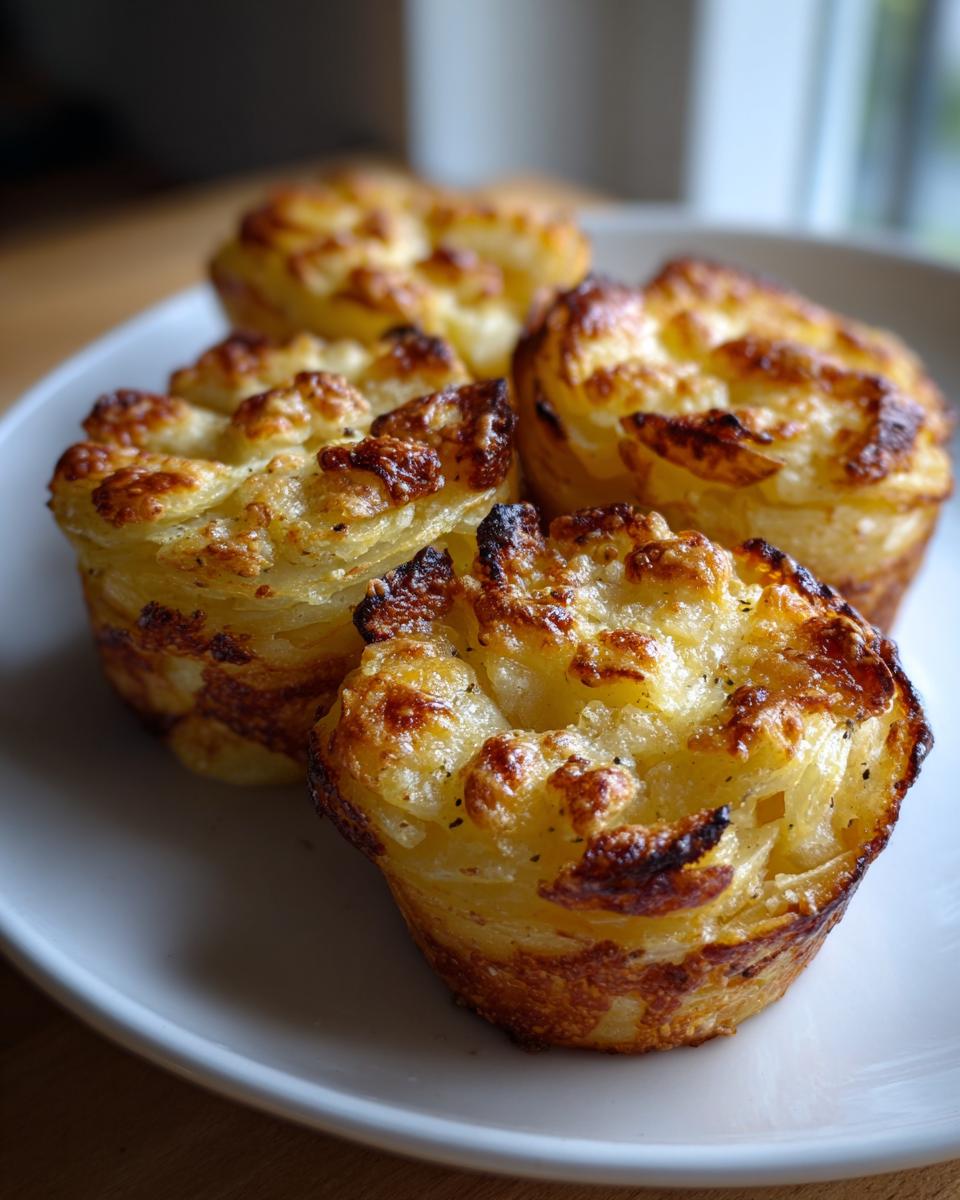
This assembling part is what creates the magic of the Layered Potato Side Dish. For each muffin cup, I take about five to seven slices and stack them vertically, pressing them down gently so they are tight against each other in the cup. Here is my secret tip: as you press them in, gently fan the edges out just a tiny bit so they stick up over the rim. Those edges poking out are the parts that get delightfully golden brown and crispy while baking!
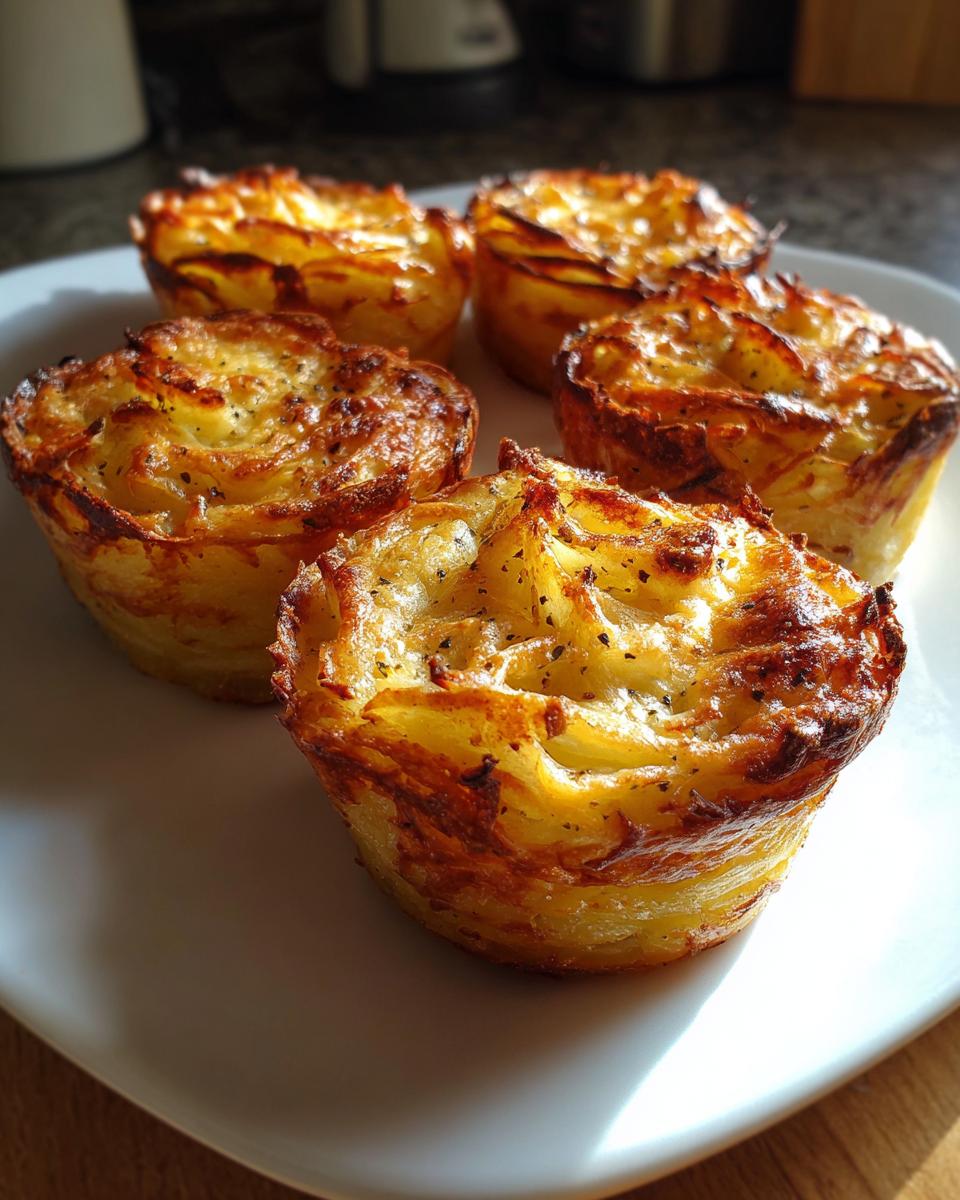
Once all 12 cups are built up, they go straight into that 400-degree oven. We are looking for a bake time between 35 and 45 minutes. You’ll know they are done when the edges are clearly golden and look crisp—that’s your visual clue! But don’t stop there; we need that creamy texture inside too. Pierce the center of a stack gently with the tip of a fork or a thin knife. If it slides in easily, they’re perfect. Once they’re out, let them rest for maybe three minutes before carefully using a small offset spatula to lift them out. Garnish them right away with fresh parsley so they look as good as they taste!
Tips for Achieving Golden Brown Potatoes and Crispy Edges
We talk a lot in our family about how the difference between a good side dish and a truly memorable one often comes down to texture. Nobody wants a soggy potato tower! Since I was a teacher for so long, I want to give you the sure-fire teaching moments that guarantee you get those beautiful, crispy edges on your potato stacks every single time.
The goal here is achieving that golden-brown crunch all around the edges while keeping the inside buttery and soft. It all boils down to consistency and surface area. If your slices are all different thicknesses, the thin ones burn before the thick ones are even cooked through. That’s just not fair to the potatoes, right?
The Role of the Mandoline in Perfect Potato Stacks
If you want restaurant-quality results where every single slice is identical, investing in a mandoline slicer is totally worth it. When I say slice them thinly, I mean it—about 1/8-inch is perfection in my book. A good mandoline makes this job fast, and frankly, it’s safer than using a regular knife when you get down to the nub of the potato.
Now, I know not everyone has one. Don’t let that stop you! If you have a food processor, use the slicing disk and set it to the thinnest possible setting. If you are going old-school with your knife, take your time. You’ll carve out a little time from the baking, but the precision you put in upfront really pays off with the final crisp. If you’ve tried making latkes, you know how important uniform shredding is; this is the same principle, just with slices instead of shreds.
Also, remember that bit about fanning the edges out in the muffin tin? Make sure those thin tips are exposed to the hot air. That’s where the butter and Parmesan will caramelize and truly crisp up. That textural contrast is what people remember about these incredible potato side dishes.
Serving Suggestions for Your Elegant Potato Sides
One of the best things about these potato stacks is how they elevate whatever you put next to them. They look like they belong next to a beautiful roast, but honestly, they are sturdy enough to stand up to all kinds of main dishes. Knowing how to create these elegant potato sides means you can switch up your dinner menu anytime without feeling overwhelmed.
Since these stacks are rich with butter and Parmesan, they pair beautifully with flavors that cut through that richness, like bright herbs or lean proteins. They are absolutely stunning next to slow-cooked meats. If you’re making a big Sunday dinner, these are the perfect side for something like my juicy meatloaf—you get that classic comfort food feel, but with a huge presentation upgrade.
For a holiday gathering, imagine pairing them with a perfectly seasoned roast chicken or even a simple honey-glazed ham. The crispy edges crunch delightfully against the tenderness of the meat. And if you’re just having a lighter meal, these cheesy bite-sized wonders are fantastic alongside pan-seared salmon or scallops. They carry enough flavor on their own that you don’t need heavy gravy or sauces.
Don’t forget, these are also wonderful as an appetizer! People always grab them first. You could serve them alongside mini dips or even some of those little mini potato parmesan stacks if you’re making a huge buffet. They really are the supporting actor that steals the entire show.
Storage and Reheating Instructions for Cheesy Potato Bites
Even with a house full of hungry people, sometimes we end up with leftovers, and that’s never a bad thing when it involves potatoes this tasty! Handling leftovers is important, especially when you want to keep that signature crispness we worked so hard to achieve in our cheesy potato bites.
First, make sure these cheesy potato bites are completely cooled down before you put them away. If you seal them up warm, the steam gets trapped, and that’s the fastest way to turn crispy edges soggy overnight. Store them in a semi-airtight container—I use glass ones—in the refrigerator for up to three days. They should hold their shape well enough, even layered like this.
Now for reheating. This is where we need to be smart. Please, please avoid the microwave if you can! Microwaves heat water molecules, and that just steams the potato, making them soft again. If you only need to warm up one or two stacks, the microwave is fast, but expect them to be softer.
For the best results, you want to revive that golden-brown crunch. The oven is always my first choice. Preheat your oven—or a toaster oven, if you only have a few stacks—to about 350 degrees F. Lay the leftovers directly on a baking sheet. They only need about 8 to 10 minutes. You are just trying to heat them through and dry out the edges again, not cook them again.
If you have an air fryer—and my goodness, those things are wonderful for reheating leftovers—use that! It mimics deep frying better than an oven does. Set your air fryer to 350 degrees F and just let them hang out in there for about 5 minutes. They come out remarkably close to how they were right out of the muffin tin. Taking these little steps to reheat properly means you still get that wonderful texture from your easy holiday potatoes the second time around!
Frequently Asked Questions About Parmesan Potato Stacks
It’s natural to have questions when you’re trying a new technique! Even though I’ve tried to make this recipe for Parmesan Potato Stacks as straightforward as possible, sometimes you just need a quick clarification. Remember, cooking is about learning and adjusting, and that’s what I love most about our community here at Cooking by Carla. Don’t hesitate to ask if you have other concerns about making these amazing side dishes! If you are looking for more great options for special meals, you should definitely check out my post on easy holiday potatoes for inspiration.
Can I make these potato stacks ahead of time?
That’s a great question about planning for busy days, especially around the holidays! You absolutely can do some prep work ahead of time, but I have a little advice here. You can peel and slice all your potatoes and even toss them in the butter/seasoning mixture up to a day ahead. Keep them covered tightly in the refrigerator. However, I strongly recommend you do NOT assemble the potato stacks until just before you are ready to bake them. If you layer the slices into the muffin tins too early, the starches will start to release and glue them together awkwardly, and they won’t bake up with that beautiful separation we want for the crispy edges!
What is the best potato type for these crispy baked potatoes?
As I mentioned earlier, my absolute favorite for these is the Yukon Gold. They are creamy, they brown nicely, and they hold their structure so well; they are the perfect middle ground for this recipe. But if you are asking about the best for achieving *really* crispy baked potatoes, you have a couple of options if Yukon Golds are unavailable.
If you use a Russet potato, you will get an even fluffier center because they have more starch, but watch them closely, as they can sometimes break apart more easily during handling. If you want to try leaving the skin on for a different look, Red Potatoes work very well too! Just make sure you scrub them clean, and keep your slices consistent, 1/8-inch if possible. We are looking for texture here, and the potato choice definitely guides that!
What cheese works best in place of Parmesan?
Parmesan is wonderful because it has a low moisture content and browns beautifully without melting entirely into an oily puddle overnight. If you need a substitute, Grana Padano is almost identical and works wonderfully. If you want something softer that gets really gooey, sharp white cheddar is a nice change, but be aware that softer cheeses might make the very inside of the stack softer, not quite as firm. If you substitute, you might need to bake your potato stacks for five minutes longer just to ensure that the center potato slices are tender.
Variations on the Classic Potato Stacks Recipe
Now, I always start with the classic recipe because it’s timeless, but I want you to feel empowered to make these potato stacks your own! Once you master the layering and the temperature, these little beauties are like a blank canvas for flavor. My philosophy is that recipes should fit your family’s taste buds, not the other way around. Don’t be afraid to experiment a little bit after you’ve tried the original Parmesan version once or twice.
If you love herb flavors, you can really jazz up that butter coating. Thyme is absolutely divine with potatoes. Next time you’re melting your butter, throw in about half a teaspoon of dried thyme leaves. You could even try a pinch of dried rosemary, but be careful with rosemary—it’s strong! If you want to try something new, I always encourage checking out recipes that play with different flavor profiles, like this roasted garlic one I saw recipe for two—it uses lots of roasting time to deepen the garlic flavor.
When it comes to cheese swaps, remember what I said about Parmesan: it’s dry and sharp. If you want a smoother, slightly gooey center, try swapping half of the Parmesan for Gruyère or even a sharp white cheddar. Just remember, if you use a high-moisture cheese, you might need to bake your potato stacks for an extra five minutes to ensure everything is cooked through properly.
For a kick of spice, which I love when serving these alongside something simple like a roast chicken—you can see how I pair it with my Garlic Parmesan Chicken Bake—try adding a tiny pinch of cayenne pepper or smoked paprika to your dry spice mix. Smoked paprika gives you a wonderful depth of color and a lovely, earthy warmth. It completely changes the profile while keeping the texture perfect. Enjoy making these your own!
Sharing Your Cooking by Carla Creations
Now that you have mastered these beautiful potato stacks, I truly hope you’ll give them a try for your next meal. Seeing your photos and hearing how much your family enjoyed them is the biggest reward for me, second only to watching my own grandchildren enjoy these classic American comfort flavors.
When you make these and they come out golden and crispy, please swing by and leave a rating on the recipe card—five stars if they earned it in your house! Knowing that these reliable recipes are working for you makes all the time I spend testing and writing them worthwhile.
If you snap a picture of your gorgeous layered potato side dish, tag me on social media! I love seeing how you present them at your own tables. It’s those shared moments and successes in the kitchen that build our community here at Cooking by Carla. If you want to learn more about my journey and why I love keeping these traditional recipes alive, take a peek at my About page. Happy cooking, dear friends!
PrintCrispy Parmesan Potato Stacks Baked in Muffin Tins

Make impressive, gourmet-looking potato stacks that feature crispy edges and tender, cheesy centers. This easy recipe uses thinly sliced potatoes baked in a muffin tin, perfect for any dinner or holiday gathering.
- Prep Time: 20 min
- Cook Time: 45 min
- Total Time: 65 min
- Yield: 12 stacks 1x
- Category: Side Dish
- Method: Baking
- Cuisine: American
- Diet: Vegetarian
Ingredients
- 5 pounds medium Yukon Gold potatoes, peeled
- 4 tablespoons melted butter
- 3 tablespoons grated Parmesan cheese
- 2 teaspoons garlic powder
- 1 teaspoon onion powder
- 1 teaspoon paprika
- 1 teaspoon salt
- 1 teaspoon ground white pepper
- 2 tablespoons fresh parsley, chopped (for garnish)
Instructions
- Preheat your oven to 400 degrees Fahrenheit. Lightly grease a standard 12-cup muffin tin.
- Peel the potatoes and slice them very thinly, about 1/8-inch thick. A mandoline slicer works best for uniform slices.
- In a large bowl, melt the butter. Add the sliced potatoes to the melted butter and toss to coat them evenly.
- In a small bowl, combine the Parmesan cheese, garlic powder, onion powder, paprika, salt, and white pepper.
- Add the cheese and spice mixture to the potatoes and toss again until all slices are well coated.
- Take about 5 to 7 potato slices and layer them vertically inside each muffin cup, pressing them down gently to form a tight stack. Try to fan the edges out slightly so they stick up over the rim of the cup for crisping.
- Bake for 35 to 45 minutes, or until the edges of the potatoes are golden brown and crispy, and the centers are tender when pierced with a fork.
- Carefully remove the potato stacks from the muffin tin using a small offset spatula or butter knife.
- Garnish the tops with fresh chopped parsley before serving immediately.
Notes
- For the crispiest edges, ensure your potato slices are uniform in thickness. Use a mandoline if you have one.
- Yukon Gold potatoes hold their shape well and provide a creamy interior texture.
- If you prefer a stronger garlic flavor, use 1 teaspoon of garlic salt instead of plain salt and reduce the garlic powder slightly.
Nutrition
- Serving Size: 1 stack
- Calories: 180
- Sugar: 1
- Sodium: 250
- Fat: 9
- Saturated Fat: 5
- Unsaturated Fat: 4
- Trans Fat: 0
- Carbohydrates: 23
- Fiber: 2
- Protein: 4
- Cholesterol: 15