
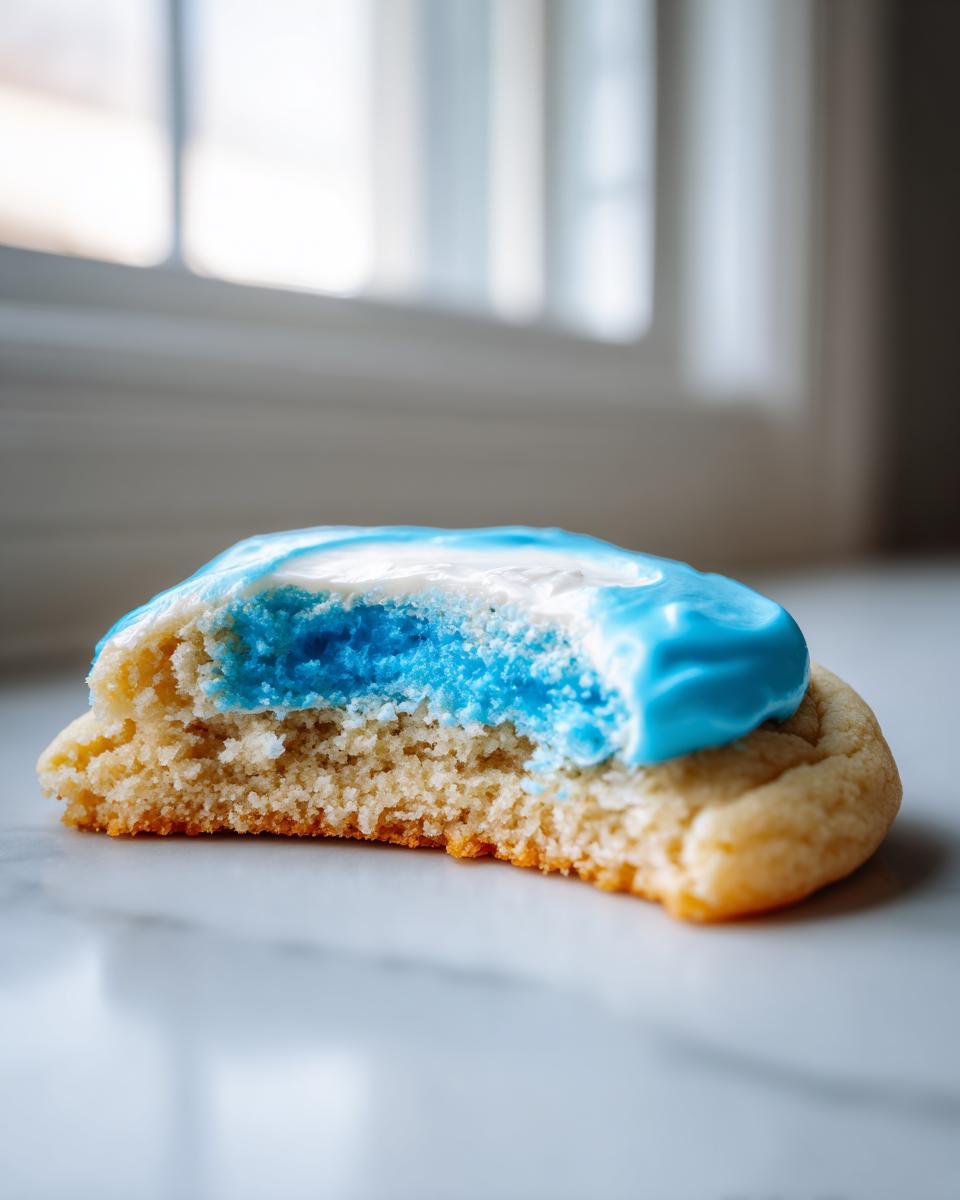
Oh, how I remember the days of decorating sugar cookies and watching the icing run right off the edge like a sad, sweet puddle! If you’ve ever wasted time coloring icing only to have it crack the second you try to stack the cookies, you know the frustration. Well, friends, I’m here to tell you to stop worrying. After thirty years of teaching third grade, I learned a thing or two about breaking down complicated instructions and getting consistent results, and that applies to baking too! This melt-in-your-mouth cookie deserves the best topping, so let’s mix up the ultimate, foolproof **cookie icing recipe** that guarantees a smooth, glossy finish and hardens up perfectly every single time. You can do this!
- Why This Is The Best Cookie Icing Recipe For Decorating
- Gathering Ingredients for Your Foolproof Cookie Icing
- Step-by-Step Instructions for This Easy Cookie Icing Recipe
- Tips for Success with Your Vanilla Cookie Icing Recipe
- Coloring and Adjusting Your Cookie Icing Recipe
- Comparing This Cookie Icing Recipe to Royal Icing for Cut Out Cookie Decoration Recipe
- Storage and Reheating Instructions for Leftover Icing
- Frequently Asked Questions About This Cookie Icing Recipe
- Share Your Perfect Cookie Icing Results
Why This Is The Best Cookie Icing Recipe For Decorating
When you’re spending time cutting out shapes and baking those beautiful sugar cookies, you deserve an icing that shows them off! This little mixture is my go-to, and I keep coming back to it for holidays and birthdays because it just *works*. It’s so easy, too—no weird techniques required, which is great for anyone just starting out with cut-out cookie decoration. If you need a recipe that delivers amazing results every time, then you’ve found the cornerstone of my best dessert recipes collection!
Here’s why this **cookie icing recipe** knocks everything else out of the park:
- It creates a naturally **glossy icing recipe** finish that looks professional right out of the bowl.
- It sets up beautifully, giving you fantastic **sugar cookie icing that hardens** just right.
- It’s forgiving! As a former teacher, I promise this recipe gives you tons of room for error.
We’ll talk more about the texture next, but trust me, this mix gives you the most reliable results for stacking and gifting!
Achieving That Professional, Smooth Cookie Icing Tutorial
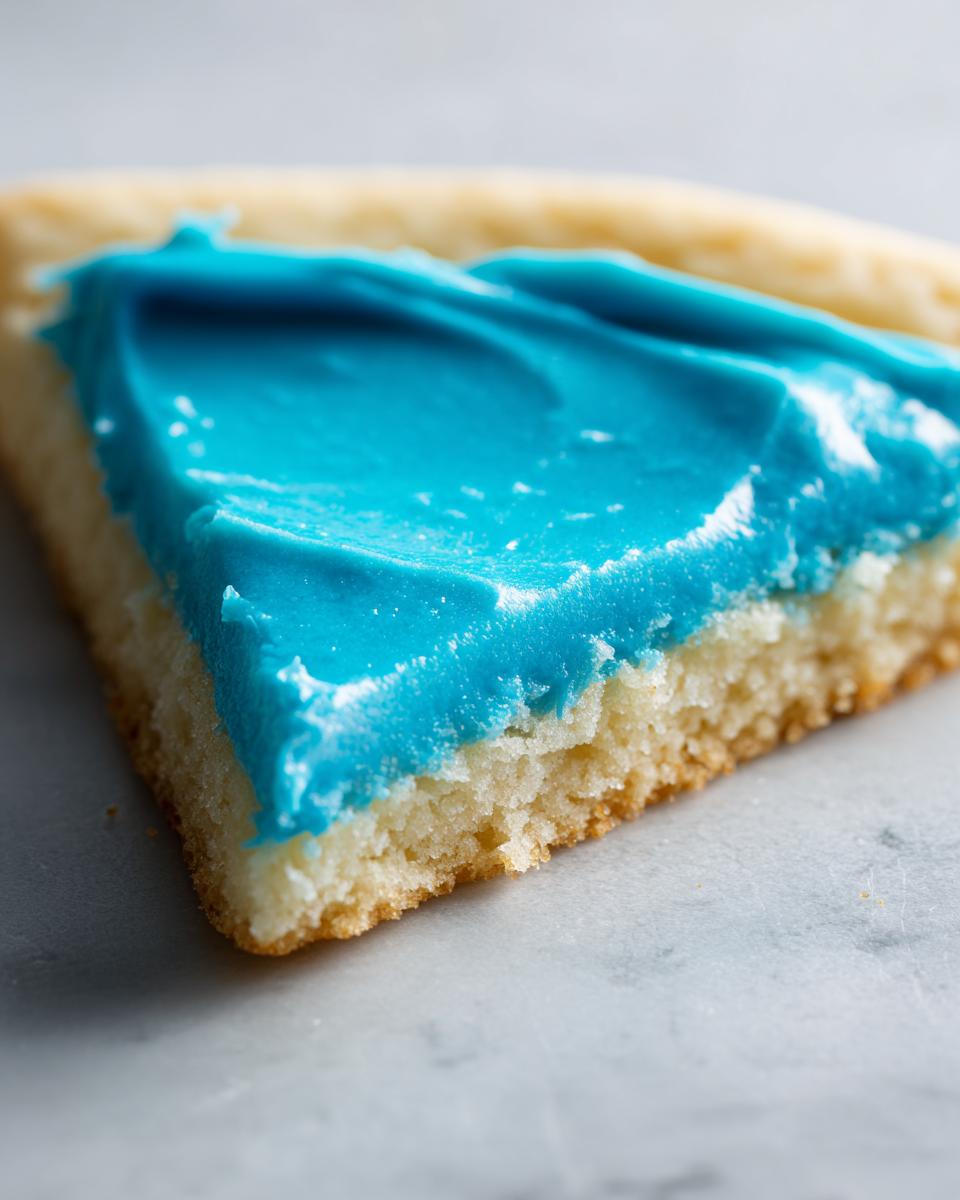
The secret to that smooth, almost porcelain-like finish you see in bakeries? It’s all about the corn syrup, believe it or not! That tiny amount keeps the glaze from crystallizing too fast while it dries, which is what causes dull patches or cracks. When I’m teaching beginners, I always emphasize mixing slowly at first. You want to incorporate everything until it just looks liquid and shiny—that’s your signal that the mixture is ready for a beautiful flooding job. We’re aiming for perfection, but we’re getting it without any fuss!
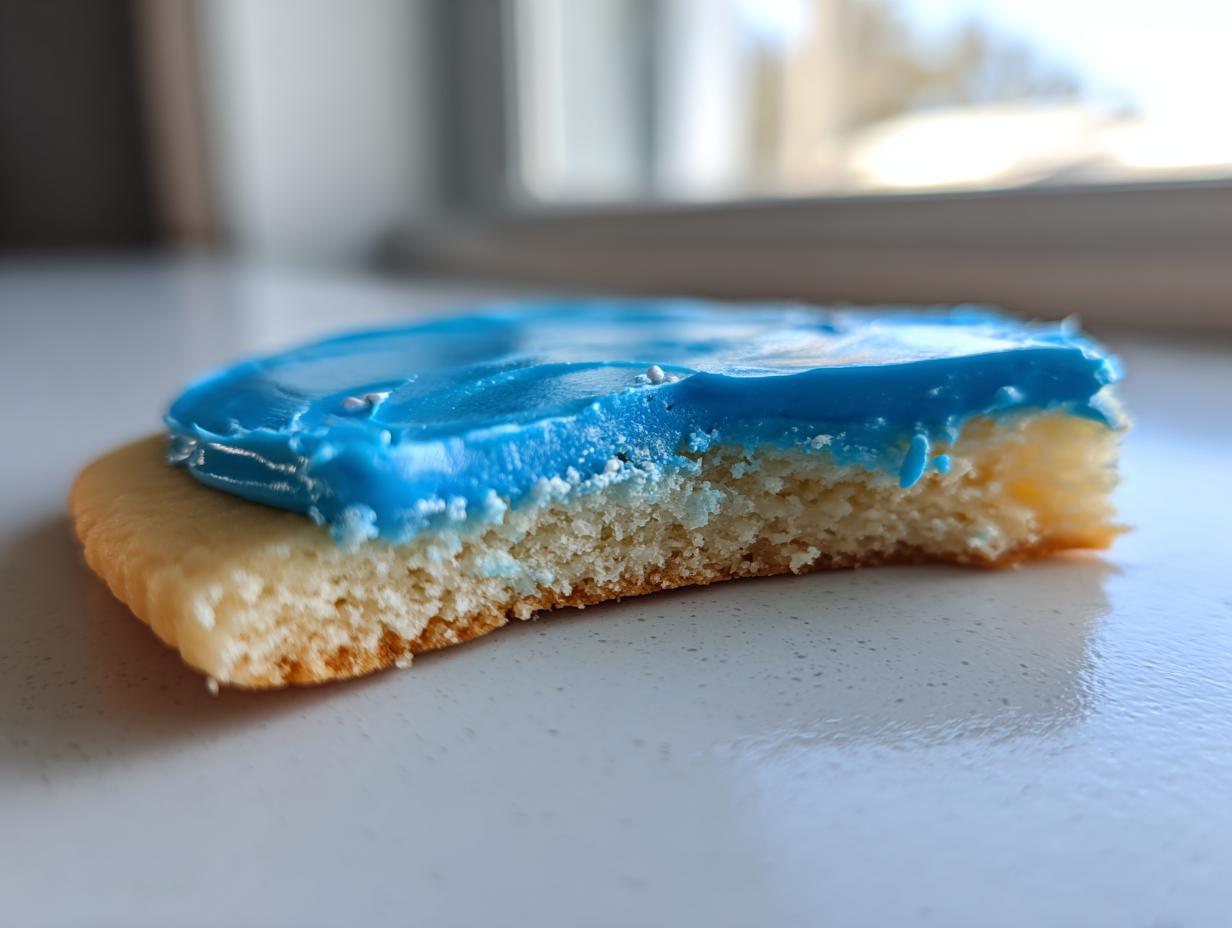
The Secret to Sugar Cookie Icing That Hardens Firmly
This is the moment of truth when you’re planning ahead for a party or need to stack cookies in tins! The way I’ve balanced the liquid (milk or water) against the powdered sugar is what ensures it dries firm. If you use too much liquid, you get a soft glaze that stays sticky forever. Too little, and it cracks. My ratio results in an icing that dries hard enough to protect your design but still offers a slight, delicious crunch when you bite into the cookie. That makes it the best kind of **sugar cookie icing that hardens** perfectly for travel!
Gathering Ingredients for Your Foolproof Cookie Icing
Okay, let’s get down to the fun part: measuring! I always say that success in baking starts right here, with getting your ingredients ready. Since this is a very simple mixture, we need great quality ingredients put together correctly to get that great finish we talked about. The star of the show, of course, is the confectioners’ sugar. Do not skip the step of sifting it! I cannot stress this enough, especially if you are aiming for that smooth cookie icing tutorial look. Sifting guarantees there are zero lumps hanging around, which would ruin the glossiness.
Here’s exactly what you need for this **cookie icing recipe** that basically makes itself:
- 4 cups confectioners’ sugar, sifted!
- 1/2 cup milk or water (I sometimes lean toward milk for a softer, creamier set, but water works great too).
- 2 tablespoons light corn syrup (This is non-negotiable for the shine!).
- 1 teaspoon vanilla extract (For that classic, pleasant vanilla cookie icing recipe flavor).
Ingredient Notes and Substitutions for Your Cookie Icing Recipe
Because I always want you to feel armed with baking knowledge, let’s talk briefly about these items. When you choose between milk or water, milk adds a very slight richness, but honestly, either works perfectly fine for a glaze that hardens. Since we are focused on getting that smooth, firm top, we need to respect the corn syrup. It interferes with sugar crystallization, which is exactly what keeps your icing from turning chalky!
Now, here’s an expert tip for when you are absolutely slammed with holiday decorating and need those cookies dry yesterday: look at the recipe notes! If you want an even faster set—almost like a super-strong, quick-drying shell—you can swap the milk or water for an equal amount of meringue powder mixed with water according to the package directions for that powder. Meringue powder is my secret weapon when I’m teaching baking classes because it gives you incredible authority over the drying time. It just speeds up the process beautifully for any **cut out cookie decoration recipe**!
Step-by-Step Instructions for This Easy Cookie Icing Recipe
Following the measurements precisely is important, but watching the magic happen as this mixture comes together is the best part of this whole **cookie icing recipe**! It mixes up in just a few minutes, so you feel like you’ve accomplished something major before the oven even finishes preheating. Remember, I learned a long time ago when I was teaching that clear steps make all the difference, whether it’s long division or decorating cookies! Don’t just stick to the recipe blindly; feel what you’re doing!
First things first, you grab your bowl, make sure your confectioners’ sugar is sifted (seriously, don’t skip it!), and whisk it together with your milk or water until you get a smooth, thick base. Then, in go the corn syrup and that lovely vanilla extract. Beat it until it’s all uniform and shiny. If you notice any little specks left, keep whisking! Once it looks like liquid silk, you’re ready to start dividing it up for coloring or using the base coat. If you’ve mastered this foolproof **cookie icing recipe**, you’ll find other simple mixtures, like my easy homemade chocolate pudding recipe, suddenly seem just as simple!
When I first started decorating years ago, I often made the mistake of making one huge batch that was too thin for details but too thick for flooding the rest of the cookie. Oops! That’s why we have to test the consistency now. You divide your icing up depending on what you’re doing next. If you’re outlining the cookie, you need that thick stuff. If you are just filling in the space, then you need to thin it down just a touch.
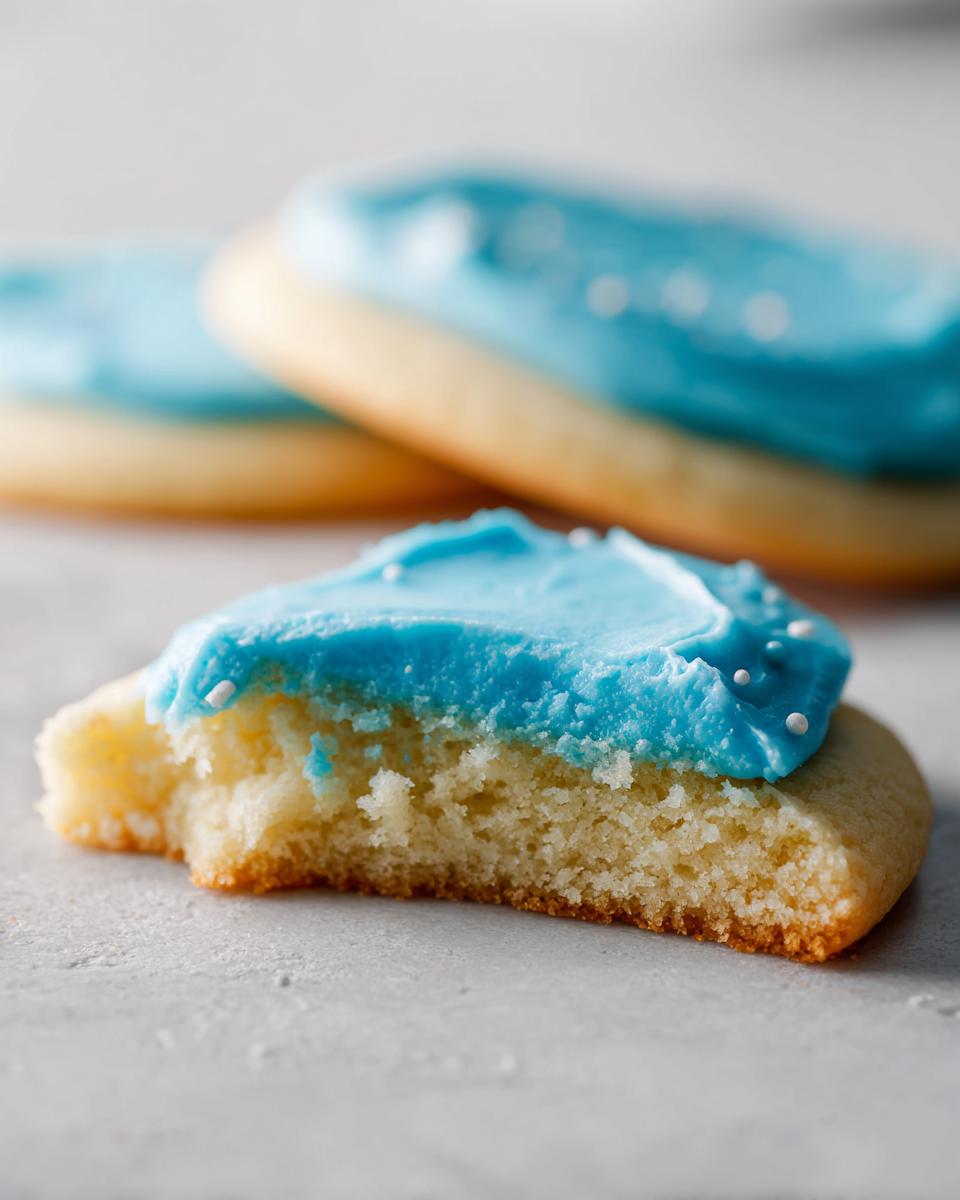
For anything that needs to hold a defined edge—like writing names or drawing the border around your cookie—you need a stiff consistency. This is where the 10-second rule comes in handy. I teach this to everyone: lift your whisk and let the icing drip back into the bowl. Is that drip line visible on the surface for about 10 seconds before it sinks back in? If yes, great! That’s your **icing consistency for piping**. If it disappears instantly, you need more sugar. If it sits there like a mountain, you need a drop or two of water.
Once you hit that sweet spot, you can use that mixture to outline your cookies. Then, you can thin the remaining icing just a little bit more with drops of liquid until it flows beautifully to fill in that outline—that process is called flooding! Remember, you can see what you are aiming for in terms of smooth cookies over at this resource if you need a visual reference while you work. Just keep testing that texture, and you’ll get those professional lines in no time!
Mastering Icing Consistency for Piping and Flooding
This step is the hinge that swings open the door to proper cookie decorating, so pay close attention! For piping, which is making those clean borders or writing specific details, your icing needs to be thick—what we call stiff consistency. I personally struggle when I’m rushing; I mix everything too fast, and the icing ends up too thin for piping! Before adding any color, pull some out. Lift your spoon and let the ribbon of icing fall back into the bowl. If that ribbon sits right on top, holding its shape for about 10 seconds before slowly smoothing out, congratulations, you have the perfect consistency for piping those sharp outlines!
Now, once you’ve outlined ten cookies, you might be ready to flood them. Flooding means smoothing out the center so you get that flat, glossy top. This requires a slightly looser texture. Take the leftover icing you just tested, and add liquid—just a teaspoon of milk or water at a time—while whisking gently. Keep testing until that ribbon flows off the spoon and disappears into the bowl in about 3 to 5 seconds. It should still be thick enough to spread evenly within the outline you piped, but thin enough that it settles flat on its own. It’s like getting two recipes out of one batch!
Tips for Success with Your Vanilla Cookie Icing Recipe
Even with a **no fail cookie icing recipe** like this one, the environment plays a big role in how your cookies turn out. I learned this the hard way during a really humid August when I was trying to decorate for a birthday party. Humidity is the enemy of drying time, plain and simple. If it’s sticky outside, your icing will take ages to set firm. If you’re struggling with drying time, remember those expert tips in the notes; swapping out the liquid for that meringue powder mixture will give you a stronger structure faster, even when the air feels heavy.
The biggest piece of advice I can give to ensure you get that reliably firm finish every time you use this **cookie icing recipe** is to let it dry completely before you even think about stacking them. I know, the temptation is real, especially when you’ve made enough to feed the whole neighborhood! But if you stack them even slightly tacky, you’ll get smudges, and you’ll ruin that beautiful, smooth surface we worked so hard to achieve.
Also, remember that tweaking consistency is a marathon, not a sprint! If your icing seems too thin right after mixing, resist the urge to dump in a whole cup of powdered sugar to fix it. You need to add that sugar just one spoonful at a time while mixing gently. The same goes for thinning things out—use only a single drop of water or milk at a time. Patience here is what separates a good decorator from one who gets frustrated! You can see some great advice on getting started with beginner decorating over at this helpful resource, too.
And hey, if you are playing around with flavors later on—maybe trying out my divine lemon crinkle cookies and needing a coordinating topping—this base recipe is perfect for experimentation! Just make adjustments slowly. If you swap the vanilla for almond or citrus extract, keep the rest of the mixture the same size so you don’t mess with the hardening properties.
Coloring and Adjusting Your Cookie Icing Recipe
Once we have that perfect base consistency—the one that’s smooth and shiny, ready for action—we move onto the fun part: color! I always suggest dividing your plain icing into smaller bowls right away, before you add any color, so you have plenty of uncolored icing just in case you need to flood a large area quickly or just want some pretty white accents.
When it comes to coloring this **vanilla cookie icing recipe**, please listen to an old elementary teacher: use gel food coloring, not the liquid drops you buy next to the sprinkles! Liquid coloring is mostly water, and adding too much water to icing immediately throws off the consistency we worked so hard to nail down. Gel colors are super concentrated, so you only need the tiniest bit on a toothpick to get vibrant, professional colors. This is a lifesaver for any **beginner cookie decorating icing** project!
After you mix in the color, you might notice a few tiny bubbles pop up from whisking. Don’t panic! This is normal, and it’s easy to fix. If I’m letting the icing sit for just a few minutes before I use it, those tiny bubbles usually pop on their own. If they are stubbornly hanging around and I need to pipe right away, I just gently tap the side of the bowl a few times on the counter. That little vibration usually releases those trapped air pockets, leaving you with that gorgeous, smooth surface we are aiming for. It’s all about being patient and observing what the icing is telling you!
Now, let’s say you went a little wild with the gel coloring just for fun, and now your icing feels slightly thinner than when you started. It happens! Unlike when you are measuring ingredients, coloring is where we adjust texture slightly. If you thickened it up previously with sugar, the extra color might have softened it again. If it looks a touch too loose for piping clean lines, just stir in half a teaspoon of sifted confectioners’ sugar at a time until it feels sturdy again. This simple back-and-forth process is why this is such a reliable **cookie icing recipe**—it lets you tweak it as you go!
Comparing This Cookie Icing Recipe to Royal Icing for Cut Out Cookie Decoration Recipe
Sometimes people ask me if the icing I use here is strictly Royal Icing. That’s a fair question, because when you look at a beautifully decorated cookie, you usually think of that hard, sturdy shell, right? Well, while I do have a fantastic foolproof meringue powder royal icing recipe here on the site, the one we just made is slightly different, and I want to explain why.
Think of what we just made as a very sturdy, reliable glaze—a magnificent alternative! This **cookie icing recipe** uses corn syrup and is a bit closer to a traditional confectioners’ glaze, which dries firm and smooth but usually maintains a little bit of softness beneath the surface. You can certainly stack cookies decorated with this, and they look fantastic!
True Royal Icing, on the other hand, is what most professional bakers use when they need that rock-hard finish that can handle serious stress, like being shipped across the country or handling very intricate piping layers. Royal Icing, especially when made with egg whites or heavy meringue powder, dries far more brittle and hard, often resulting in a sharper *snap* when broken. Our current recipe is friendlier for beginners because it’s easier to mix, less prone to weeping in humidity, and it offers a slightly softer bite, which I personally love!
If your main goal is just lovely, smooth cookies for a party next weekend, this recipe is your champion. If you are entering a baking contest or need icing that sets like concrete, then you might lean toward the traditional royal icing approach, which you can read more about over here. Either way, you get a beautiful, edible decoration that pairs perfectly with your sweet cut-out creations!
Storage and Reheating Instructions for Leftover Icing
I always end up with an extra bowl of colored icing because I can never trust myself when dividing colors! It’s so sad to dump that leftover beautiful color down the sink, so let’s talk about how to store it properly. Since this is a simple confectioners’ sugar-based icing, not a complicated buttercream, storing it is pretty straightforward, but you have to seal it up tight!
For any icing that you haven’t used yet—that lovely batch of thick outlining consistency or the thinner flood mix—you must cover it tightly. I wrap the bowl cling film right over the surface of the icing to prevent a hard skin from forming on top. Then, I cover the whole bowl with a lid or another layer of foil. You can usually keep this icing on your counter at room temperature for a day or two, especially if your kitchen isn’t too warm. If you are making this weeks before Christmas, though, tuck it into the fridge. Just make sure it’s sealed airtight so it doesn’t absorb any strange fridge smells!
Now, the word “reheating” makes me giggle a little, because we aren’t putting this in the oven! When you bring that chilled icing back out to use it later, it’s probably going to look stiff, maybe even a little crumbly. That’s just the sugar settling down when it gets cold. Don’t panic and dump in more sugar—that will make it way too thick the next time!
To revive that leftover **cookie icing recipe** texture, you just need to add back a tiny bit of moisture. Start with just a drop or two of milk or water. Use a small spoon or a toothpick, stir it in gently—we don’t want bubbles!—and check the consistency. If it’s still too stiff for what you need, add another drop. It is amazing how much liquid that sugar will absorb once it’s been cooled. This simple step means you never waste bright pink or deep green icing!
If you used the meringue powder variation I mentioned earlier, you might find that it dries even harder in the fridge. If that’s the case when you bring it out, stir in a tiny bit more water until it becomes workable again. Storing and reviving leftover icing keeps your decorating sessions stress-free and helps you save money on supplies. It’s just practical home baking at its best!
Frequently Asked Questions About This Cookie Icing Recipe
I know that when you’re tackling cookie decoration, you often have a million little questions running through your head. That’s okay! I was the same way when I first started baking these for my own kids’ school parties. My goal with this **cookie icing recipe** is to make sure you feel completely prepared, so let’s tackle the things I get asked about most often. Don’t worry if this is your first time trying to get a **glossy icing recipe** that actually works!
How long does this cookie icing recipe take to dry completely?
This is probably the number one question I get! Because this is a slightly softer glaze than true royal icing, drying time depends heavily on the weather in your kitchen. Generally, if you have nice, average humidity, you can expect the icing to set enough that you can carefully handle the cookies in about 4 to 8 hours. If you are preparing these for a major event, I always tell people to plan on a full overnight dry time, just to be safe. If it’s pouring rain outside, humidity dramatically slows down the hardening process, so you need to be patient! If you’re in a rush, you can turn on a dehumidifier in the room where they are setting.
Can I make this icing ahead of time for holiday cookie icing ideas?
You definitely can plan ahead, which is essential when you’re juggling a huge batch of holiday baking! While this **easy cookie icing recipe** is best made the day you decorate, you can certainly mix the base recipe, divide it, color it, and store it. Remember what we discussed about storage: cover the surface tightly with plastic wrap and keep it airtight at room temperature or in the fridge.
When you go to use it the next day, it will likely feel stiff. Just recall our revival instructions: take a toothpick and gently stir in tiny drops of water or milk until it loosens back up to that perfect consistency for piping or flooding. It might take a minute or two of gentle stirring, but it comes right back! This is great for keeping your decorating day smooth, especially if you’re using this reliable **vanilla cookie icing recipe** for several different colored batches. You can see some wonderful holiday cookie icing ideas online for inspiration, but make sure you test your revived icing before you start piping intricate designs!
Will this icing crack if I stack the cookies?
That is the beauty of this particular mixture! Because of the light corn syrup we add, this **sugar cookie icing that hardens** creates a durable shell. Unlike a simple powdered sugar glaze that shatters when you breathe on it, this recipe sets firm enough for gentle stacking. I’ve layered my holiday cookies three or four high in tins, and they’ve been perfectly fine! Just ensure you let them dry for that full 4 to 8 hours minimum, or until they feel completely dry to the touch. If you’re ever worried, you can always use that meringue powder substitution to ensure an extra-firm set!
How do I get that super glossy finish every time?
The high-gloss aspect of this **smooth cookie icing tutorial** style topping comes from our two secret weapons: the sifted confectioners’ sugar and the light corn syrup. Corn syrup is crucial because it stops the sugar crystals from forming that dull, dusty look. When you whisk gently until the mixture is completely uniform and shiny *before* you add colors, you’ve done the hard work! If you skip sifting, those tiny hard sugar clumps will show up as dull spots once the icing dries.
If you’d like to learn more about my teaching style and approach to reliable recipes, you can always check out my About page anytime!
Share Your Perfect Cookie Icing Results
Now that you have the best **cookie icing recipe** in your hands—the one that looks smooth, shines beautifully, and hardens like a champion—I truly want to see what you’ve created! There is nothing more rewarding for me than knowing that one of my tried-and-true recipes helped make your holiday tray or birthday party a truly colorful success.
If you followed along with my instructions, especially that bit about resting the icing until it held a 10-second line, I hope you ended up with dozens of flawless cookies ready for gifting! Please take a moment when you’re done and leave a star rating right here on the recipe card. It helps other home cooks, just like you, find this reliable **vanilla cookie icing recipe** when they are searching for something simple that actually works.
And please, I love seeing my readers’ work! If you snapped a picture of your beautifully decorated cookies—whether you went for simple outlines or some fancy flooding—share it! You can tag me on social media, or if you have any final lingering questions about technique, consistency, or storage, don’t hesitate to drop them down in the comments below. This community is built on sharing those little kitchen victories, and I’m always here to help you troubleshoot or just cheer you on! If you need to reach out privately for any reason, you can always find my contact details right here. Happy decorating, friends!
PrintThe Best Sugar Cookie Icing Recipe: Smooth, Glossy, and Hardens Perfectly
This is the foolproof cookie icing recipe you need for decorating cut-out sugar cookies. It mixes easily, dries to a smooth, glossy finish, and hardens firm enough for stacking and gifting.
- Prep Time: 10 min
- Cook Time: 0 min
- Total Time: 10 min plus drying time
- Yield: Coats about 2 dozen medium cookies 1x
- Category: Dessert
- Method: Mixing
- Cuisine: American
- Diet: Vegetarian
Ingredients
- 4 cups confectioners’ sugar, sifted
- 1/2 cup milk or water (use milk for a slightly softer set)
- 2 tablespoons light corn syrup
- 1 teaspoon vanilla extract
Instructions
- In a medium bowl, whisk together the sifted confectioners’ sugar and the milk or water until smooth.
- Add the corn syrup and vanilla extract to the mixture. Whisk until the icing is completely smooth and glossy. This is your base icing consistency.
- Test the consistency. For outlining and piping details, the icing should be thick enough to hold a line on the surface for about 10 seconds. If it is too thin, add more sifted confectioners’ sugar, one tablespoon at a time.
- If the icing is too thick for flooding (spreading smoothly over the cookie surface), add liquid (milk or water) one teaspoon at a time until it flows easily.
- Divide the icing into separate bowls for coloring, if desired. Add gel food coloring slowly and mix until the color is uniform.
- Use the icing immediately for decorating. For piping, use a piping bag fitted with a small round tip. For flooding, use a spoon or a bottle to spread the icing within the piped outline.
- Allow the decorated cookies to sit at room temperature until the icing is completely dry and hard. This usually takes 4 to 8 hours, depending on humidity.
- Store decorated cookies in an airtight container once the icing is fully set.
Notes
- For a firmer, faster-drying icing, substitute the milk or water with an equal amount of meringue powder mixed with water according to package directions.
- If you need to thin the icing quickly while decorating, use a few drops of water. If you need to thicken it, mix in a small amount of sifted confectioners’ sugar.
- This recipe works well for beginner cookie decorating as it provides a reliable texture for both outlining and flooding.
Nutrition
- Serving Size: 1/4 cup
- Calories: 420
- Sugar: 105
- Sodium: 5
- Fat: 0
- Saturated Fat: 0
- Unsaturated Fat: 0
- Trans Fat: 0
- Carbohydrates: 108
- Fiber: 0
- Protein: 0
- Cholesterol: 0