
When the air turns crisp, doesn’t your heart just crave something wonderfully warm and comforting? Well, for me, that scent—cinnamon mingling with baked fruit—always leads me straight to my very best apple cobbler recipe. This isn’t some fussy, complicated dessert that requires pastry skills. No, this is the easiest, most classic apple cobbler you will ever make, and it comes out perfect every single time. Teaching this recipe, just like I taught my students years ago, requires patience and clarity. This dish is special because it tastes exactly like the Fall holidays growing up in the Midwest. It’s pure, straightforward love baked into a single dish, meant for sharing with those you care about most.
- Why This Easy Apple Cobbler Recipe is a Family Favorite
- Gathering Ingredients for Your Homemade Apple Cobbler
- Step-by-Step Instructions for the Best Apple Cobbler
- Tips for Perfecting Your Apple Cobbler
- Serving Suggestions for Warm Apple Dessert
- Storage and Reheating Your Apple Cobbler
- Frequently Asked Questions About Apple Cobbler Recipe
- Nutritional Estimates for This Apple Cobbler
- Share Your Apple Cobbler Experience
Why This Easy Apple Cobbler Recipe is a Family Favorite
We turn to this Easy Apple Cobbler over and over again because it hits all the right notes for true Comfort Food Desserts. It comes together so quickly—you can have it ready for the oven in under 20 minutes! The real magic, though, is the contrast. You get cozy, tender fruit sitting right underneath that glorious, golden crust. It’s a study in textures, and it’s simply irresistible when it comes right out of the oven.
If you love quick weeknight bakes that taste like they took all day, stick with this recipe. You can even see how it compares to my Apple Pie Dump Cake recipe, another winner for easy holiday baking!
Tender Cinnamon Spiced Apples
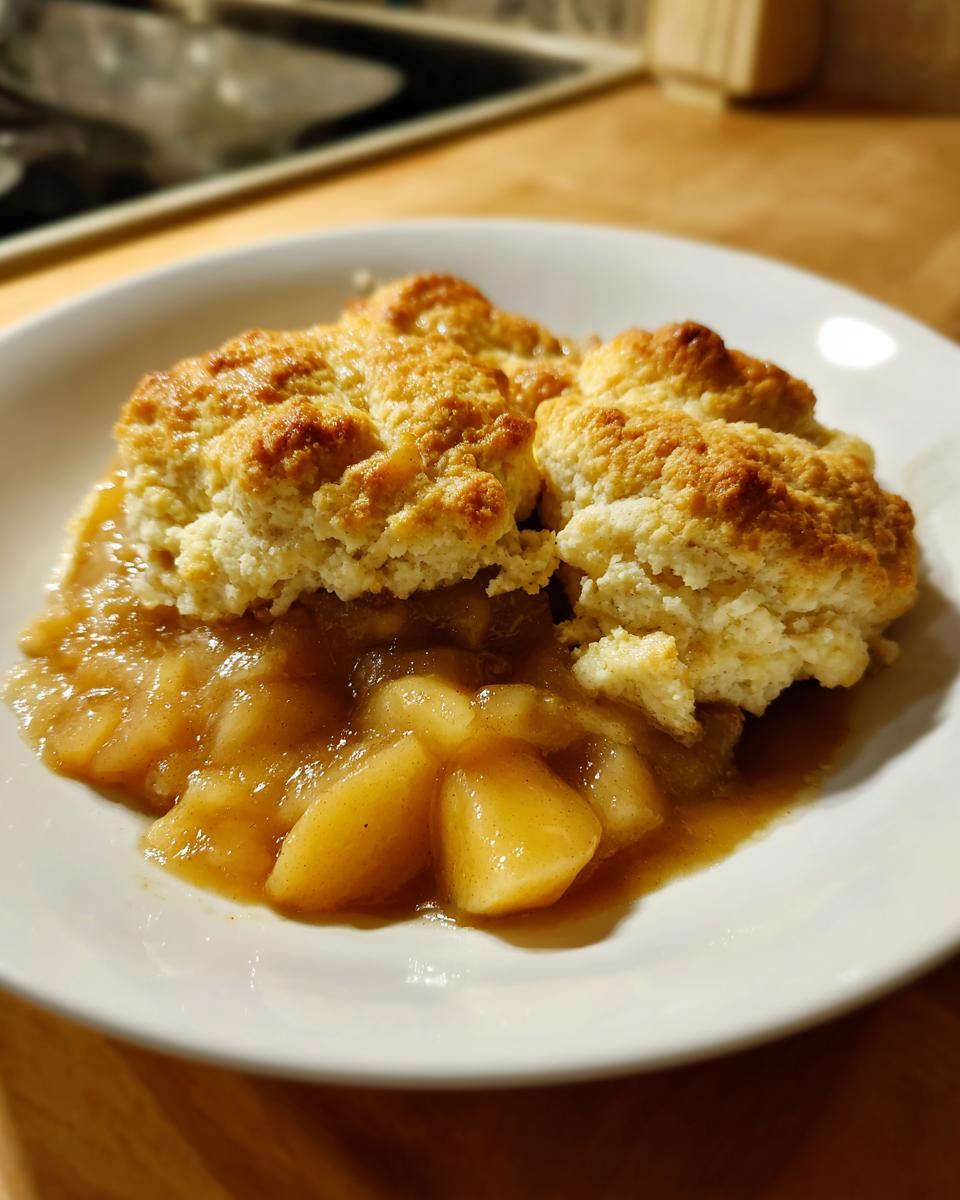
I always insist on using a mix of tart and sweet apples here, usually Granny Smith for that necessary structure, maybe paired with a Honeycrisp for a touch more sweetness. We don’t just use cinnamon, either; a tiny pinch of nutmeg goes into the mix, and it just wakes up that sweet-and-tart profile perfectly. These cinnamon-spiced apples get wonderfully soft but they never turn to mush. That’s the key to a great fruit filling!
The Golden Buttery Cobbler Topping
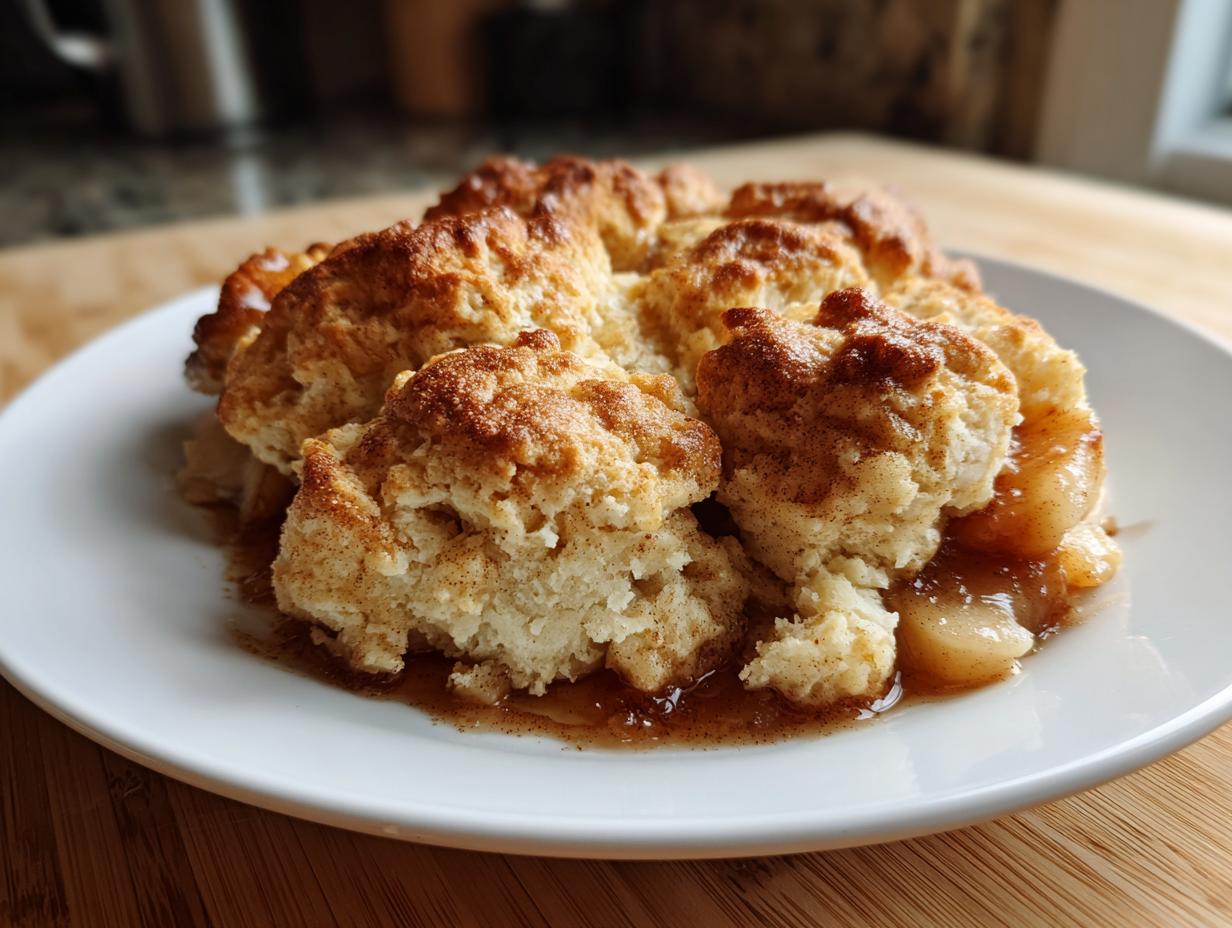
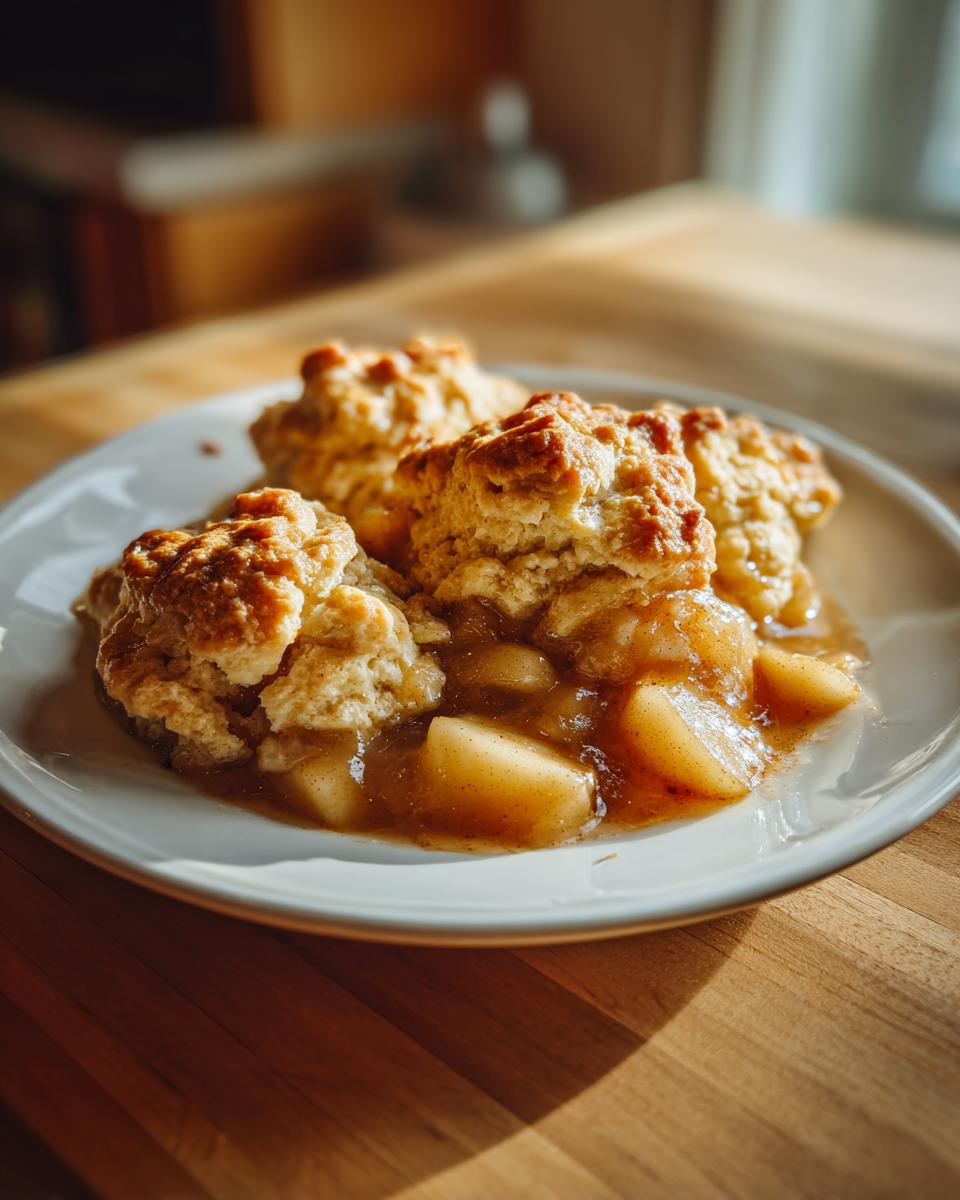
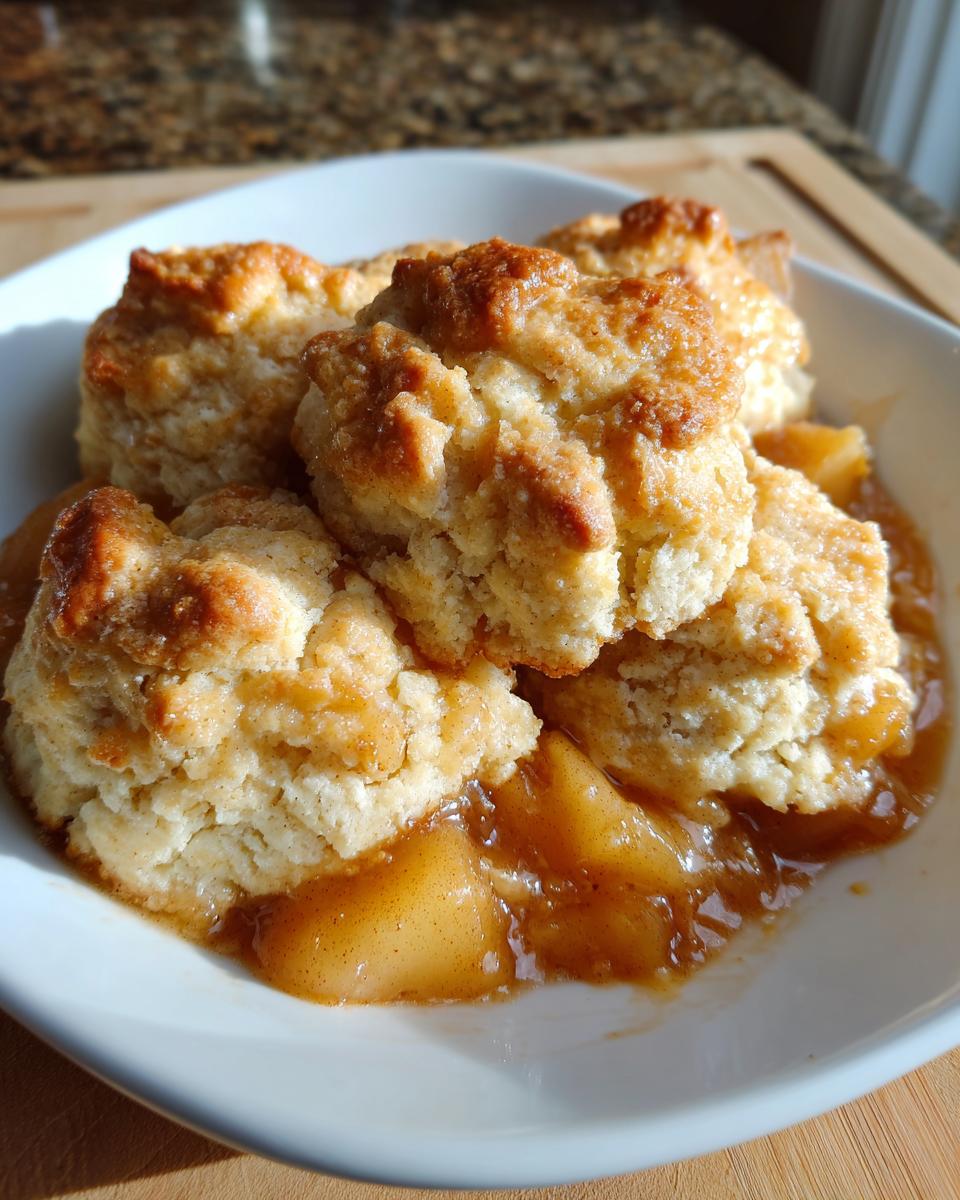
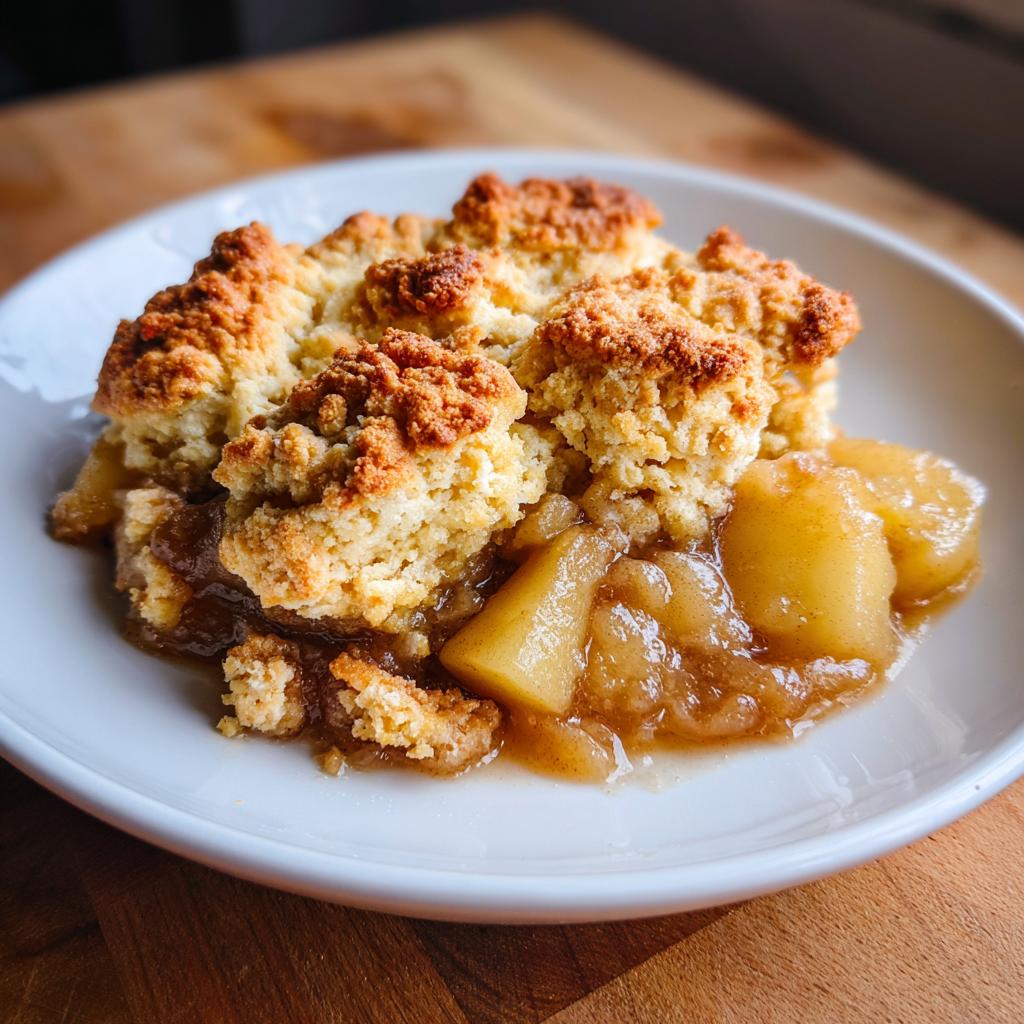
Oh, the topping! This isn’t a crispy streusel, and it’s not quite a pie crust—it’s right in the sweet spot, almost like a soft, rich biscuit cookie sitting on top of the hot fruit. Because we use chilled butter cut into the flour, that Buttery Cobbler Topping puffs up beautifully golden brown in the oven. When you pull that dish out and it’s bubbling around the edges? That’s the moment you know you’ve made something truly special.
Gathering Ingredients for Your Homemade Apple Cobbler
See? I told you this was going to be easy! Making a phenomenal Homemade Apple Cobbler doesn’t require a trip to any specialty stores. Everything here is what I keep stocked in my pantry and fridge for when those sudden autumn baking cravings hit. We’ll tackle the fruit first, then move on to that wonderful biscuit top. If you’re looking for other simple pantry recipes, you must check out my Cinnamon Rolls—they are life-changing!
For the Cinnamon Spiced Apples Filling
- 6 large apples (like Granny Smith or Honeycrisp), peeled, cored, and sliced
- 1/2 cup granulated sugar
- 1/4 cup packed light brown sugar
- 1 tablespoon all-purpose flour
- 1 teaspoon ground cinnamon
- 1/4 teaspoon ground nutmeg
- 1 tablespoon lemon juice
- 1/4 cup cold unsalted butter, cut into small pieces (for the filling)
For the Buttery Cobbler Topping
Remember, the butter must be cold—that’s non-negotiable for that flaky texture!
- 1 1/2 cups all-purpose flour
- 2 tablespoons granulated sugar
- 1 tablespoon baking powder
- 1/2 teaspoon salt
- 1/2 cup cold unsalted butter, cut into small pieces (for the topping)
- 1/2 cup buttermilk
- 1 large egg, beaten (for egg wash)
- 1 teaspoon coarse sugar (for sprinkling)
Step-by-Step Instructions for the Best Apple Cobbler
Alright, let’s get baking! Following these simple steps is how you guarantee you get the absolute Best Apple Cobbler every single time. My goal, as always, when teaching a recipe is for you to feel confident, even if you’re just starting out. We’re making something rustic and delicious here, so don’t worry about perfection, just follow the rhythm of the mixing. It’s just as essential to get the rhythm right here as it is when making my fluffy old-fashioned pancakes!
Preparing the Apples and Dish
First things first: get your oven warming up to 375 degrees Fahrenheit. You’ll want to lightly grease a nice 9×13 inch baking dish before you do anything else. Now, take those beautiful sliced apples we prepped and toss them really well in that bowl with the sugars, flour, spices, and lemon juice until they look glistening. Pour all of that into the prepared baking dish, spreading it out evenly. To help those apples get super tender and rich, take that 1/4 cup of cold butter pieces and just dot them randomly right over the top of the apple layer.
Mixing the Buttery Cobbler Topping
Switch over to a separate bowl for the topping. Give the flour, the remaining sugar, baking powder, and salt a good whisk to make sure everything is totally combined. This is where the magic happens: take your cold butter pieces and use a pastry blender—or honestly, just your clean fingertips work great—to cut that butter right into the dry mix. You’re looking for coarse crumbs, maybe some bits the size of small peas. Do not overwork it trying to make it smooth!
Once it looks crumbly, quickly stir in the buttermilk. I mean quickly. Mix it just until you don’t see streaks of dry flour anymore. Overmixing gives you tough tops, and we want tender biscuits!
Assembling and Baking Your Apple Cobbler
Take big spoonfuls of that delicious topping and drop them right over the apples. You don’t have to cover every inch; those little gaps let the baked apples bubble up, and I love seeing that steam! Lightly brush the tops of those mounds with your beaten egg wash—this is what helps them turn that lovely golden color. Then, sprinkle on that last bit of coarse sugar for a little sparkle and crunch. Bake it for about 40 to 45 minutes. You’ll know it’s done when the topping is beautifully golden brown and you can see the apple filling bubbling happily underneath. If you want to check the linked recipe for visual cues, you can look at one from another wonderful home baker.
Remember to let it rest for about 15 minutes when it comes out of the oven. That bubbling fruit needs a minute to settle down!
Tips for Perfecting Your Apple Cobbler
Even with a Quick and Delicious Cobbler recipe like this, a couple of extra pointers can take it from great to absolutely restaurant-worthy. I’ve learned these little tricks over the years, often by making mistakes myself! Don’t let the simplicity fool you; sometimes the smallest details make the biggest difference in your final dessert.
Choosing and Preparing the Right Apples
When it comes to apples, texture is everything. Truly, you want an apple that holds up to heat. I almost always go for Granny Smith because that tartness cuts through the sugar beautifully. If your apples are too soft to begin with, they’ll turn to applesauce when baked, and we want pieces you can feel in every bite. Use firm apples, and make sure you slice them relatively evenly so they all cook at the same pace.
Buttermilk Substitution for the Cobbler Topping
I know not everyone keeps buttermilk stocked, even though I think it adds the best subtle tang to the topping. If you run out, don’t panic and don’t skip the acid! Take your regular milk—whole milk is best here—and stir in half a teaspoon of white vinegar or lemon juice per half cup of milk. Just give it a quick stir and let it sit on the counter for about five minutes. It will curdle just slightly, and honestly, it works perfectly for that biscuit topping. For another great side dish idea using simple kitchen staples, you might want to look at my recipe for Honey Butter Skillet Corn!
Serving Suggestions for Warm Apple Dessert
When that glorious dish comes out of the oven, it’s practically glowing! This Warm Apple Dessert demands to be served when it’s still bubbling and hot. Honestly, the only acceptable way to serve proper cobbler is with a generous scoop of vanilla bean ice cream melting right on top. That cold creaminess hitting that hot, spiced fruit and buttery crust? It’s just dreamy. If you’re feeling extra fancy, a drizzle of caramel sauce works wonders, too. I love seeing how folks customize theirs; some even skip the ice cream and add whipped cream. For a perfect pairing on a chilly evening, try sipping on my recipe for Rich and Creamy Hot Chocolate alongside it.
If you are taking this to a gathering, make sure to point out the texture contrast mentioned in this great article on texture, because people always comment on how wonderful the topping is!
Storage and Reheating Your Apple Cobbler
Now, the hardest part of making this dessert is usually having leftovers because everyone tends to devour it right away! But what if you need to make it the day before a big potluck? Don’t worry, sweet bake holds up beautifully. This cobbler tastes best the day it’s made, of course, when that topping is crispest, but it certainly keeps well.
You can store any leftovers right on the counter, covered loosely with foil or plastic wrap, for about a day, provided your kitchen isn’t too warm. After that, tuck it safely into the refrigerator for up to three or four days. Just make sure it’s in an airtight container so it doesn’t absorb any funny fridge smells!
When it’s time to enjoy the leftovers, you have a couple of choices for reheating. If you want to bring back some of that glorious crispness to the biscuit topping, use a low oven—maybe 300 degrees Fahrenheit—for about 10 to 15 minutes. You just want it warmed through, not baked again! Now, if you are desperate for a quick bite, the microwave works too. Just be warned: the topping will get soft, but the apples underneath will still be heavenly warm, especially with a dribble of cream.
Frequently Asked Questions About Apple Cobbler Recipe
When I first started teaching this recipe, I got tons of questions, and I bet you have a few too! Everyone wants to make sure their batch of this wonderful dessert turns out just right. Here are the most common things folks ask me about making this Apple Cobbler Recipe.
Can I make this apple cobbler ahead of time?
You certainly can assemble it ahead of time, which is a lifesaver when company is coming! You can put the apples in the dish and cover it tight with plastic wrap, keeping it in the fridge for up to 24 hours. Keep the topping ingredients measured out separately, though. You don’t want to drop the biscuit topping on until you are ready to bake, or the baking powder can lose its strength, and no one wants a flat top on their cobbler!
What is the difference between apple cobbler and apple crisp?
It all comes down to the topping, dear cook! An apple crisp usually has an oat-based crumble on top—it’s crunchy and crumbly. Our dessert here is a true cobbler because the topping is dropped on in spoonfuls and bakes up into something soft, buttery, and biscuit-like. I have a great Pumpkin Pecan Cobbler recipe if you ever decide to try a different style of topping!
How do I ensure the topping cooks through on my apple cobbler?
The key, as I always say, is making sure those apples are bubbling vigorously when you pull it out. If the apples are hot and steaming, the heat is transferring up to the dough! If the topping seems golden but you are worried about the very center, just gently place a skewer right into the thickest part of one of those biscuit mounds. If it comes out clean, you are good to go. But honestly, if the edges are beautifully brown and the filling is splashing, it’s ready!
Nutritional Estimates for This Apple Cobbler
Now, I know many of you watch what you eat, and that’s perfectly reasonable! While I always tell folks to enjoy these moments of comfort food fully, it helps to have a general idea of what’s in that slice of heaven. Please remember that because we are using fresh apples, butter, and buttermilk, these numbers are just my best estimate based on the ingredients listed. If you swap out Granny Smiths for Honeycrisps, or if you use regular milk instead of buttermilk, those totals will shift a bit!
Here is a general breakdown per serving, based on the recipe yielding 8 slices:
- Serving Size: 1 serving
- Calories: 380
- Fat: 18g (with 11g of that being saturated fat—that wonderful butter!)
- Carbohydrates: 55g
- Sugar: 35g
- Protein: 5g
- Sodium: 250mg
It’s definitely a treat, but when you consider how much love—and how many beautiful, fresh apples—went into it, every calorie is earned. Enjoy it warm!
Share Your Apple Cobbler Experience
That’s it, my friends! We’ve come to the end of the recipe for this beautiful, comforting fruit bake. I truly hope that when you pull that golden dish out of the oven, the smell reminds you of cozy moments and happy gatherings. That’s what cooking is all about to me—creating small moments of joy around the table.
I truly want to know how this turned out for you! As you know, this community here at Cooking by Carla is built on sharing what works in real kitchens. If you tried this recipe, please come back and leave a rating down below. Five stars, three stars—I want to hear about it! Let me know if you used Granny Smiths or Honeycrisps, or if you tried adding pecans to your topping.
And if you managed to snap a picture before you all devoured it (which I know is the hardest part!), please share it on social media and tag me! I love seeing your creations. In the meantime, you can always read a little more about my philosophy on simple home cooking right here. Happy baking, and may your apples always be perfectly spiced. Don’t forget to check out the simple steps in this guide if you need an extra visual reference!
PrintEasy, Classic Cinnamon Apple Cobbler with a Buttery Biscuit Topping

Make this easy apple cobbler for a warm, comforting dessert. It features tender, cinnamon-spiced apples topped with a golden, buttery biscuit crust, perfect for serving with vanilla ice cream.
- Prep Time: 20 min
- Cook Time: 45 min
- Total Time: 65 min
- Yield: 8 servings 1x
- Category: Dessert
- Method: Baking
- Cuisine: American
- Diet: Vegetarian
Ingredients
- 6 large apples (like Granny Smith or Honeycrisp), peeled, cored, and sliced
- 1/2 cup granulated sugar
- 1/4 cup packed light brown sugar
- 1 tablespoon all-purpose flour
- 1 teaspoon ground cinnamon
- 1/4 teaspoon ground nutmeg
- 1 tablespoon lemon juice
- 1/4 cup cold unsalted butter, cut into small pieces (for the filling)
- 1 1/2 cups all-purpose flour (for the topping)
- 2 tablespoons granulated sugar (for the topping)
- 1 tablespoon baking powder
- 1/2 teaspoon salt
- 1/2 cup cold unsalted butter, cut into small pieces (for the topping)
- 1/2 cup buttermilk
- 1 large egg, beaten (for egg wash)
- 1 teaspoon coarse sugar (for sprinkling)
Instructions
- Preheat your oven to 375 degrees Fahrenheit. Lightly grease a 9×13 inch baking dish.
- In a large bowl, combine the sliced apples, granulated sugar, brown sugar, flour, cinnamon, nutmeg, and lemon juice. Toss gently until the apples are evenly coated.
- Pour the apple mixture into the prepared baking dish and spread it into an even layer. Dot the top of the apples with the 1/4 cup of cold butter pieces.
- Prepare the topping: In a separate medium bowl, whisk together the 1 1/2 cups flour, 2 tablespoons sugar, baking powder, and salt.
- Cut in the 1/2 cup of cold butter using a pastry blender or your fingertips until the mixture resembles coarse crumbs.
- Stir in the buttermilk until just combined. Do not overmix the dough.
- Drop spoonfuls of the biscuit topping evenly over the apple mixture in the baking dish. It does not need to cover the entire surface; gaps are fine.
- Brush the tops of the biscuit mounds lightly with the beaten egg wash and sprinkle with coarse sugar.
- Bake for 40 to 45 minutes, or until the topping is golden brown and the apple filling is bubbly.
- Let the apple cobbler cool for at least 15 minutes before serving warm with vanilla ice cream.
Notes
- For the best texture, use firm, slightly tart apples like Granny Smith.
- If you do not have buttermilk, mix 1/2 cup of regular milk with 1/2 teaspoon of white vinegar or lemon juice and let it sit for 5 minutes before using.
- This dessert is excellent for feeding a crowd during Fall baking or holiday gatherings.
Nutrition
- Serving Size: 1 serving
- Calories: 380
- Sugar: 35
- Sodium: 250
- Fat: 18
- Saturated Fat: 11
- Unsaturated Fat: 7
- Trans Fat: 0
- Carbohydrates: 55
- Fiber: 3
- Protein: 5
- Cholesterol: 55