
Oh, that smell! If you ask me what the true aroma of home is, it’s the scent of apples simmering with cinnamon, baking away under a golden, buttery crust. That’s the magic we’re capturing today, friends. I know you’re looking for something dependable, something that just tastes like comfort on a chilly evening, and I promise you’ve found it. This is my Ultimate Easy Old-Fashioned Apple Crisp. It’s straightforward, it’s not fussy, and it’s built on the simple, tested techniques that I brought from my own Midwest kitchen right here to Cooking by Carla. To learn more about where these reliable methods come from, you can always check out my About page. Trust me, this apple crisp will become part of your best memories for years to come.
- Why This Old Fashioned Apple Crisp Recipe is Your New Favorite
- Gathering Ingredients for Your Apple Crisp
- Step-by-Step Instructions for the Best Apple Crisp
- Tips for the Perfect Buttery Oat Topping on Your Apple Crisp
- Serving Suggestions for this Easy Apple Crisp Recipe
- Storing and Reheating Your Homemade Apple Crisp
- Frequently Asked Questions About Apple Crisp
- Nutritional Estimates for This Classic Dessert Recipes
- Share Your Apple Crisp Experience
Why This Old Fashioned Apple Crisp Recipe is Your New Favorite
I know you’ve seen a million apple crisp recipes out there, but this one, this is the one you keep coming back to. Why? Because it delivers that old-fashioned goodness without demanding hours in the kitchen. It’s my answer when I need a fantastic, warm dessert quickly. It’s true comfort food desserts, made simple for your table.
Here’s what makes this recipe stand out, even in a busy week:
- Super Easy Prep: Seriously, we’re talking maybe 15 minutes to get this into the oven. It’s a wonderful Quick Apple Dessert that feels homemade.
- Classic Flavor: We stick to the basics—tender, spiced apples that transport you right back to autumn at Grandma’s house.
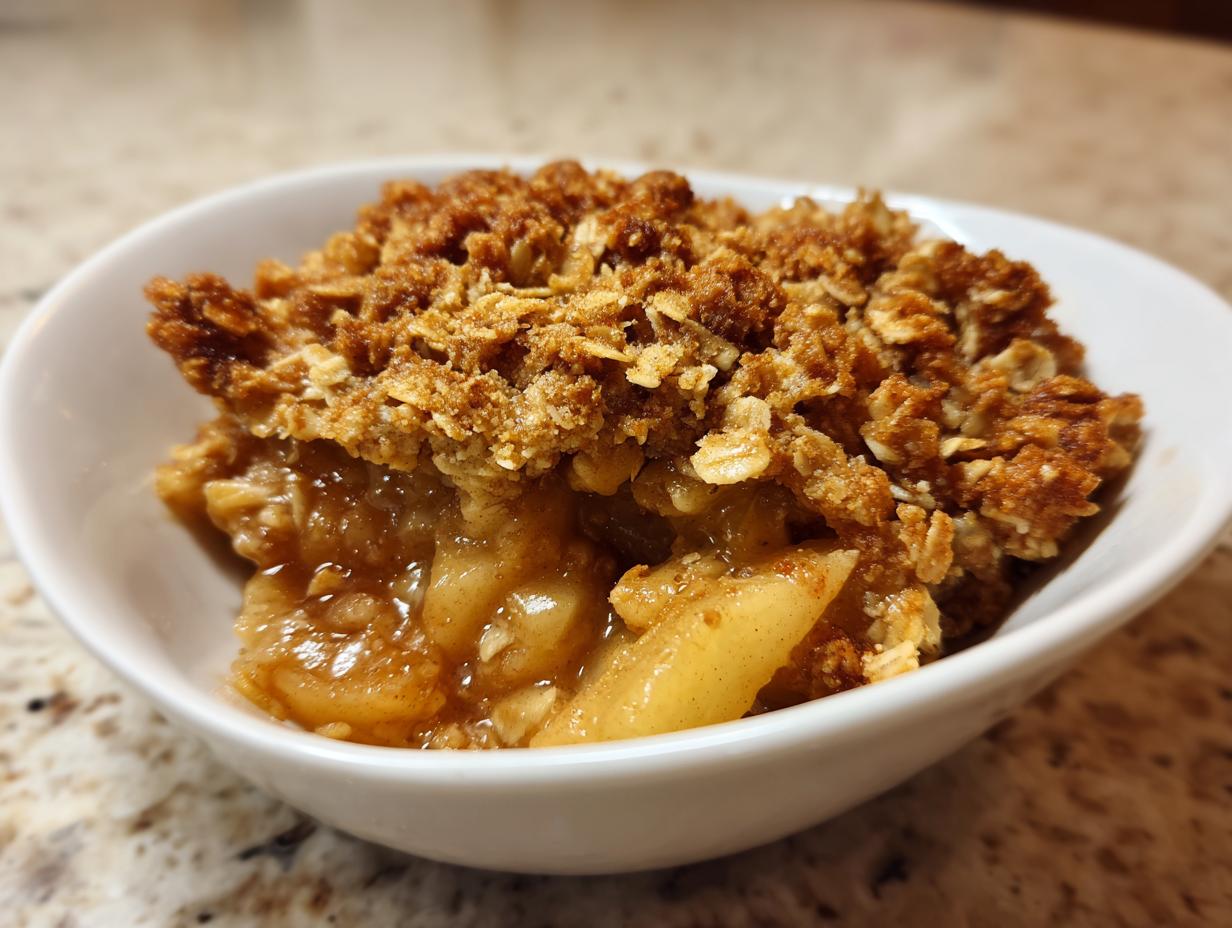
- The Buttery Oat Topping: This is the best part! It bakes up golden brown and perfectly crunchy every single time.
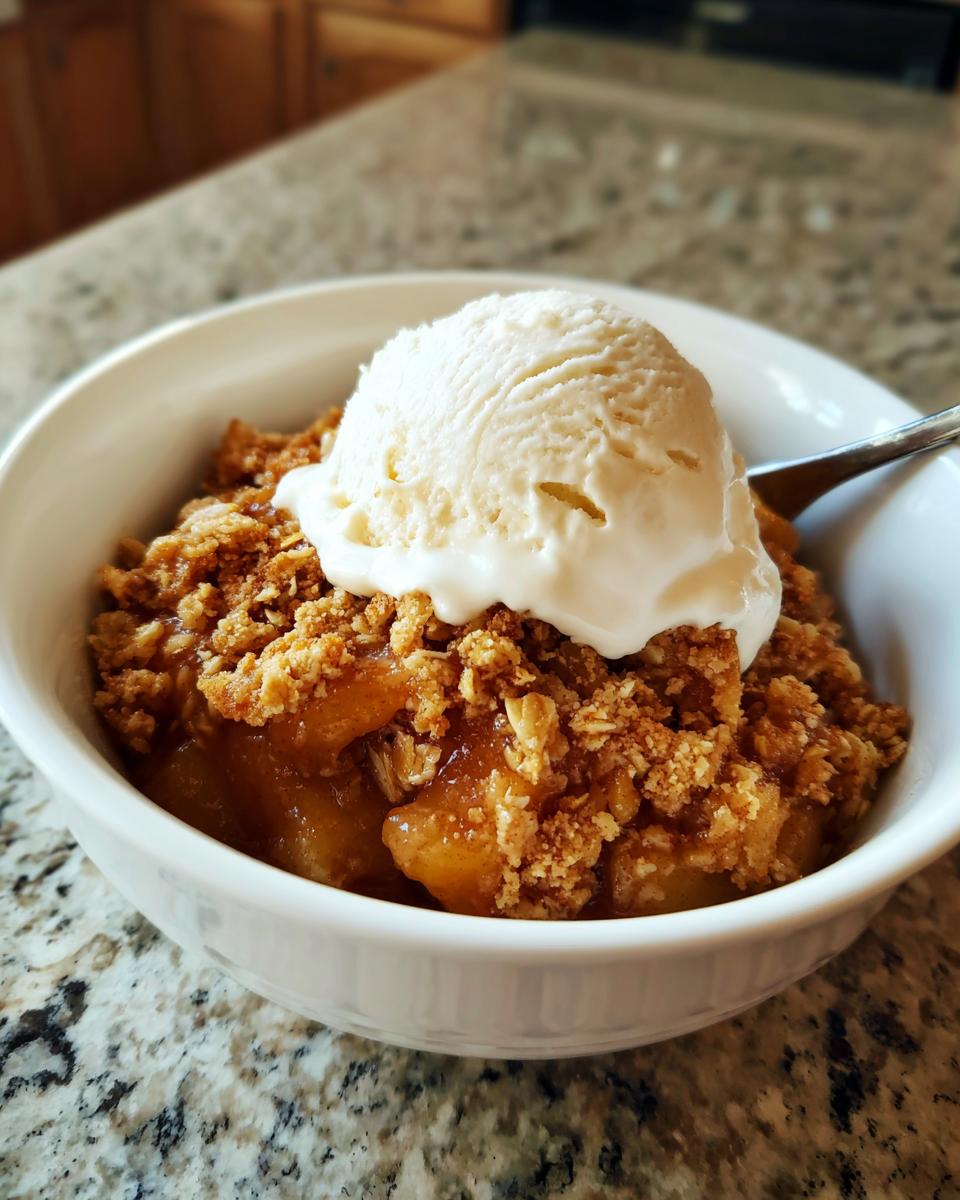
- Always Served Warm: There is absolutely no better way to enjoy this than warm, maybe right out of the oven, before it has a chance to cool down too much.
If you’re looking for more dependable, family-approved sweets, be sure to check out my collection dedicated to my best dessert recipes. They are all tested and true!
Gathering Ingredients for Your Apple Crisp
Now that we’ve established this is the easiest, most comforting recipe you’ll ever make, let’s talk about what you need. Don’t run to the store just yet! Most of these things are probably already tucked away in your pantry. The secret to keeping this an Easy Apple Dessert is using simple, quality ingredients. We break this down into two parts: what makes the apples tender and spiced, and what creates that incredible, crunchy blanket on top.
I always tell folks that for the best results, you must use firm apples. We’re talking Granny Smith, Honeycrisp, or something similar. If we use apples that get too soft, well, you’ll end up with apple sauce instead of a lovely, firm Juicy Apple Filling.
For the Juicy Apple Filling
This part is where the spice happens. Make sure your apples are sliced consistently, about a quarter-inch thick. Everything else just gets tossed right in with them.
- 6 large baking apples (Granny Smith or Honeycrisp are my picks!)
- 1/4 cup granulated sugar
- 1 tablespoon all-purpose flour (This helps thicken the juices!)
- 1 teaspoon ground cinnamon (Don’t skimp here!)
- 1/4 teaspoon ground nutmeg
- 1 tablespoon lemon juice
- 1/4 cup water
For the Buttery Oat Topping Recipe
This is the star, the reason we call it an Apple Crisp and not just baked apples! We absolutely need the butter to be cold here—that’s key to getting that lovely crumble texture instead of a flat paste. This is what makes our Buttery Oat Topping so reliable.
- 1 cup all-purpose flour
- 1 cup rolled oats (I use old-fashioned, never the quick kind!)
- 3/4 cup packed light brown sugar
- 1/2 teaspoon ground cinnamon
- 1/4 teaspoon salt
- 1/2 cup (1 stick!) cold unsalted butter, cut into small pieces
Step-by-Step Instructions for the Best Apple Crisp
Okay, let’s get baking! This Old Fashioned Apple Crisp comes together so fast, which is why I love relying on it when I need a delicious crowd-pleaser without a huge fuss. The key here is to work methodically but quickly, especially when putting that topping together. I always grab my 9-inch pie plate first, grease it up lightly, and get that oven warming up to 375 degrees F. That way, the fruit is ready to go into a hot environment right away. If you love easy baked fruit dishes, you simply must check out my recipe for apple pie dump cake—it’s another low-effort winner!
Preparing the Apple Filling and Dish
First things first: preheat your oven to 375 degrees F. Then, grab that glass baking dish—a 9-inch pie plate works beautifully—and make sure it’s greased well. Now for the apples! Put all your sliced apples into the biggest bowl you have. Toss them gently but thoroughly with the granulated sugar, the tablespoon of flour, cinnamon, nutmeg, lemon juice, and that little bit of water. We want every single apple slice coated in that spice mixture. Once they are evenly coated, pour them right into your prepared dish and spread them out nice and flat.
Creating the Crumble Topping Recipe
Time for the gorgeous, crunchy part! In a separate bowl, whisk together your dry topping ingredients: the flour, the oats, brown sugar, cinnamon, and salt. You have to trust me on having the butter cold here. Toss those little cold cubes into the dry mix. Now, use your fingertips or a pastry blender, and work that butter in. Stop when it looks like coarse crumbs mixed with little bits of butter, maybe pea-sized. If you rub it until it’s smooth like sand, you’ve gone too far! We want texture for that perfect Crumble Topping Recipe.
Baking and Resting Your Apple Crisp
Sprinkle that lovely oat mix evenly over the apples and pat it down slightly—but don’t smash it! Pop the whole thing into that preheated oven. It needs about 40 to 50 minutes. You’ll know it’s done when you see the apple filling bubbling up thick and hot around the edges, and the topping is beautifully golden brown. If you notice the top is getting dark too quickly, just cover it loosely with foil. This is one of my trusted checks for a good home bake! Once it comes out, please, please let it rest on a wire rack for at least 15 minutes. This little bit of patience helps the filling firm up so it doesn’t run everywhere.
Tips for the Perfect Buttery Oat Topping on Your Apple Crisp
Getting that topping right is why people ask for my recipe over and over again. It’s all about technique, really, and trusting the process even when it looks a little messy. When you’re cutting in that cold butter for your Buttery Oat Topping, remember we are aiming for texture that holds air, not a paste that melts immediately. That crisp, crumbly texture is what makes this a true Cinnamon Apple Crisp experience.
Also, I want to bring up the apples again because it matters so much for the overall success of this Warm Dessert. You need apples that are slightly tart and will hold their shape while baking underneath that heavier topping. If you use softer varieties, they turn to mush, and that lovely bubbly filling doesn’t look quite as good. So, stick to Granny Smith if you like a bit of tang, or Honeycrisp if you want something a touch sweeter but still sturdy!
Don’t be afraid to get your hands a little messy when mixing the topping! I find my fingers work better than any tool once the butter starts to soften slightly. These little nuggets of butter will melt during baking and create those pockets of delicious richness, giving you the very best topping texture. For more cozy spice ideas, sometimes I use this same topping mixture over baked fruit when I make my apple cinnamon French toast!
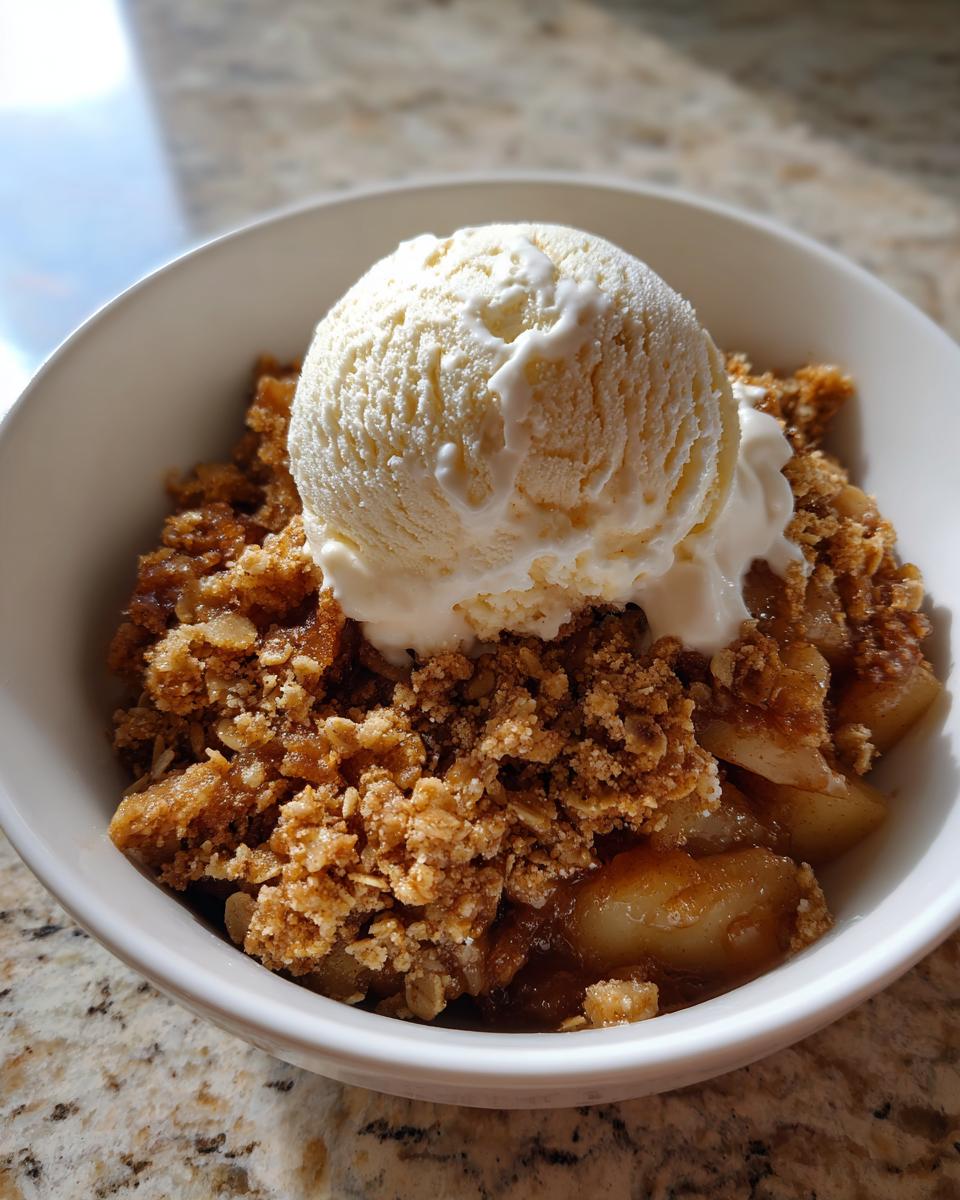
Serving Suggestions for this Easy Apple Crisp Recipe
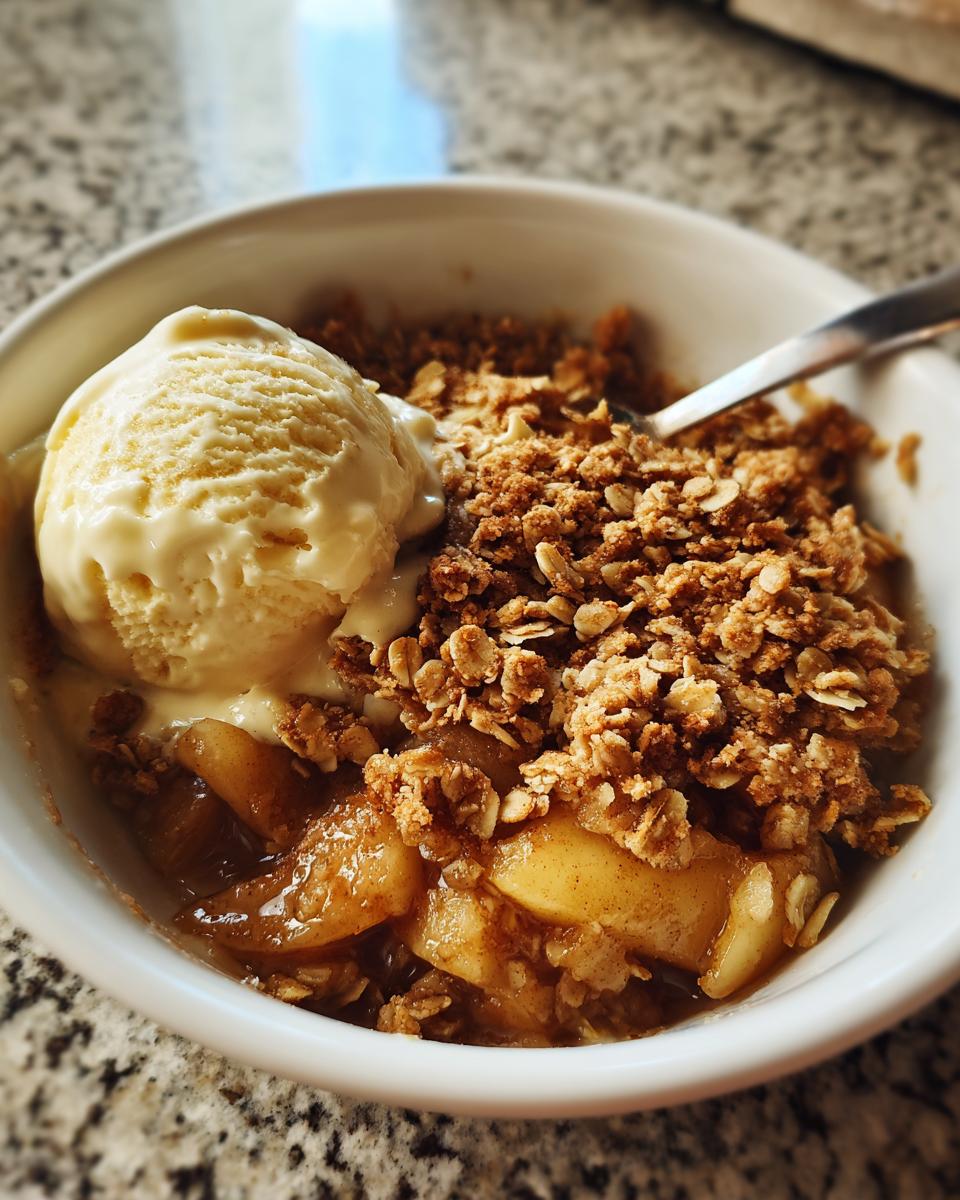
Oh, finally, the best part! This Easy Apple Crisp Recipe is definitely best served warm. I mean, you just can’t beat that aroma filling the house, right? While it’s absolutely delicious on its own, I have to admit that it achieves perfection when paired with something cold and creamy. My go-to, and really the only way my grandkids will eat it, is with a generous scoop of good vanilla ice cream on top. That contrast between the hot, spiced apples and the melting ice cream is just heaven.
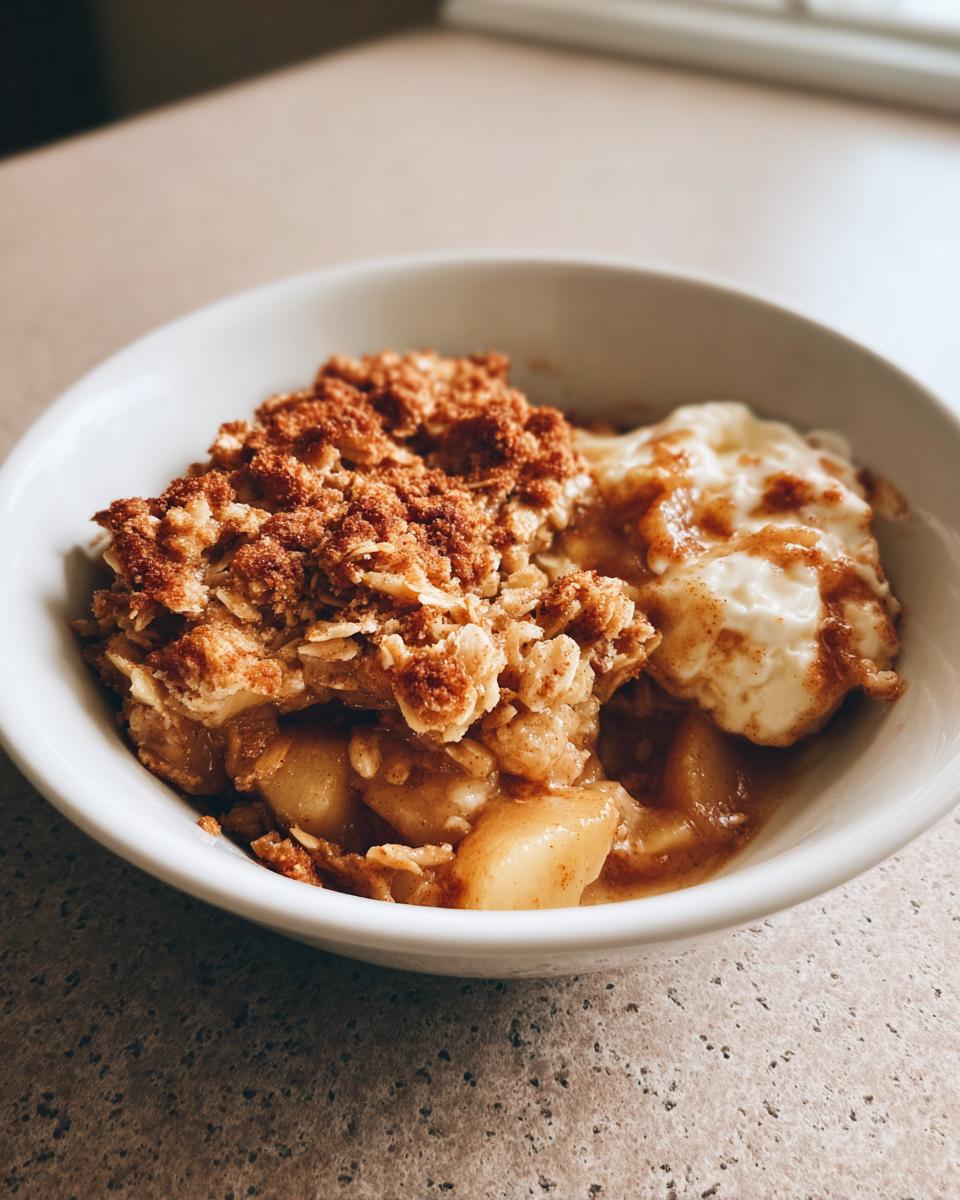
I often make this after our Sunday family dinner. It doesn’t need an elaborate sauce or any extra fuss. Just make sure you get that scoop right before you carry the plate to the table so it starts melting immediately. If you’re feeling extra fancy, a small drizzle of caramel sauce over the top of the Apple Crisp with Ice Cream makes it look like you spent all day on it, even though we know it was quick!
Storing and Reheating Your Homemade Apple Crisp
Now, what if you actually have leftovers? That’s rare in my house, but it happens! Store any remaining apple crisp covered tightly, either on the counter for a short time or in the fridge for up to three days. The topping will naturally soften a bit, and that’s just natural; it’s still going to taste wonderful.
When you’re ready for seconds, skip the microwave if you can. Microwaving makes that glorious oat topping go soggy fast. I highly recommend reheating individual servings in a toaster oven or the regular oven at about 325 degrees F until it’s piping hot again and the topping has crisped up a little. It brings it right back to tasting fresh-baked!
Frequently Asked Questions About Apple Crisp
It warms my heart when I get questions from fellow home cooks! It means you’re really thinking about the process, and that’s how you become a great baker. I’ve gathered a few of the questions I get asked most often about making this staple, easy apple dessert. If your question isn’t here, please send me a note through my contact page!
Can I use different apples in this apple crisp?
Yes, you absolutely can mix them up! But remember, the structure of the apple fills matters greatly. For the Best Apple Crisp, you need apples that are firm and have a nice bit of tartness to cut through the sweet brown sugar topping. A mix of Granny Smith (for the tang and structure) and a sweeter apple like Honeycrisp or Fuji (for flavor) is usually perfect. Avoid apples that break down too quickly, like McIntosh, unless you really prefer a very soft filling.
What is the difference between apple crisp and apple crumble?
That’s a common point of confusion! Generally speaking, the difference is just one ingredient: oats. An Apple Crisp Recipe Alternative recipe will typically use oats in the topping, which gives it that wonderfully textured crunch—that’s what we’re aiming for here! An Apple Crumble Recipe Alternative usually leaves the oats out and relies only on flour, sugar, and butter for the topping, resulting in something a bit softer and less chunky. Since ours has those lovely rolled oats mixed in, it stays firmly in the crisp category!
Can I make this apple crisp ahead of time?
You can certainly prep ahead, which is a lifesaver when you’re busy! I would recommend mixing up the topping and keeping it stored very cold in the fridge, maybe even covered with a little plastic wrap so it doesn’t dry out. Then, slice your apples and mix them with the spices just before you assemble everything. If you pre-assemble the entire dish, the flour in the topping will start absorbing moisture from the apples, making it dense instead of crisp. You want to assemble right before baking to make sure that topping is perfectly golden and delicious when you pull it out of the oven!
Nutritional Estimates for This Classic Dessert Recipes
Now, I know that for most of us, when we are baking something like this warm apple crisp, we aren’t really thinking about the numbers on a label. We are thinking about comfort, sharing, and that delightful cinnamon aroma—and that’s perfectly fine! Food should feed the soul first. However, since so many of you ask, I wanted to give you a basic idea of what you might see in a single serving of this wonderful dessert.
Please remember these are just estimates based on the ingredients list I provided. The type of apple you use, or whether you add a huge splash of caramel sauce on top, is going to change these figures slightly. These figures are just for guiding purposes, so you know what you’re working with in this delicious treat!
- Serving Size: 1 serving
- Calories: Around 380
- Fat: About 18 grams (Remember, a lot of that is the good buttery flavor from our crumble!)
- Sugar: Roughly 35 grams
- Carbohydrates: About 55 grams
- Protein: Around 5 grams
When you look at that, especially if you are serving this with a scoop of vanilla ice cream, it really shows you this is a wonderful, rich treat meant for special occasions, maybe an Autumn gathering or a fun Thanksgiving dessert idea. Enjoy the flavor, and don’t worry too much about the math!
Share Your Apple Crisp Experience
Well, we did it! We’ve baked up what I truly believe is the ultimate, cozy, homemade apple crisp. I sincerely hope the smell of that cinnamon and brown sugar filling your kitchen right now is transporting you to a comfy place. That’s the goal here at Cooking by Carla—making real food that creates real memories.
Now comes the part I always look forward to: hearing from you! Did you try it exactly as written? Maybe you added a pinch of cardamom to your Cinnamon Apple Crisp, or perhaps you chose Braeburn apples instead of Granny Smith? I absolutely love hearing about the little twists and turns you take in your own kitchens.
If this recipe made your dinner table a little warmer, please take a moment to leave a rating right below this section. A 5-star rating shows other home cooks, just like you, that this recipe is completely dependable and worth their time. Your feedback is what helps our community trust these old-fashioned methods!
Don’t be shy; tell me everything! You can always reach out directly through my contact page as well. Happy baking, dear friends. I’m already looking forward to seeing your wonderful results!
PrintThe Ultimate Easy Old-Fashioned Apple Crisp with Buttery Cinnamon Oat Topping

This recipe delivers the classic, comforting flavor of an old-fashioned apple crisp. You get tender, spiced apples beneath a perfectly buttery and crunchy oat topping. It is simple to make and tastes like home.
- Prep Time: 15 min
- Cook Time: 50 min
- Total Time: 65 min
- Yield: 6 servings 1x
- Category: Dessert
- Method: Baking
- Cuisine: American
- Diet: Vegetarian
Ingredients
- 6 large baking apples (like Granny Smith or Honeycrisp), peeled, cored, and sliced 1/4-inch thick
- 1/4 cup granulated sugar
- 1 tablespoon all-purpose flour
- 1 teaspoon ground cinnamon
- 1/4 teaspoon ground nutmeg
- 1 tablespoon lemon juice
- 1/4 cup water
- For the Topping:
- 1 cup all-purpose flour
- 1 cup rolled oats (old-fashioned)
- 3/4 cup packed light brown sugar
- 1/2 teaspoon ground cinnamon
- 1/4 teaspoon salt
- 1/2 cup (1 stick) cold unsalted butter, cut into small pieces
Instructions
- Preheat your oven to 375 degrees F. Lightly grease a 9-inch pie plate or an 8×8-inch baking dish.
- Prepare the apple filling: In a large bowl, combine the sliced apples, granulated sugar, 1 tablespoon flour, 1 teaspoon cinnamon, nutmeg, lemon juice, and water. Toss gently until the apples are evenly coated.
- Pour the apple mixture into your prepared baking dish and spread it into an even layer.
- Prepare the buttery oat topping: In a separate medium bowl, whisk together the 1 cup flour, rolled oats, brown sugar, 1/2 teaspoon cinnamon, and salt.
- Cut in the cold butter using a pastry blender or your fingertips until the mixture resembles coarse crumbs with some pea-sized pieces of butter remaining. Do not overmix.
- Sprinkle the oat topping evenly over the apple filling. Press it down lightly.
- Bake for 40 to 50 minutes, or until the topping is golden brown and crisp, and the apple filling is bubbling thickly around the edges.
- Let the apple crisp cool on a wire rack for at least 15 minutes before serving. This allows the filling to set slightly.
- Serve warm, often with a scoop of vanilla ice cream for the best experience.
Notes
- For the best texture, use firm apples that hold their shape during baking.
- If the topping begins to brown too quickly before the apples are tender, loosely cover the dish with aluminum foil for the last 10 to 15 minutes of baking.
- This dessert is excellent for Thanksgiving dessert ideas or any cozy autumn treat.
Nutrition
- Serving Size: 1 serving
- Calories: 380
- Sugar: 35g
- Sodium: 150mg
- Fat: 18g
- Saturated Fat: 11g
- Unsaturated Fat: 7g
- Trans Fat: 0.5g
- Carbohydrates: 55g
- Fiber: 5g
- Protein: 5g
- Cholesterol: 45mg