
Are you ready to create a little culinary magic right in your own kitchen? I know that rich, creamy classic crème brûlée seems like something reserved for fancy restaurants, but trust me, it absolutely isn’t! It’s one of those perfect desserts where simple, high-quality ingredients turn into something truly elegant. After thirty years of teaching, I’ve learned patience is everything—and with a little clarity in the steps, you’ll master that perfect, glassy snap on top. We are going to make this luxury dessert achievable, every single time.
- Why This Classic Creme Brulee Recipe Works for Home Cooks
- Gathering Ingredients for Your Creme Brulee
- Step-by-Step Instructions for the Ultimate Creme Brulee
- Chilling and Finishing Your Elegant French Dessert
- Troubleshooting Common Creme Brulee Issues
- Serving Suggestions for This Vanilla Custard Dessert
- Storing and Reheating Your Creme Brulee
- Frequently Asked Questions About Making Creme Brulee
- Estimated Nutrition for This Classic Creme Brulee
Why This Classic Creme Brulee Recipe Works for Home Cooks
When you try to make a creme brulee for the first time, I know you worry about two things: soups instead of custard and a burnt topping. But this method is designed to remove all that guesswork! My goal, just like when I was teaching third grade, is to give you the clearest instructions for a perfect result.
- It relies on tried-and-true ratios of that rich heavy cream and egg yolks, which helps everything set up beautifully.
- We use a gentle water bath—the *bain-marie*—which insulates the custard, preventing those dreaded hot spots that turn your silky smooth bake into scrambled eggs.
- The technique for caramelizing the sugar is incredibly quick, giving you that signature cold/hot contrast everyone loves.
Achieving the Perfect Vanilla Custard Dessert Texture
That fear of curdled eggs is real, but we conquer it with gentle heat. You’ll see in the steps that we never boil the cream; we just take it until it sighs near the edges. The real magic here is tempering—slowly introducing the hot cream mixture to your yolks while whisking like mad. This raises the temperature just enough so that when they finally meet the rest of the warm liquid, everything combines smoothly. Strain it afterward, and you’re guaranteed a luscious, smooth vanilla custard dessert.
The Secret to a Shattering Caramelized Sugar Topping
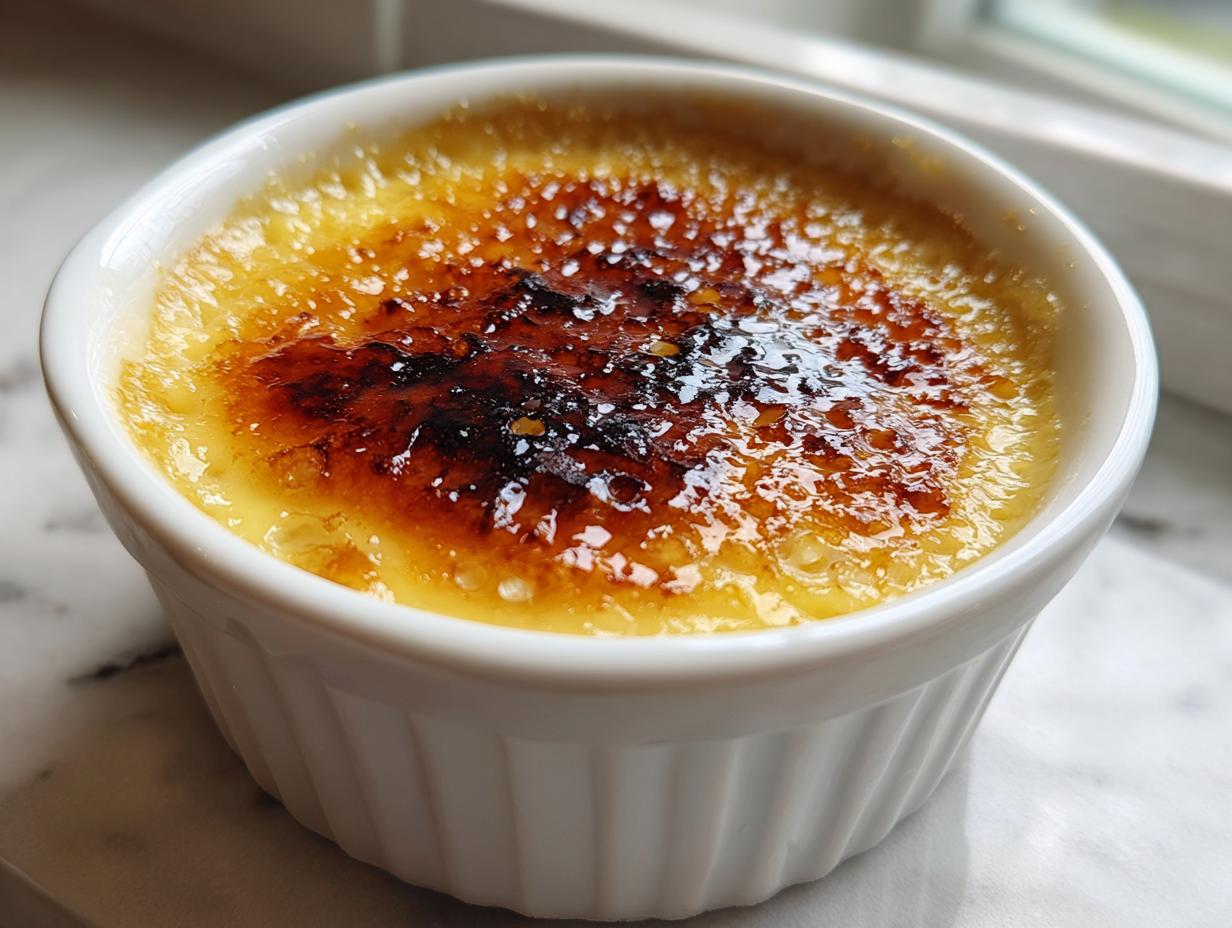
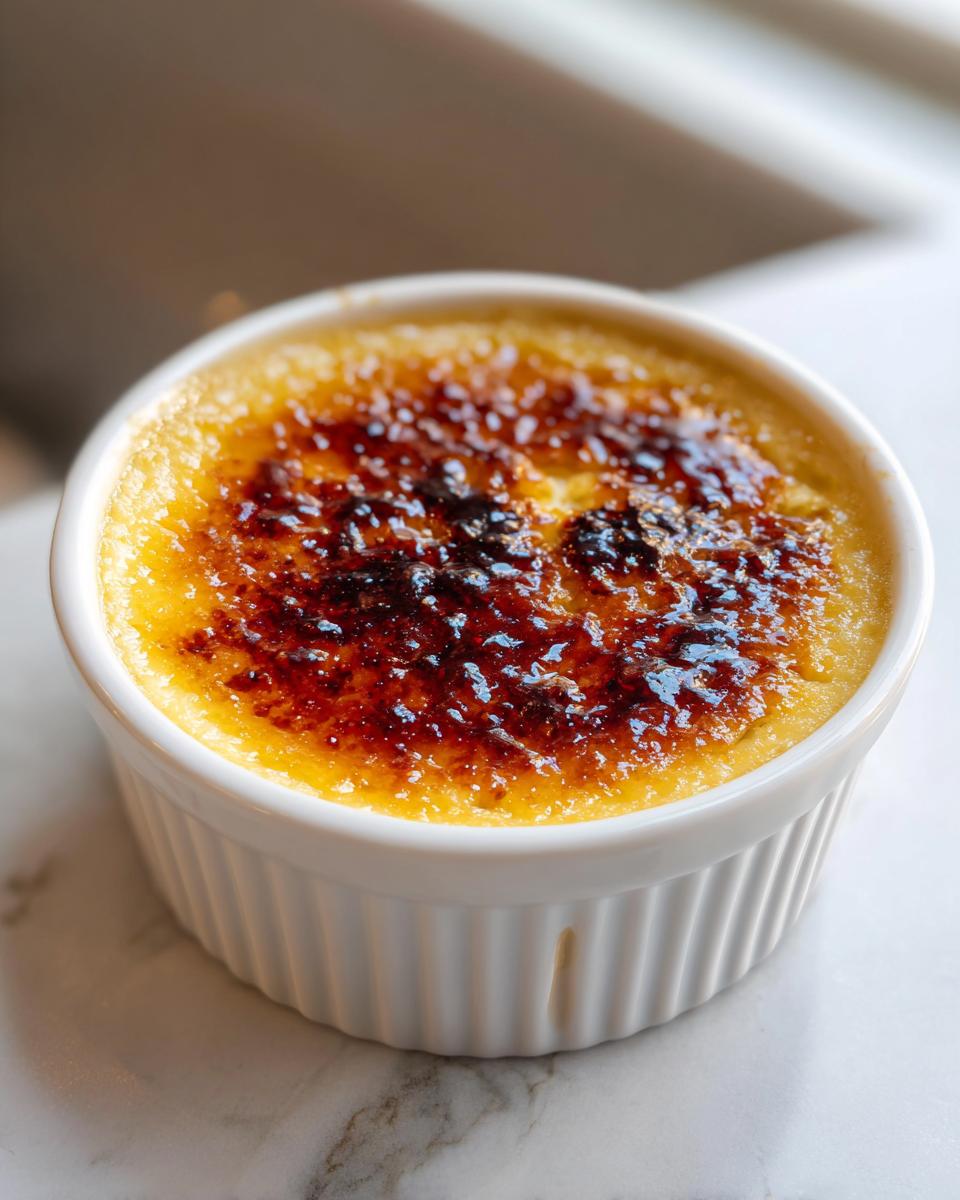
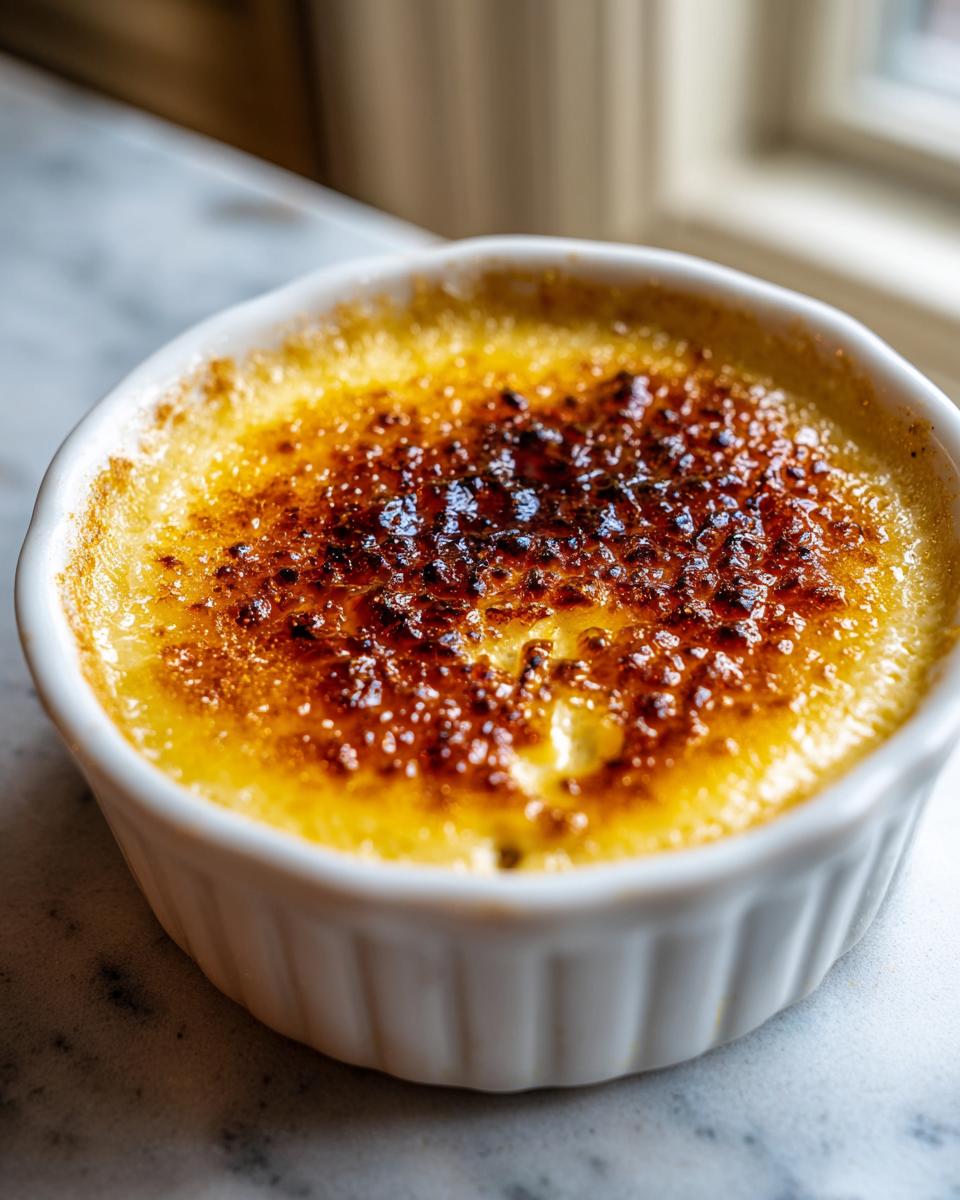
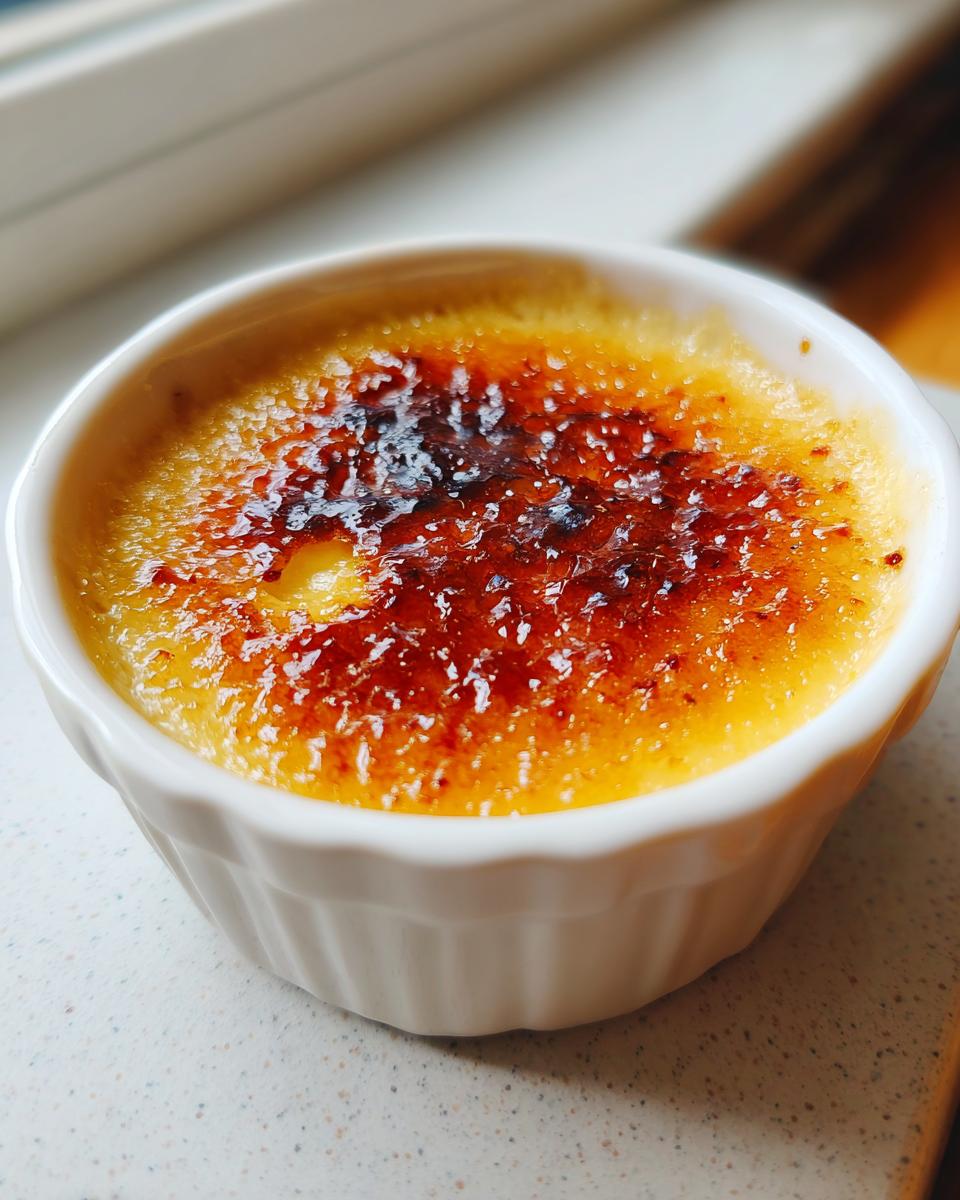
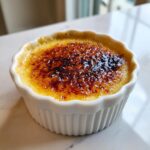
This is the grand finale, and you need speed! While you *can* use your broiler if you absolutely don’t have a torch (see my note in the recipe steps!), using a kitchen torch gives you total control. You sprinkle a thin, even layer of sugar on the completely chilled custard. Then, hold that flame about three inches away and move it constantly in small circles. You want a deep amber color, not black smoke! It sets up hard and brittle in about two minutes, ready for that wonderful *crack*.
Gathering Ingredients for Your Creme Brulee
Okay, let’s talk ingredients because for an elegant French dessert like this creme brulee, quality really matters. You only need a few things, which is the beauty of true classic French cooking! The richness comes almost entirely from your dairy, so please use good heavy cream—don’t try to skimp here, it won’t set right otherwise. And for flavor? Make sure you grab that pure vanilla extract. It makes such a huge difference in a simple vanilla custard dessert.
Ingredient Notes and Substitutions for Creme Brulee
When you shop, look for large egg yolks; this recipe depends on exactly five of them for the silky body. Remember, we are aiming for silk, so stick to the heavy cream mentioned in the list—no substitutions there, seriously! If you want to play around once you master the base, you could try switching up the extract. Some folks love swirling in just a tiny drop of almond extract with the vanilla, or even using a scraped vanilla bean pod if you’re feeling fancy. Just remember, the foundation has to be solid first!
Step-by-Step Instructions for the Ultimate Creme Brulee
Alright, deep breath! This is where we turn ingredients into magic. I promise, if you follow these steps exactly, your wonderful creme brulee will be perfect. It’s all about timing and gentle hands. Remember what I always say from my teaching days? The process matters far more than the recipe card itself sometimes! You can find out more about my cooking philosophy over on my About Page.
Preparing the Custard Base and Tempering Yolks
First things first, get that oven preheated to 300°F and set up your ramekins in that deep baking dish. Now, whisk your yolks and the main portion of sugar until they’re pale and smooth—but stop before they look overly bubbly! Next, we gently warm the cream until it just starts to simmer around the edges; never let it roll! This is mandatory for tempering: slowly, so slowly, drizzle about a third of that hot cream into your yolks while whisking nonstop. This stops the yolks from immediately scrambling, which would ruin that beautiful texture.
Once it’s tempered, pour that thinned-out yolk mixture back into the remaining warm cream in the saucepan, stir in your vanilla, and then—here’s my personal tip for ultimate silkiness—strain the whole thing through a fine-mesh sieve. That gets rid of any tiny bits that could make your custard grainy. That pure, liquid base is now ready for the oven!
Baking the Creme Brulee in a Water Bath
Divide that smooth custard carefully into your prepared ramekins. Now for the key to gentle cooking: the water bath. Carefully pour hot water into the surrounding pan so it comes about halfway up the sides of the little dishes. This water bath acts like a giant insulator. When you slide that pan into the oven, the water absorbs the heat gently, protecting the delicate egg proteins.
You’re baking for about 30 to 40 minutes. How do you know it’s done? Don’t rely on a timer alone! When you gently nudge the pan, the edges should look solid, but that center needs to retain a very slight, almost nervous jiggle. If it’s completely solid, you’ve baked it too long. Pull them out immediately onto a wire rack to start cooling down the custard base before they go into the fridge.
Chilling and Finishing Your Elegant French Dessert
We’ve come so far! We have this incredible, rich base for our creme brulee, but we can’t rush the reward. First, those ramekins need to come all the way down to room temperature on the counter. After that, they need a long, cold nap in the refrigerator—seriously, four hours minimum, but I always push mine overnight. The custard needs to be thoroughly chilled before we even think about caramelizing the sugar. That cold contrast is the joy of this dessert!
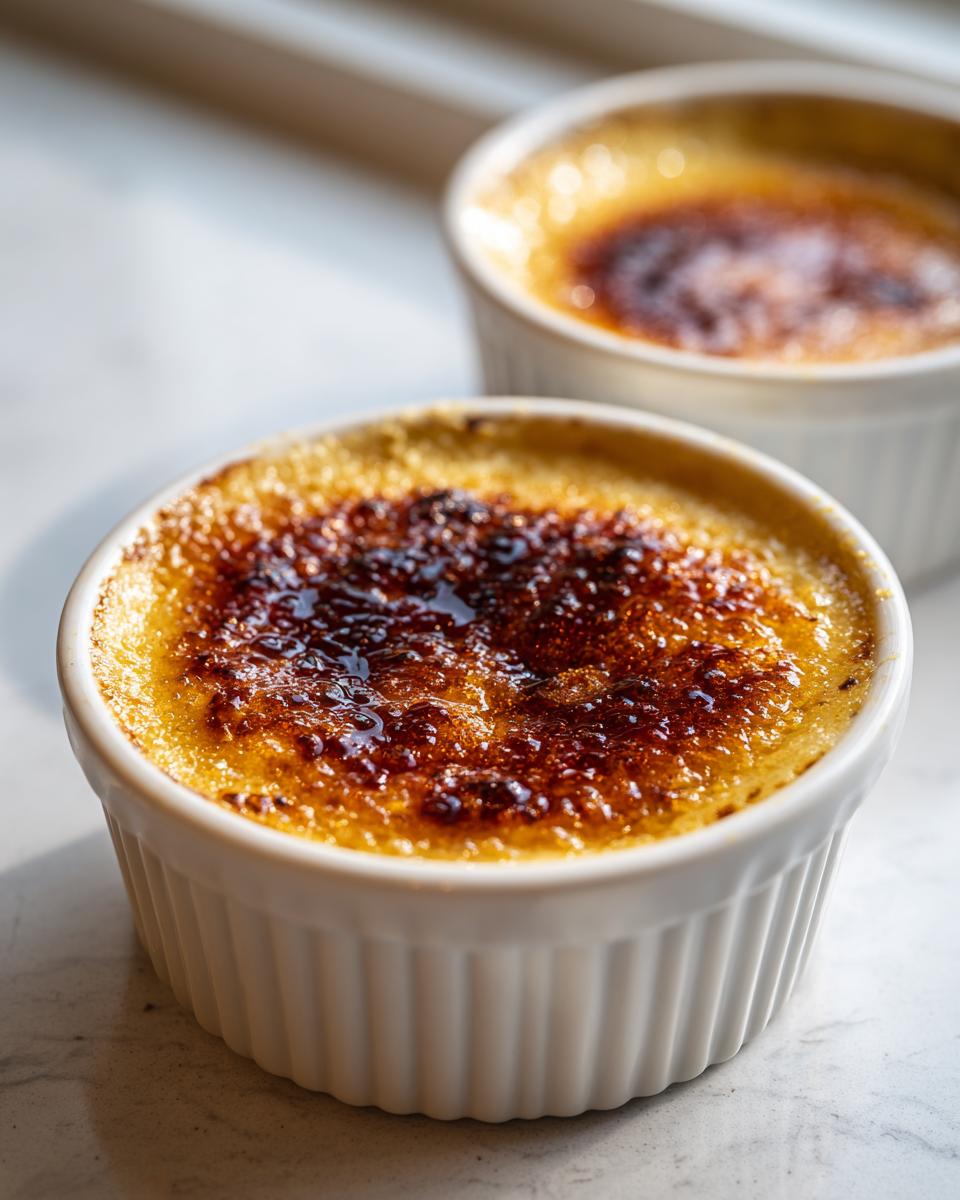
Once they are icy cold, take them out and sprinkle the remaining sugar evenly over the top. This is the moment you’ve been waiting for to create that signature crisp crust on your creme brulee! Do this right before you plan to serve them so the sugar doesn’t start sinking into the cold cream.
Tips for the Perfect Caramelized Sugar Topping
If you have a kitchen torch, this is your moment to shine! Hold the flame about three inches above the sugar and keep that torch moving in smooth, continuous circles. Don’t leave it in one spot, or that sugar will burn instantly and taste bitter, which ruins the whole beautiful creme brulee experience. You are looking for a deep, even, dark amber color across the entire surface—it happens so fast!
If you don’t have a torch, don’t panic! You can put the sugared ramekins under a very hot broiler. But you have to stay right there the entire time, watching like a hawk, because it can go from perfect to charcoal in about five seconds. Once that crust is set and brittle, let it cool for just a minute or two until it hardens completely, and then serve immediately so your guests get that wonderful *crack*!
Troubleshooting Common Creme Brulee Issues
Now, don’t you worry if your first attempt at this classic creme brulee doesn’t look exactly like the magazines. It happens to everyone! As a teacher, I know the value of troubleshooting. If your custard ended up grainy or scrambled, sadly, that milk got too hot too fast, or you skipped that crucial tempering step. Next time, whisk slower and watch the cream carefully!
Did your custard refuse to set? That usually means one of two things: you either didn’t use enough egg yolks, or you pulled it out of the oven too soon. Remember that slight jiggle we talked about? It needs that little bit of wobble to set up firmly once it cools. If your caramelized sugar topping ended up bitter or burnt, it means your torch was too close or you stopped moving! Keep that flame dancing over the sugar until it’s a beautiful dark amber, not black.
Serving Suggestions for This Vanilla Custard Dessert
When you impress someone with this beautifully rich vanilla custard dessert, you want the presentation to be just as lovely. Since the texture is already so silky smooth, I tend to keep things super simple on the side. A scattering of fresh raspberries or bright blueberries cuts through the richness wonderfully, don’t you think?
I also love tucking just one perfect little mint sprig right onto the side of the ramekin—instant elegance! You don’t need anything heavy here; let that warm, sugary top and cold, creamy base be the star of the show. It looks like something from an expensive pâtisserie.
Storing and Reheating Your Creme Brulee
Here is the absolutely vital requirement for this elegant French dessert: you must keep the custard and the sugar topping totally separate! Store your plain, chilled creme brulee custard covered tightly in the fridge for up to four days; it holds up beautifully. Do not torch it until the very moment you are ready to eat it.
If you torch it too early, that glorious, hard sugar crust will melt right back into the cold custard, leaving you with disappointing sweet soup instead of that classic crack. So, chill, then sprinkle, then torch right before serving your perfect creme brulee batch!
Frequently Asked Questions About Making Creme Brulee
I totally get it; sometimes you just need that quick answer so you can get back to baking this gorgeous vanilla custard dessert! As a former teacher, I love laying out the answers real clearly for you. If you’ve got burning questions left, check out the answers below!
Can I make the custard ahead of time?
Yes, and you absolutely should! I recommend making the custard base and chilling it for at least four hours, or even overnight. Just make sure the ramekins are covered well with plastic wrap—but remember the golden rule: do. not. torch. the. sugar. until you are ready to serve it, or you’ll lose that satisfying brittle topping.
My custard didn’t set firm, what happened with my classic creme brulee?
When the custard doesn’t set, nine times out of ten, the heat either went too high or too fast. Did you skip the gentle tempering? Did you use low-fat milk instead of heavy cream? For a proper set, you need that rich fat content! Check your oven thermometer too; sometimes ovens lie, and if it was too hot, the eggs scramble instead of setting gently.
Is there a way to get that caramelized sugar topping without a kitchen torch?
Oh, yes! It’s not my first choice because the broiler can be aggressive, but it works in a pinch! You sprinkle the sugar evenly on the chilled custard. Then, place them on the top rack under a preheated broiler. You have to stand right there, Carla’s promise, and watch them constantly for about 60 to 90 seconds until that beautiful amber color appears. If you want to read more about my general safety philosophy in the kitchen, you can check out my Privacy Policy page, which touches on being aware of your environment!
Why do you strain this elegant French dessert mixture?
Straining removes those tiny, tough bits of cooked egg white or any bubbles that formed during whisking. This step is the non-negotiable secret to getting that unbelievably smooth, almost silky mouthfeel in your final vanilla custard dessert. It takes two seconds and makes the texture heavenly!
Estimated Nutrition for This Classic Creme Brulee
When you serve up this amazing creme brulee, I know you might be curious about the numbers! Keep in mind these are just estimates based on standard heavy cream and sugar amounts, but they give you a good idea. This rich, elegant French dessert comes out to about 450 calories and 38 grams of fat per ramekin, with 25 grams of sugar, because, well, it’s pure decadence!
Remember that the un-torched custard is what we base these numbers on, since the sugar topping measurement is so variable. These are just friendly guidelines, not professional nutrition advice. For more details on our site standards, you can always check out the Terms of Use.
PrintClassic Crème Brûlée Recipe
Make a restaurant-quality crème brûlée with a rich vanilla custard base and a perfectly crisp, caramelized sugar topping.
- Prep Time: 15 min
- Cook Time: 40 min
- Total Time: 4 hours 55 min
- Yield: 4 servings 1x
- Category: Dessert
- Method: Baking and Torching
- Cuisine: French
- Diet: Vegetarian
Ingredients
- 5 large egg yolks
- 1/2 cup granulated sugar plus 1/4 cup for topping
- 2 cups heavy cream
- 1 teaspoon pure vanilla extract
- Pinch of salt
Instructions
- Preheat your oven to 300°F (150°C). Place four 6-ounce ramekins in a deep baking pan.
- In a medium bowl, whisk the egg yolks and 1/2 cup of sugar until the mixture is pale yellow and smooth. Do not over-whisk to avoid incorporating too much air.
- In a saucepan, heat the heavy cream and salt over medium heat until it just begins to simmer around the edges. Remove from heat.
- Temper the yolks: Slowly pour about one-third of the hot cream into the yolk mixture while whisking constantly. This raises the temperature of the yolks gently.
- Pour the tempered yolk mixture back into the saucepan with the remaining cream. Stir in the vanilla extract.
- Strain the custard mixture through a fine-mesh sieve into a clean bowl to remove any chalazae or cooked bits. This step helps create a smooth texture.
- Divide the custard evenly among the four ramekins.
- Carefully pour hot water into the baking pan until the water reaches halfway up the sides of the ramekins. This water bath insulates the custard.
- Bake for 30 to 40 minutes, or until the edges are set but the center still has a slight jiggle when gently nudged.
- Remove the ramekins from the water bath and let them cool completely on a wire rack. Then, chill them in the refrigerator for at least 4 hours, or preferably overnight.
- Before serving, sprinkle an even, thin layer of the remaining 1/4 cup of sugar over the top of each chilled custard.
- Use a kitchen torch to melt and caramelize the sugar until it forms a dark amber, brittle crust. Work quickly to avoid heating the custard underneath.
- Let the caramelized sugar cool and harden for a few minutes before serving. Tap the top with a spoon to break the crust.
Notes
- If you do not have a kitchen torch, place the sugared ramekins under a preheated broiler for 1-2 minutes, watching constantly to prevent burning.
- For the smoothest custard, use whole milk or heavy cream only; do not substitute with low-fat dairy.
- Make sure the water bath water is hot when you pour it into the pan to help maintain oven temperature.
Nutrition
- Serving Size: 1 ramekin
- Calories: 450
- Sugar: 25
- Sodium: 50
- Fat: 38
- Saturated Fat: 22
- Unsaturated Fat: 16
- Trans Fat: 1
- Carbohydrates: 28
- Fiber: 0
- Protein: 7
- Cholesterol: 350