
Oh, when the craving for something truly vibrant hits, nothing beats the sunshine of the islands! If you’re looking to bake a dessert that shouts ‘vacation’ before you even take a bite, you’ve landed exactly where you need to be. Forget those dry, disappointing versions you might have tried elsewhere. I promise you, my **hawaiian guava cake** recipe is what you’ve been searching for—it’s incredibly moist, bursting with that irresistible sweet-tart tropical punch, and crowned with the richest cream cheese frosting you can imagine. This recipe has proven itself time and time again in my own kitchen for my grandkids, so you know it’s dependable. Let’s make a cake that tastes like pure aloha!
- Why This Hawaiian Guava Cake Recipe is a Family Favorite
- Ingredients for Your Hawaiian Guava Cake
- Step-by-Step Instructions: How to Make Guava Cake
- Tips for the Best Guava Cake Recipe Success
- Variations on This Hawaiian Guava Cake
- Serving Suggestions for This Tropical Layer Cake Recipes Showstopper
- Storage and Reheating Instructions for Your Hawaiian Guava Cake
- Frequently Asked Questions About Making Hawaiian Guava Cake
- Sharing Your Hawaiian Guava Cake Creations
Why This Hawaiian Guava Cake Recipe is a Family Favorite
I know you have a ton of recipes bookmarked, so why should you trust my **hawaiian guava cake** version? Well, that’s easy! I spent years developing recipes that actually *work* every single time, even when you’re juggling things around the house. My goal is always to make your baking successful and delicious. This cake is definitely one of our most requested **Tropical layer cake recipes**!
Here’s what makes this specific cake a guaranteed winner on your table:
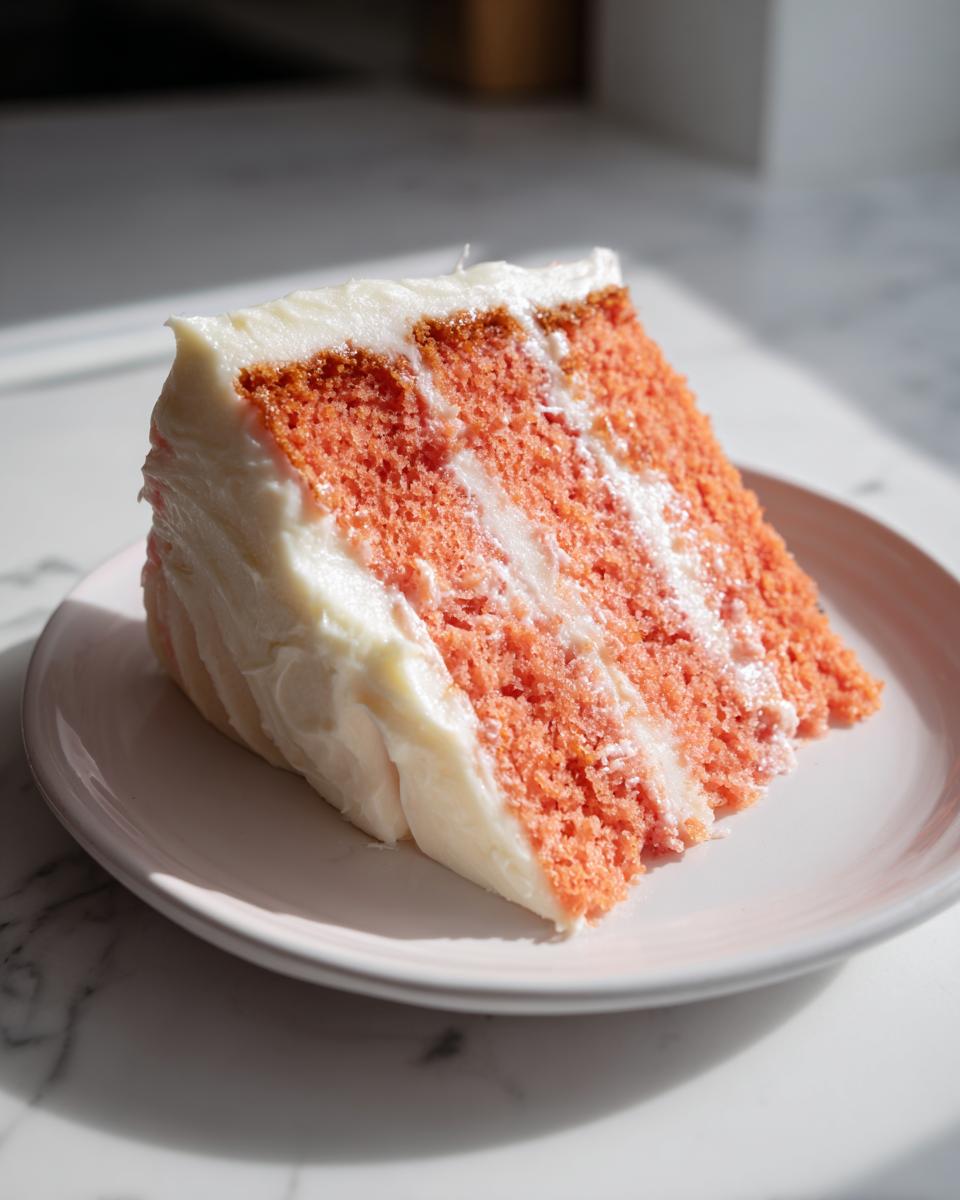
- Unbeatable Moisture: Between the sour cream and the fruit puree, this cake stays soft for days. You won’t find any crumbly, dry spots here, trust me.
- Authentic Island Flavor: We aren’t just dusting this with flavoring; we’re incorporating real guava to get that perfect balance of sweet and tartness that screams tropical refreshment.
- Foolproof Success: I taught third grade for thirty years, and I approach baking the same way—with clear, simple steps and reliable ratios. This is a **from scratch guava dessert** that anyone can master.
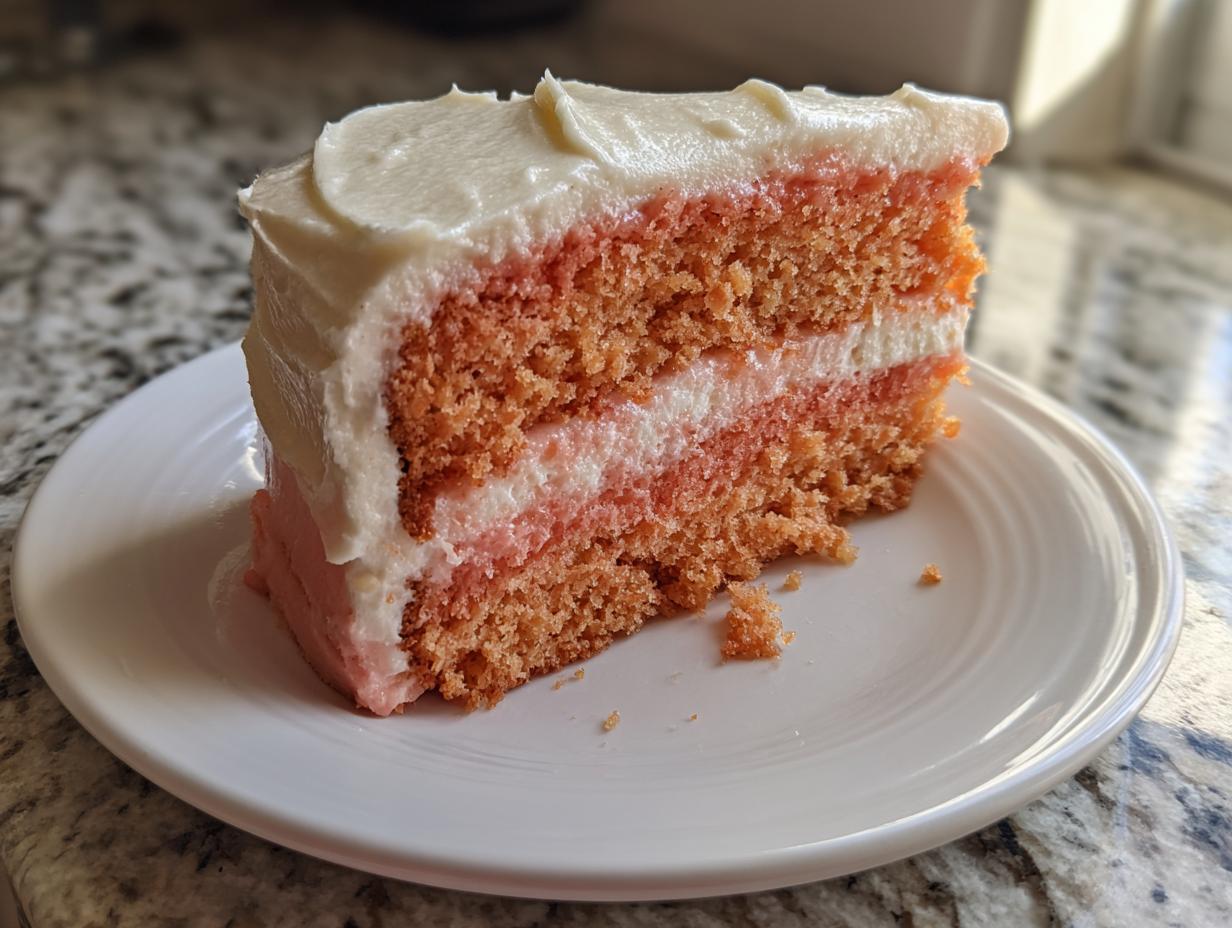
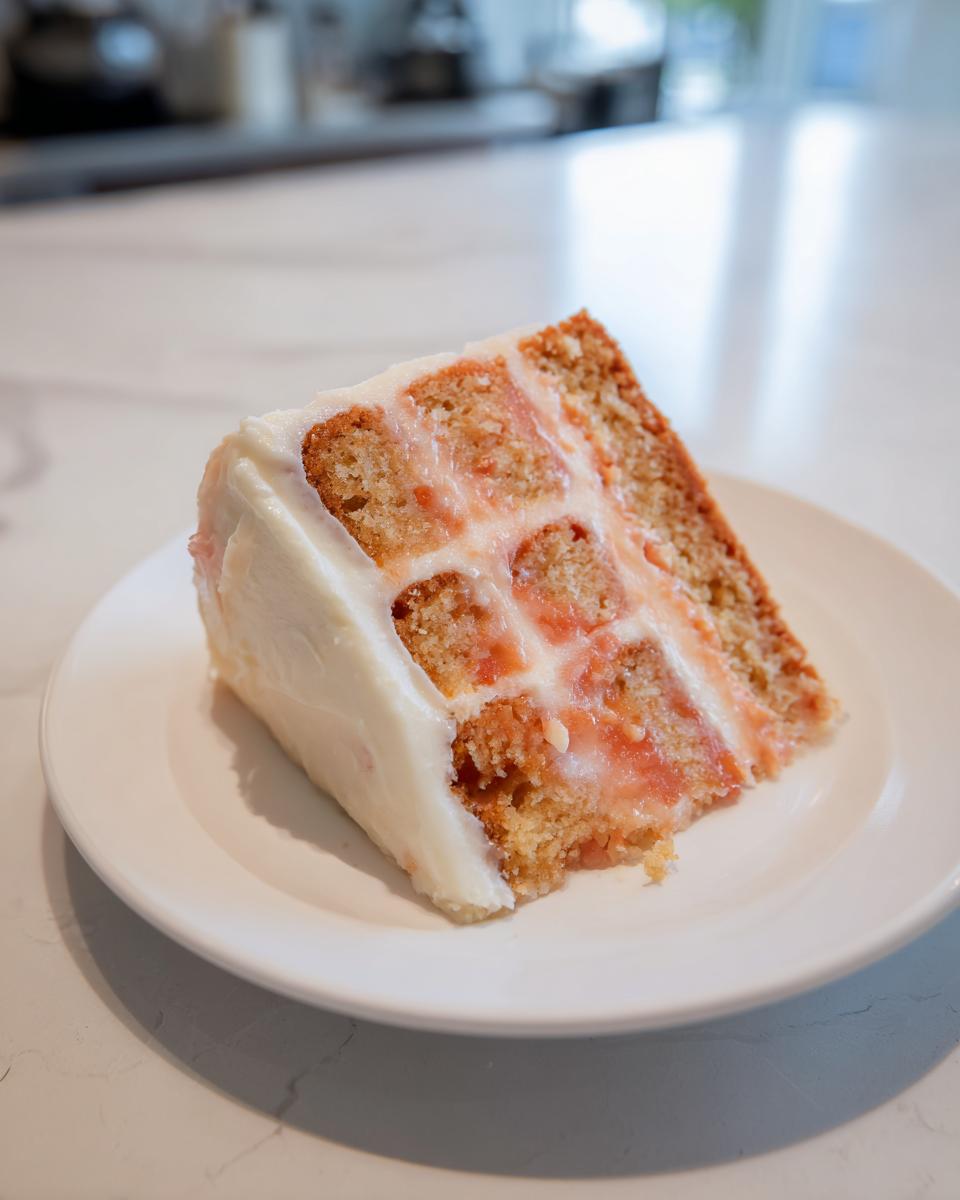
- The Perfect Finish: This recipe is crafted specifically to pair with a tangy cream cheese frosting. The richness cuts through the fruit perfectly, making it a truly stunning **Guava layer cake with cream cheese frosting**.
If you love cakes that deliver big on flavor without needing fancy equipment, you’ll find this recipe incredibly rewarding. If you’ve had issues with other fruit cakes feeling dense, you should take a look at how I handle the wet ingredients in my easy moist lemon loaf recipe—the technique here is very similar and ensures a light crumb!
Ingredients for Your Hawaiian Guava Cake
Good baking, my friends, always starts with good, precisely measured ingredients. You know I believe in using what you have, but when it comes to a cake this special, we need to nail the measurements. I’ve separated this list so you aren’t confused about which ingredients go where. Having everything prepped and ready before you turn on the mixer is my golden rule—it keeps things calm and prevents overmixing later on!
If you want to see how I make what I consider the absolute best frosting base, check out my thoughts on cream cheese frosting recipes that hold their shape. But for now, here’s exactly what you need for this incredible tropical beauty.
For the Hawaiian Guava Cake Layers
- 1 3/4 cups all-purpose flour
- 1 1/2 teaspoons baking powder
- 1/2 teaspoon salt
- 1/2 cup unsalted butter, softened completely
- 1 1/2 cups granulated sugar
- 3 large eggs, room temperature is best!
- 1 teaspoon vanilla extract
- 1/2 cup whole milk
- 1/2 cup guava puree or jam (the higher quality, the better the flavor!)
- 1/2 cup sour cream (don’t skip this, it’s key for moisture!)
For the Guava Cream Cheese Frosting
This topping makes the whole experience—it truly turns it into that show-stopping **Guava layer cake with cream cheese frosting** we all dream about.
- 8 ounces cream cheese, softened
- 1/2 cup unsalted butter, softened
- 3 cups powdered sugar, sifted well
- 1 teaspoon vanilla extract
- 2 tablespoons guava puree or jam
Step-by-Step Instructions: How to Make Guava Cake
Now that we have our beautiful tropical ingredients measured out, it’s time to get this batter mixed up! Remember what I always say about baking: accuracy in the beginning leads to joy at the end. We aren’t rushing this, but we are moving with purpose! If you’re interested in making sure your cake comes out perfectly tender, I have some great general tips in my article on moist homemade cake ideas that apply perfectly here.
Preparing the Cake Batter for Your Hawaiian Guava Cake
First things first, get that oven cranked up to 350°F (175°C). We need it nice and hot! While it warms up, grease and flour two 8-inch round pans, and go ahead and cut those parchment circles for the bottom—that’s my insurance policy against sticking!
In a smaller bowl, just whisk together your flour, baking powder, and salt. Set that aside. Now, grab your big bowl. We need to cream that softened butter and sugar together using your mixer until it looks genuinely light and fluffy—that takes a good three minutes. Don’t skimp here; this is where we trap the air! Once airy, beat in those eggs one at a time, followed by the vanilla.
In yet another little bowl (yes, we use a few!), gently whisk together your milk, that wonderful guava puree, and the sour cream until it’s looking smooth and pinkish. Keep all these components separate for now!
Baking and Cooling the Hawaiian Guava Cake Layers
This is the most important part for texture! We need to alternate. Add about one-third of your dry mixture, mix just until it disappears, then add half of your guava milk mixture. Repeat that pattern—dry, wet, dry—always starting and ending with the dry stuff. My biggest piece of advice for this **Hawaiian Guava Cake**? Mix only until the streaks of white flour vanish. If you keep going, you’ll toughen the beautiful soft crumb we worked so hard to create.
Divide that batter evenly between your pans. Pop them into the oven to bake for about 30 to 35 minutes. When a wooden pick comes out clean when you poke the center, they’re done! Let them rest in the pans for about 10 minutes—no more, no less—then gently turn them out onto a wire rack to cool completely. Remember, never frost a warm cake, or you’ll end up with a sad, melted puddle!
Making the Cream Cheese Frosting for Your Hawaiian Guava Cake
While those layers are cooling down, let’s make the topping. You want this frosting light and stackable, not soupy! Make sure both your cream cheese and butter are truly soft. Beat those two together until they look like smooth velvet. Gradually beat in the three cups of sifted powdered sugar. Slowly incorporating it keeps the sugar from exploding all over your kitchen!
Finally, mix in the vanilla and those final two tablespoons of guava puree. Beat it for one last minute on medium speed until it’s beautiful, fluffy, and perfectly spreadable for your **Hawaiian Guava Cake**.
Tips for the Best Guava Cake Recipe Success
Getting a cake recipe right is all about confidence, and confidence comes from knowing the little secrets the professionals keep tucked away. I want this **Hawaiian Guava Cake** to be the most delicious **From scratch guava dessert** you’ve ever attempted! We’ve nailed the ratios, but here are a few real-life pointers I rely on to ensure peak tropical flavor and texture every single time you bake.
Don’t be shy about adjusting things slightly based on what you find in the store. My method is reliable, but flexibility in the kitchen is what truly separates a good baker from a great one!
Sourcing and Using Guava for Your Hawaiian Guava Cake
The guava is the star here, so we need to treat it right! If you are lucky enough to find genuine, thick guava puree, use that! That’s what gives us the deepest, most authentic flavor profile.
However, I know that pure ingredient sourcing can be tough depending on where you live. If you can only find good quality guava jam or preserves, that’s perfectly fine, but you must take one extra step. After you measure out the 1/2 cup needed for the cake and the 2 tablespoons for the frosting, you need to strain it. Put the jam in a fine-mesh sieve over a bowl and gently press it with a spatula to push the liquid pulp through. This removes the seeds, which can sometimes be tough or gritty, leaving you with that smooth, vibrant puree we are looking for. It’s easy to do and makes a huge difference for a silky texture!
Achieving the Perfect Moist Homemade Cake Ideas Texture
Texture is where most fruit cakes fall flat. They either turn out gummy or dry—we’re avoiding both! My secret for that luxurious, moist feel, which applies to all my **moist homemade cake ideas**, really boils down to temperature management.
I harp on this constantly, but your butter, eggs, and sour cream *must* be at room temperature. When cold ingredients meet creamy butter, they don’t emulsify well. If the eggs are cold, they shock the butter, creating little hard specks instead of a smooth blend. Take them out at least an hour before you start.
And please, stay vigilant when adding the flour mixtures! Once you start alternating the dry ingredients with the guava milk mixture, keep your mixer speed low and stop mixing the instant you no longer see dry flour streaks. That instruction to ‘mix only until just combined’ isn’t just suggestion; it’s the law for a tender crumb! You can always read more about how temperature affects texture in my deep dive on baking with tropical fruit puree.
Variations on This Hawaiian Guava Cake
I truly believe every baker should make a recipe their own, and this Hawaiian Guava Cake is fantastic exactly as written. But why stop at guava when the tropics offer so much flavor? If you want to pivot slightly for a party or just because you love mixing fruits, you have some wonderful options here that still fit perfectly into that **Hawaiian inspired baking** theme.
You don’t need to completely rewrite the recipe to get a new experience. Small tweaks in the liquid components can really change the overall feeling of the cake!
For instance, you can easily blend your fruit flavor profile. If you want the guava flavor to sing a little softer, try swapping out a quarter cup of that whole milk for pineapple juice. You’ll notice a slight tanginess that brightens up the entire cake. This little switch is wonderful if you are looking for a cake that balances sweetness and tartness perfectly.
If you’re feeling adventurous and want to try a completely different tropical direction, you could substitute half of the guava puree with passion fruit puree. Oh, that gives it such a wonderfully sharp, floral note! Just make sure that passion fruit puree is thick; if it’s too watery, you might need to slightly reduce the milk amount to keep your batter consistency the same.
And speaking of delicious savory-sweet complements—though this is for a different dish—if you ever want to see how pineapple works in a totally unexpected, zesty way, you should peek at my recipe for chipotle pineapple bang bang chicken skewers! It reminds you of how versatile tropical acidity can be when you start thinking outside the dessert box.
The beauty of this base recipe is its sturdiness. It can handle those extra fruit purees without collapsing, resulting in a lovely, fragrant **delicious fruit cake from scratch** every time you play with it.
Serving Suggestions for This Tropical Layer Cake Recipes Showstopper
When a cake is this beautiful and tastes like paradise, you want to make sure you serve it right! This isn’t just a weeknight dessert, folks; this **Hawaiian Guava Cake** shines when it’s the centerpiece of a gathering. It’s one of those perfect **Tropical fruit desserts for parties** that people remember long after the gathering is over.
Because the cake itself is so rich with fruit and topped with that luscious cream cheese frosting, you don’t need a ton of heavy sides. Simplicity lets the guava flavor really stand out!
Here are a few ways I love to present this beauty:
- With a Light Beverage: Pair slices with a strong but delicate cup of tea—maybe a high-quality Earl Grey or a light green tea. The tannins in the tea keep the sweetness of the frosting in check. If it’s a warm afternoon gathering, a simple, sparkling lemonade is perfection too!
- Fresh Fruit Garnish: A slight garnish on the plate does wonders. Place a few thin slices of fresh, ripe pineapple or maybe a couple of starfruit slices right next to the cake wedge. It visually emphasizes the tropical theme!
- For a Celebration: If you’re serving this layer cake for a shower or a bigger event, you simply must make a batch of my easy festive champagne punch recipe. The bubbles and light fruit notes in the punch feel so celebratory next to the heavy, moist cake.
- Keep it Simple: Honestly, if you’ve nailed that cream cheese frosting, sometimes the best serving suggestion is no suggestion at all! Cut generous slices and let the cake speak for itself. It’s rich enough to stand alone.
Remember, the goal is to celebrate that gorgeous tropical flavor. Keep whatever you serve alongside it light and bright so the guava shines through!
Storage and Reheating Instructions for Your Hawaiian Guava Cake
This is one area where I get asked questions all the time, especially because this **hawaiian guava cake** is so moist, it seems like it should go bad quickly! But you’ll be happy to hear that this recipe, made from scratch, holds up beautifully. That thick cream cheese frosting, while delicious, slightly changes how we store it compared to a simple loaf cake.
The good news is that this cake is even better the next day! The flavors of the guava and the spices really settle in overnight. It’s a fantastic cake to bake a day ahead for a party, which frees up your morning!
Room Temperature vs. Refrigeration for Cakes with Cream Cheese Frosting
Since we used both butter and cream cheese in that lovely frosting, refrigeration is the safest route, especially if you live somewhere warm. Food safety comes first, always!
If you plan to eat the cake within two days, cover the entire cake tightly with plastic wrap (make sure the plastic isn’t touching the frosting if it’s been sitting out for a bit, or use toothpicks to hold the wrap up). Store it in the refrigerator. The cold will firm up that frosting so it slices cleanly.
However, I have to give you a strong piece of advice: **Never serve this cake cold!** When you pull a frosted cake straight from the fridge, the cold mutes all those beautiful tropical flavors. So, if you refrigerate it, pull it out onto the counter about one to two hours before you plan to serve it. Let it come up to a nice cool room temperature. It’s amazing how much softer and more flavorful the cake layers become!
Can I Freeze Slices of My Hawaiian Guava Cake?
Absolutely, you can freeze it! This is a lifesaver if you bake a cake for a small household and don’t want leftovers going stale. I recommend freezing the cake *after* spreading the frosting on. If you want to freeze single slices, that works perfectly too.
Wrap each slice or the whole layer very tightly—I mean really wrap it—first in plastic wrap, and then pop it into a freezer-safe bag or container. This prevents freezer burn, which is the enemy of moist cakes! It keeps well for about three months.
How to Revive Frozen or Refrigerated Cake Slices
If you’ve frozen your slices, just unwrap them, place them on a plate, and let them thaw on the counter for a couple of hours. Again, don’t rush it by microwaving, or you’ll melt your beautiful frosting!
Sometimes, if a slice has been in the fridge for a full day or two, it might taste just a tiny bit less tender than when it was fresh. If that happens, here’s a trick: place the slice on a microwave-safe plate and give it just 8 to 10 seconds on about 50% power. It just warms up the fruit slightly, making the whole crumb feel instantly fresh and soft again. It’s perfect for a little afternoon treat!
Frequently Asked Questions About Making Hawaiian Guava Cake
We’ve covered the how-to, but sometimes you just have one little question left swirling around before you pull out the mixer. That’s perfectly normal! As a former teacher, I always want to make sure everyone feels totally confident before they start baking. These questions about texture and sourcing are things I get asked a lot when folks try this recipe for the first time. If you need even more inspiration for speedy tropical treats, you can always check out my list of easy island dessert recipes for inspiration!
Can I use fresh guava instead of puree in this hawaiian guava cake?
Oh, that’s a wonderful idea if you have access to fresh guavas! Using fresh fruit always brings an extra layer of bright flavor. If you’re going this route, you’ll need quite a bit of fruit, probably about five or six medium-sized guavas, because they cook down significantly.
Here’s the process: Wash your fruit well! Cut them open and scoop out the interior pulp, seeds and all. You’ll want to simmer that pulp in a small saucepan with maybe a tablespoon of water (just so it doesn’t stick) for about 10 minutes until it softens up. Then, you run that mixture through a fine-mesh sieve, pressing hard to extract all that lovely juice and pulp. You need to boil that liquid down slowly until it thickens to the consistency of jam or puree. Once it cools, you can use it exactly where the recipe calls for 1/2 cup of puree. It’s a bit of extra work, but the resulting flavor is just magnificent!
How do I prevent the cream cheese frosting from becoming too soft?
This is the main battle we fight with cream cheese frosting, especially if your kitchen runs a little warm! The ratio of cream cheese to butter is pretty balanced here, but anytime we add that extra 2 tablespoons of guava puree, we are introducing more liquid, which can make it sloppy.
If you are making this cake on a very hot day, or if you know you won’t be assembling it right away, try chilling your cream cheese and butter slightly before you start—maybe 15 minutes in the freezer. They shouldn’t be rock hard, just firm up a bit. Also, the secret weapon is the powdered sugar! If your frosting is too soft after you’ve mixed everything, just slowly add an extra half-cup of sifted powdered sugar until it stiffens up enough to hold peaks. It’s better to add a little extra sugar than to have your beautiful cake layers slide apart!
Is this considered one of the delicious fruit cake from scratch options?
You bet it is! I get nervous when people look for recipes that use box mixes or artificial flavoring, because frankly, they just don’t taste the same! This entire **Hawaiian Guava Cake** recipe follows my philosophy: starting with basic, real pantry staples like flour, butter, sugar, and eggs, and transforming them using fresh, natural flavors.
When you see that ingredient list—real butter, fresh eggs, real guava puree—you know you’re getting an authentic, from-scratch experience. It takes a little more effort than opening a box, but those flavors—that unique tropical sweetness—could never be replicated by a powdered packet. This is exactly why my family cherishes these **delicious fruit cake from scratch** recipes; they taste like care and effort, and they are always worth it!
Sharing Your Hawaiian Guava Cake Creations
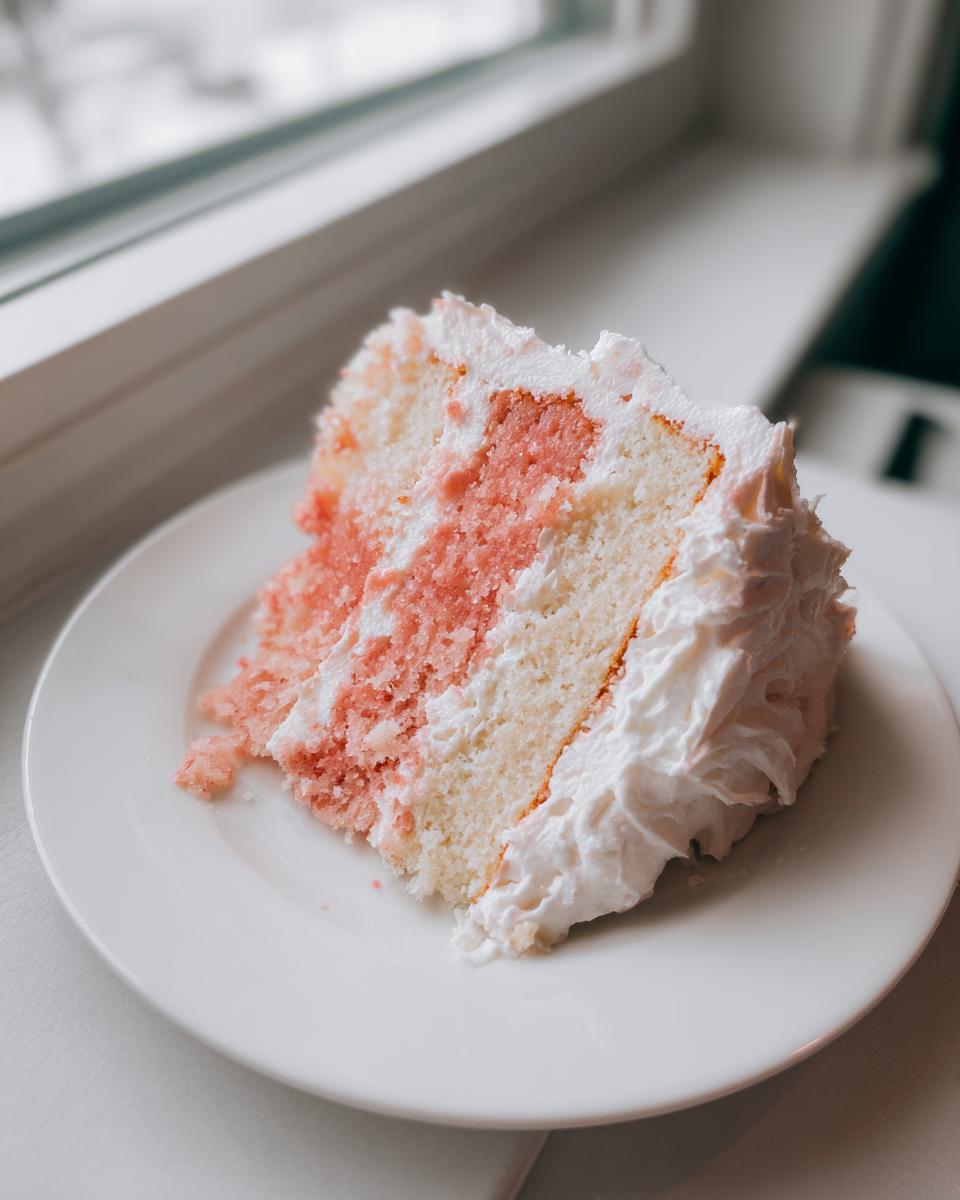
Now the best part begins! You’ve poured your heart into mixing, baking, and frosting this absolutely stunning **Hawaiian Guava Cake** with cream cheese, and I can’t wait for you to finally take that first bite. When you make a dessert this special, I truly want to see what you’ve created!
This community we’ve built here at Cooking by Carla thrives on sharing successes—and even learning from the occasional baking oopsie! It makes my day to see photos of my recipes popping up in your kitchens.
Once you’ve had a slice or two, please come back and leave a star rating right here on the recipe card. It helps other home bakers know just how delicious and dependable this **tropical layer cake recipes** showstopper turned out for you.
And if you took a picture—especially of that gorgeous stack or that perfect slice showing off the crumb—I’d be thrilled if you shared it with me! You can always reach out through the contact page. Telling me how your family loved this **moist homemade cake idea** is the biggest reward for me. Happy baking, dear friends!
PrintAuthentic Hawaiian Guava Cake with Cream Cheese Frosting

Make a moist, tropical Hawaiian Guava Cake from scratch. This recipe features real guava flavor and is topped with a rich cream cheese frosting, perfect for any gathering.
- Prep Time: 25 min
- Cook Time: 35 min
- Total Time: 60 min
- Yield: 12 servings 1x
- Category: Dessert
- Method: Baking
- Cuisine: Hawaiian
- Diet: Vegetarian
Ingredients
- 1 3/4 cups all-purpose flour
- 1 1/2 teaspoons baking powder
- 1/2 teaspoon salt
- 1/2 cup unsalted butter, softened
- 1 1/2 cups granulated sugar
- 3 large eggs
- 1 teaspoon vanilla extract
- 1/2 cup whole milk
- 1/2 cup guava puree or jam (high-quality recommended)
- 1/2 cup sour cream
- For the Frosting: 8 ounces cream cheese, softened
- 1/2 cup unsalted butter, softened
- 3 cups powdered sugar, sifted
- 1 teaspoon vanilla extract
- 2 tablespoons guava puree or jam
Instructions
- Preheat your oven to 350°F (175°C). Grease and flour two 8-inch round cake pans. Line the bottoms with parchment paper.
- In a medium bowl, whisk together the flour, baking powder, and salt. Set this dry mixture aside.
- In a large bowl, cream together the softened butter and granulated sugar with an electric mixer until light and fluffy, about 3 minutes.
- Beat in the eggs one at a time, mixing well after each addition. Stir in the vanilla extract.
- In a separate small bowl, whisk together the milk, guava puree, and sour cream until combined.
- Gradually add the dry ingredients to the wet ingredients, alternating with the milk mixture, beginning and ending with the dry ingredients. Mix only until just combined; do not overmix.
- Divide the batter evenly between the prepared cake pans.
- Bake for 30 to 35 minutes, or until a wooden pick inserted into the center comes out clean.
- Let the cakes cool in the pans for 10 minutes before inverting them onto a wire rack to cool completely.
- Prepare the frosting: Beat the softened cream cheese and butter together until smooth. Gradually add the powdered sugar until incorporated. Mix in the vanilla extract and 2 tablespoons of guava puree until the frosting is light and spreadable.
- Once the cakes are completely cool, frost and stack the layers. Serve this delicious fruit cake from scratch.
Notes
- If you cannot find pure guava puree, use a high-quality guava jam, ensuring you strain out any large seeds if desired.
- For an extra tropical flavor, substitute 1/4 cup of the milk with pineapple juice.
- This cake stays moist for several days when stored in an airtight container at room temperature.
Nutrition
- Serving Size: 1 slice
- Calories: 420
- Sugar: 55g
- Sodium: 250mg
- Fat: 20g
- Saturated Fat: 12g
- Unsaturated Fat: 8g
- Trans Fat: 0.5g
- Carbohydrates: 60g
- Fiber: 1g
- Protein: 4g
- Cholesterol: 85mg