
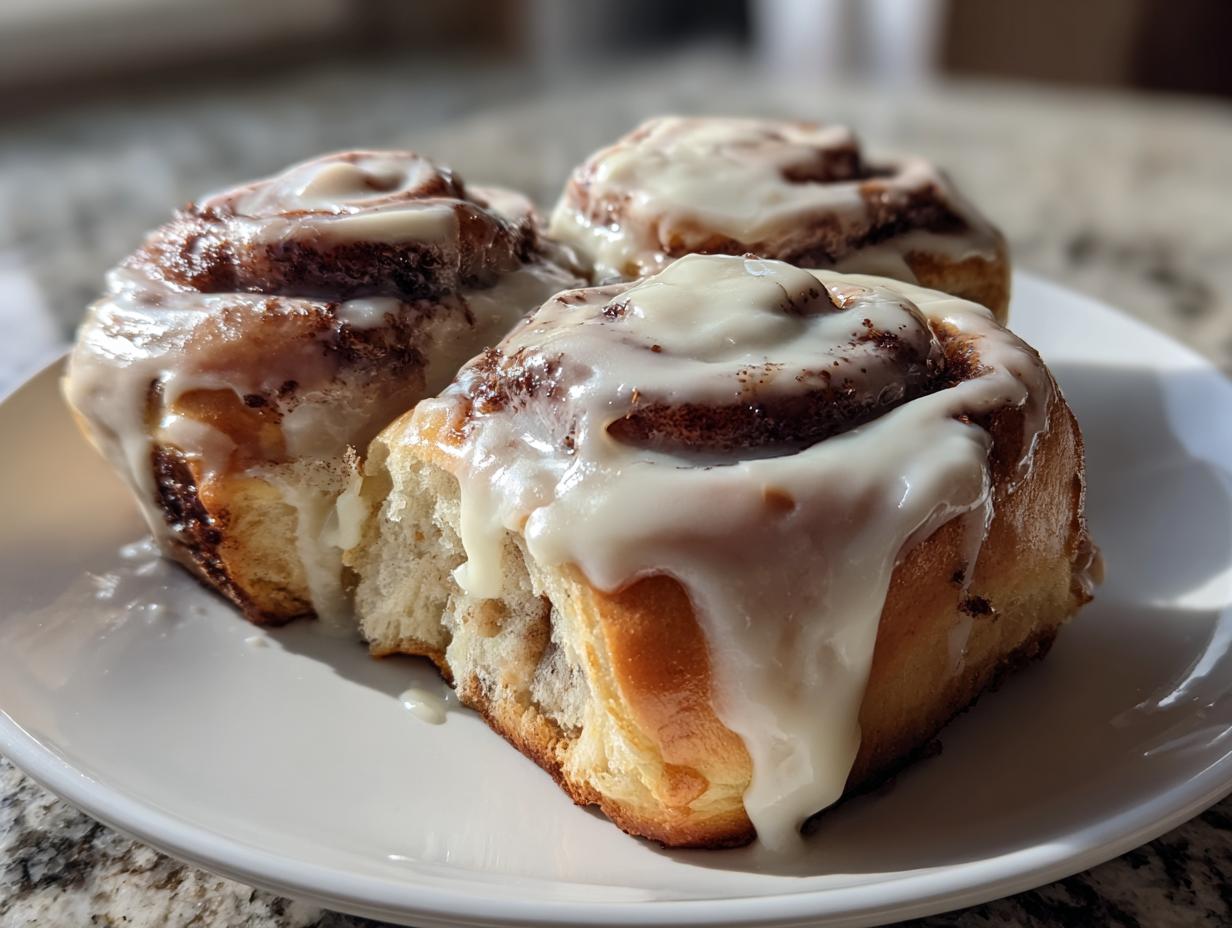
I know, I know. You’ve tried a dozen recipes promising perfection, but you end up with rolls that are just… fine. A little dry, maybe just slightly sticky. But let me tell you, searching for that truly unforgettable, bakery-style roll that practically melts when you pull it apart? That search ends right here. My best gooey cinnamon rolls recipe isn’t complicated, but it’s built on the foundation of reliable, comforting home baking I learned growing up. We’re aiming for a dough so soft it practically whispers, paired with thick, decadent icing. Trust me, these are the **gooey cinnamon rolls** you’ve been dreaming about making.
- Why You Will Make the Best Gooey Cinnamon Rolls Ever
- Gathering Ingredients for Truly Moist Cinnamon Rolls
- Step-by-Step Tutorial for Sticky Cinnamon Buns
- Crafting the Best Cream Cheese Frosting for Rolls
- Tips for No Dry Cinnamon Rolls Method
- Serving Suggestions for Your Homemade Sweet Rolls Recipe
- Storing and Reheating Leftover Gooey Cinnamon Rolls
- Frequently Asked Questions About Gooey Cinnamon Rolls
- Share Your Baking Success
Why You Will Make the Best Gooey Cinnamon Rolls Ever
When you’re hunting for something truly special, it comes down to the texture, right? I’m not interested in making sweet bread rolls that taste good for five minutes and then become toast the next day. These rolls are different because every element is designed to maximize that glorious, sticky texture.
- The Dough Miracle: I use a rich dough—more fat and eggs than standard recipes. This creates that fluffy cinnamon rolls from scratch base that stays tender no matter what.
- The Filling That Spreads: We mix the butter, brown sugar, and cinnamon until it’s almost a paste. This ensures maximum spread and prevents the sugar from crystalizing, giving you that pull apart sticky buns pull.
- Focus on ‘Gooey’: This isn’t a light dusting of sugar frosting situation. We are going heavy on the filling and the icing to ensure every surface is coated.
- True Moisture Retention: My notes always stress not over-baking. A slightly shorter bake time keeps the interior just right so they melt in your mouth.
- The Icing Game Changer: The generous amount of cream cheese frosting you coat them with melts beautifully into the warm rolls, guaranteeing that signature sticky cinnamon buns tutorial result.
- Guaranteed No Dry Cinnamon Rolls Method: If you follow my little trick after they come out of the oven (which I’ll share later!), you lock in moisture for days.
Gathering Ingredients for Truly Moist Cinnamon Rolls
Now, friends, this is where we put in the foundational work. You can’t get those wonderfully soft cinnamon rolls ever without starting with ingredients that are treated just right. See those little notations, like ‘room temperature’ or a specific temperature for the milk? Those aren’t suggestions; they are the little secrets to making sure your dough behaves and ends up fluffy instead of sad. Pay attention to the butter amounts; we need plenty of it in the dough, the filling, and the icing for that fantastic gooey experience!
Here is exactly what you need for Carla’s best cream cheese frosting for rolls and the dough beneath it:
- 1 cup whole milk, warmed to just 105-115°F. Don’t guess this temperature; if it’s too hot, you’ll kill your yeast!
- 2 1/4 teaspoons active dry yeast.
- 1/2 cup granulated sugar, divided—we use some now, and some later.
- 2 large eggs, always at room temperature. This really helps the dough mix evenly.
- 1/2 cup unsalted butter, melted, plus a little extra for greasing our bowl.
- 4 1/2 cups all-purpose flour, plus whatever you need for dusting later.
- 1 teaspoon salt. We need salt to balance all the sugar!
- 1/2 cup unsalted butter, softened (this is for the filling, so set it out ahead of time).
- 1 cup packed light brown sugar (for filling). Hello, moisture and caramel flavor!
- 2 tablespoons ground cinnamon (for filling). Don’t skimp here!
- 1/2 cup cream cheese, softened (for the icing—again, let this sit out).
- 1/4 cup unsalted butter, softened (also for the icing).
- 2 cups powdered sugar (for the icing).
- 1 teaspoon vanilla extract.
- 2 tablespoons heavy cream or milk (for getting that perfect icing runniness).
Step-by-Step Tutorial for Sticky Cinnamon Buns
Alright, lace up your apron! This is where we turn those lovely ingredients into the softest cinnamon rolls ever. I always tell my grandkids that baking is just like teaching—you have to follow the steps in order, but you have to *feel* when it’s right. We’re aiming for that perfect, rich dough that makes these **gooey cinnamon rolls** worth every minute.
Activating Yeast and Mixing the Dough Base
First thing’s first: we wake up the yeast. Combine your warm milk (remember, 105 to 115°F—if it feels hot, it’s too hot!) with the yeast and a pinch of sugar. Wait until it gets foamy; that means your little neighbors are ready to get to work making us fluffy cinnamon rolls from scratch.
Next, we mix the wet stuff. I always use room temperature eggs because, just like when I was teaching, the temperature of your components really impacts how well everything incorporates. Whisk those eggs with the sugar and that melted butter. Once that’s happy, pour in your bubbly yeast mixture. Now slowly start adding the flour and salt until it just comes together into a shaggy mass. Don’t try to mix it smoothly in the bowl!
Kneading and First Rise for Fluffy Cinnamon Rolls
Time to get those hands working! Turn the dough out onto a lightly floured surface. You need to knead this dough for a good 8 to 10 minutes. You’ll know it’s ready when it feels smooth, elastic, and almost bouncy—it shouldn’t stick stubbornly to your fingers anymore. Pop that beautiful ball into a buttered bowl, cover it with a cloth, and let it hang out somewhere warm for about an hour and a half, or until it has doubled up on itself. Patience is key for that cloud-like final texture!
While that dough is resting, have your filling ready to go. After all, we want to catch that dough right when it’s perfectly proofed!
Creating the Gooey Cinnamon Roll Filling
This is where the magic starts to happen for that gooey factor. Take your softened butter, that beautiful light brown sugar, and the cinnamon—and you need to mix them together until they become a thick, almost uniform paste. Seriously, cream them together so there are no dry pockets of sugar. This rich, buttery spread is what prevents dry spots and creates steam inside the roll while baking, keeping everything wonderfully moist.
Rolling, Cutting, and Second Proofing
When the dough is perfect, knock the air out gently. On your floured surface, roll it out into a nice, wide 12 by 18-inch rectangle. Spread that gorgeous filling evenly all over, but leave about an inch bare on one of the long edges—that’s your seal!
Roll it up super tight, starting from the side *opposite* the bare edge, like rolling a carpet. Pinch that seam closed so it doesn’t unravel while baking. Now, use a sharp knife or unflavored dental floss to cut the log into 12 nice, thick pieces. Arrange them close together in your greased 9×13 pan. Cover them loosely and let them puff up again for about 30 to 45 minutes. They should look puffy and almost touching each other before they go into the oven.
Baking the Bakery Style Gooey Rolls
Preheat your oven to 375°F. You’re going to bake these for 20 to 25 minutes. Here’s my biggest warning for a truly moist cinnamon roll: Do not overbake! As soon as the tops look golden brown, pull them out. If you wait until a toothpick comes out totally dry, you’ve gone too far. We want those centers soft, ready to drown in icing!
Remember, for the ultimate texture, check out my guide on making cinnamon roll cake ideas for faster assembly!
Crafting the Best Cream Cheese Frosting for Rolls
Oh, the icing! This is where we lock in the title of best **gooey cinnamon rolls recipe**. A thin, watery glaze just won’t do here. I want a frosting that is thick enough to hold its shape slightly but soft enough that when you spread it over those warm rolls, it just sinks down the crevices and melts into the crevices. That melting action is what makes these homemade sweet rolls recipe truly shine.
We are using cream cheese here because that slight tang cuts through the deep sweetness of the brown sugar filling perfectly. Don’t worry about making this icing too stiff; we’re going for maximum coverage and delicious stickiness. If you need to check out my classic recipe structure, you can look over my guide on the best cream cheese frosting for rolls, but for this application, we need it a bit softer.
Here’s the trick, and this is the part that determines if you get sticky cinnamon buns or just frosted buns: consistency. You mix the softened cream cheese and butter until they are purely smooth—no lumps allowed! Then, slowly beat in the powdered sugar and vanilla. The final step is where I use my teacher’s patience. Add the heavy cream or milk just a teaspoon at a time. If you want it spreadable but firm, stop adding liquid early. If you want it pooling and running down the sides to create that ultra-gooey icing effect? Keep adding that cream slowly until it looks heavy, glossy, and almost too much! It should look like thick, beautiful cream when it hits those warm rolls.
Remember, the residual heat from the rolls when you glaze them is what pulls that thick frosting down into every single swirl. That’s the flavor bomb moment, folks!
Tips for No Dry Cinnamon Rolls Method
There is nothing sadder in life than biting into what looks like a gorgeous, pillowy cinnamon roll only to find it’s drier than the Sahara. Trust me, after thirty years in a classroom, I learned how to manage expectations and deliver reliability—and that absolutely extends to my baking! If you’re wary of making **truly moist cinnamon rolls**, I have two absolute must-do steps that guarantee a great result every single time you whip up this **best gooey cinnamon rolls recipe**.
The Secret to Extra Moisture: Post-Bake Cream Drizzle
This is my favorite little trick, and I think it’s what elevates these from good to legendary. This happens right after the rolls come out of the oven—seconds count here! Don’t waste time waiting for them to cool down the slightest bit. As soon as you pull that hot 9×13 pan out, take about a quarter cup of heavy whipping cream and slowly drizzle it all over the tops of the hot rolls, covering every inch you can reach.
The heat of the rolls instantly sucks that fat right into the bread structure. It steams them from the inside out, ensuring that even if you bake them a minute too long, you still have an incredible amount of moisture locked in. It’s a game-changer for achieving that soft texture!
Making Gooey Cinnamon Rolls Overnight Instructions
I get it; mornings are hectic. You can absolutely prep these the night before and still wake up to the promise of incredible **gooey cinnamon rolls**. If you want to use my **overnight cinnamon roll instructions**, you just need to modify Step 7 and Step 8 slightly.
After you cut and arrange the rolls in your baking dish according to Step 6, instead of covering them with a towel for the second proof, cover the dish tightly, I mean *tightly*, with plastic wrap. Then, slide the whole pan into the refrigerator. They can hang out there for up to 12 hours. When you wake up?
Take them out of the fridge and let them sit on the counter while your oven preheats. They need about an hour at room temperature to warm up and proof again—they just won’t double in size like they did at room temp, but they’ll get lovely and puffy. Then, bake as normal. Because they were cold going into the oven, they might need 3-5 minutes extra baking time, so keep an eye on the color!
If you want to see how I use this same concept to make a full breakfast bake, check out my guide on easy breakfast recipes for inspiration!
Serving Suggestions for Your Homemade Sweet Rolls Recipe
Now that you’ve mastered these incredible, sticky cinnamon buns, the hard part is over! But how do you serve them to really make the moment special? These rolls are so rich and decadent—they are practically dessert disguised as breakfast. Because they are so wonderfully dense, you don’t need a lot of fuss on the side.
Honestly, they are perfect just piled high on a platter, maybe with a little extra drizzle of leftover cream cheese frosting poured right over the top for maximum appeal. My favorite way to enjoy them is when they are still warm enough that the icing is just barely liquid.
- Coffee Pairing: You absolutely need a strong, hot cup of coffee to cut through that richness. A bold dark roast is my go-to when I’m eating these **gooey cinnamon rolls** for breakfast.
- Tea Time: If coffee isn’t your thing, a strong black tea, perhaps with just a slice of lemon, works beautifully. It’s a more subtle counterpoint to the heavy brown sugar.
- A Little Freshness: Since these are so sweet and heavy, a small bowl of lightly sugared berries—strawberries or raspberries—adds a lovely, tart freshness. It offers a nice visual contrast on the plate, too!
- Brunch Spread: If you’re making these for a big gathering, I love having a simple side of scrambled eggs or perhaps some savory prosciutto nearby. It gives folks an out if they can’t handle a second roll!
These sweet bread rolls baking guide results stack up beautifully, whether you’re serving them right away or planning ahead. For more great ideas that pair well with a cozy morning bake, take a look at my list of easy breakfast recipes!
Storing and Reheating Leftover Gooey Cinnamon Rolls
If you managed not to eat this entire batch of **gooey cinnamon rolls** in one sitting—and trust me, it’s hard—you need to know the proper way to store them so they don’t turn into hockey pucks overnight. The whole point of this recipe is the soft crumb and the sticky sweetness, so we can’t compromise that when saving them for later!
For short-term storage, say, up to a day, you can leave them right there in that 9×13 pan. Just cover the pan tightly with plastic wrap or aluminum foil. Keep them on the counter, away from direct sunlight or anything too warm. Storing them at room temperature keeps the dough texture softer than putting them in the fridge too soon.
If you know it’ll be longer than 24 hours, the fridge is necessary. Wrap the entire pan—or slice off just a few rolls to wrap individually—very tightly in plastic wrap, and then maybe wrap that in foil as an extra shield against the cold air. They’ll keep soundly in the fridge for up to four days this way.
Now, the important part: reheating to bring back that fresh-from-the-oven glory. You want warmth, not harsh, fast heat. That’s what dries things out!
- The Oven Method (Best for a Batch): This is my preferred way to bring back that bakery style gooey rolls feel. Preheat your oven to a low 300°F. Place the rolls (still in their serving dish or on a baking sheet) uncovered and warm them up for about 10 to 15 minutes. Test one; when it’s warm all the way through and soft, they are done.
- The Microwave Hug (Best for Single Rolls): If you just need one serving fast, wrap the single roll in a slightly damp paper towel. This little bit of steam helps re-moisturize the bread. Microwave on medium power for about 15 to 20 seconds. You just want it warmed through and soft, not blazing hot.
If you reheated them, that icing will likely have hardened a bit. Don’t panic! Just warm up a teaspoon of milk or cream and drizzle just a tiny bit over the top of the warmed roll. The heat will melt it right into that perfect sticky layer. Enjoy those leftovers!
Frequently Asked Questions About Gooey Cinnamon Rolls
I always get so many questions after people try this recipe because they want to make sure they nail that perfect, soft dough and sticky top again! Baking is intuitive, but sometimes having those few key answers helps you troubleshoot. Here are the questions I hear most often about making the absolute best gooey cinnamon rolls recipe.
Can I use bread flour instead of all-purpose flour for these gooey cinnamon rolls?
Oh, that’s a good technical question! You certainly *can*, but I wouldn’t necessarily recommend it if your goal is purely cloud-like softness. Bread flour has a higher protein content, which develops more gluten. This means your **homemade sweet rolls recipe** will end up chewier, which isn’t bad, but it won’t give you that delicate, tender crumb we are aiming for here. All-purpose flour balances the structure perfectly against all that butter and sugar.
What makes these the softest cinnamon rolls ever?
It’s a two-pronged approach, really! The first part is the dough base itself: we use room temperature eggs and a higher ratio of melted butter than plain recipes. This keeps the dough rich and pliable. But the real secret weapon for guaranteeing that moisture, even the next day, is that little drizzle of heavy cream immediately after they come out of the oven. That post-bake soak is essential for achieving the **softest cinnamon rolls ever**!
How can I make the icing thicker for my sticky cinnamon buns tutorial?
If you prefer your glaze to sit up a bit more—maybe you want it to look more like a thick blanket rather than a pool of deliciousness—you just need to be stingy with your liquid! When you are mixing that cream cheese frosting, after you’ve added your powdered sugar, only add half a teaspoon of the heavy cream at a time. Beat it well between additions. You are looking for a consistency that is thick enough that when you lift the whisk, the drip holds its shape for a second or two before melting back in. That slight stiffness will give you great definition for your **sticky cinnamon buns tutorial** visuals, but it will still melt gorgeously onto the warm rolls.
Share Your Baking Success
I absolutely love seeing what all of you create in your kitchens! When you tackle a recipe that focuses so much on texture—like getting those perfect, melt-in-your-mouth **gooey cinnamon rolls**—I want to know how it turned out. Did you achieve that bakery-style gooiness I promised?
Don’t be shy! Head down to the comments section below and let me know what your family thought. Did you try my trick of adding that extra cream after baking? I need to hear all about how moist your rolls were!
If you snapped a picture of your beautiful, sticky creation, I would be thrilled if you shared it! Tag me on social media—it truly makes my day to see my community baking and sharing meals together. You can always reach out to me through my contact page if you have specific questions about the sticky cinnamon buns tutorial or need a little extra nudge!
Happy baking, dear friends. I’m already looking forward to reading your success stories!
PrintCarla’s Best Gooey Cinnamon Rolls Recipe

Make the softest cinnamon rolls ever using this straightforward recipe that guarantees a moist dough and a thick, sticky cream cheese icing. This is the truly moist cinnamon rolls method you need for bakery style gooey rolls.
- Prep Time: 45 min
- Cook Time: 25 min
- Total Time: 145 min
- Yield: 12 servings 1x
- Category: Breakfast
- Method: Baking
- Cuisine: American
- Diet: Vegetarian
Ingredients
- 1 cup whole milk, warmed to 105-115°F
- 2 1/4 teaspoons active dry yeast
- 1/2 cup granulated sugar, divided
- 2 large eggs, room temperature
- 1/2 cup unsalted butter, melted, plus more for greasing
- 4 1/2 cups all-purpose flour, plus more for dusting
- 1 teaspoon salt
- 1/2 cup unsalted butter, softened (for filling)
- 1 cup packed light brown sugar (for filling)
- 2 tablespoons ground cinnamon (for filling)
- 1/2 cup cream cheese, softened (for icing)
- 1/4 cup unsalted butter, softened (for icing)
- 2 cups powdered sugar (for icing)
- 1 teaspoon vanilla extract (for icing)
- 2 tablespoons heavy cream or milk (for icing)
Instructions
- Activate the yeast: In a small bowl, combine the warm milk, yeast, and 1 tablespoon of the granulated sugar. Let stand for 5 to 10 minutes until foamy.
- Mix the dough: In a large bowl, whisk together the remaining granulated sugar, eggs, and melted butter. Add the yeast mixture. Gradually mix in the flour and salt until a shaggy dough forms.
- Knead: Turn the dough onto a lightly floured surface and knead for 8 to 10 minutes until smooth and elastic. Place the dough in a lightly buttered bowl, turning once to coat. Cover and let rise in a warm place for 1 to 1.5 hours, or until doubled in size.
- Prepare the filling: While the dough rises, mix the softened butter, brown sugar, and cinnamon together in a small bowl until well combined. This creates a rich, sticky filling.
- Shape the rolls: Punch down the risen dough. On a lightly floured surface, roll the dough into a large rectangle, about 12 by 18 inches. Spread the cinnamon-sugar filling evenly over the dough, leaving a small border on one long edge.
- Roll and cut: Starting from the long edge opposite the border, tightly roll the dough into a log. Pinch the seam closed. Cut the log into 12 equal pieces.
- Second proof: Arrange the rolls cut-side up in a greased 9×13 inch baking pan. Cover the pan loosely with plastic wrap or a clean towel. Let the rolls rise again in a warm spot for 30 to 45 minutes until puffy.
- Bake: Preheat your oven to 375°F (190°C). Bake for 20 to 25 minutes, or until golden brown. Do not overbake to keep them moist.
- Make the icing: While the rolls cool slightly, beat the softened cream cheese and butter until smooth. Gradually beat in the powdered sugar and vanilla extract. Add the heavy cream or milk one tablespoon at a time until you reach a thick, spreadable, yet gooey consistency.
- Glaze: Immediately spread the cream cheese icing generously over the warm rolls. Allow the icing to melt slightly into the rolls for that extra gooey texture before serving.
Notes
- For truly moist cinnamon rolls, pour 1/4 cup of heavy cream over the rolls immediately after they come out of the oven, before applying the icing. This adds moisture while they are still hot.
- If you prefer overnight cinnamon roll instructions, complete step 6, cover the pan tightly with plastic wrap, and refrigerate for up to 12 hours. In the morning, let them sit at room temperature for 1 hour before baking as directed.
- Use room temperature ingredients for the dough; this helps the yeast work better and results in a fluffier texture.
Nutrition
- Serving Size: 1 roll
- Calories: 450
- Sugar: 45
- Sodium: 320
- Fat: 22
- Saturated Fat: 13
- Unsaturated Fat: 9
- Trans Fat: 0.5
- Carbohydrates: 58
- Fiber: 2
- Protein: 7
- Cholesterol: 65