
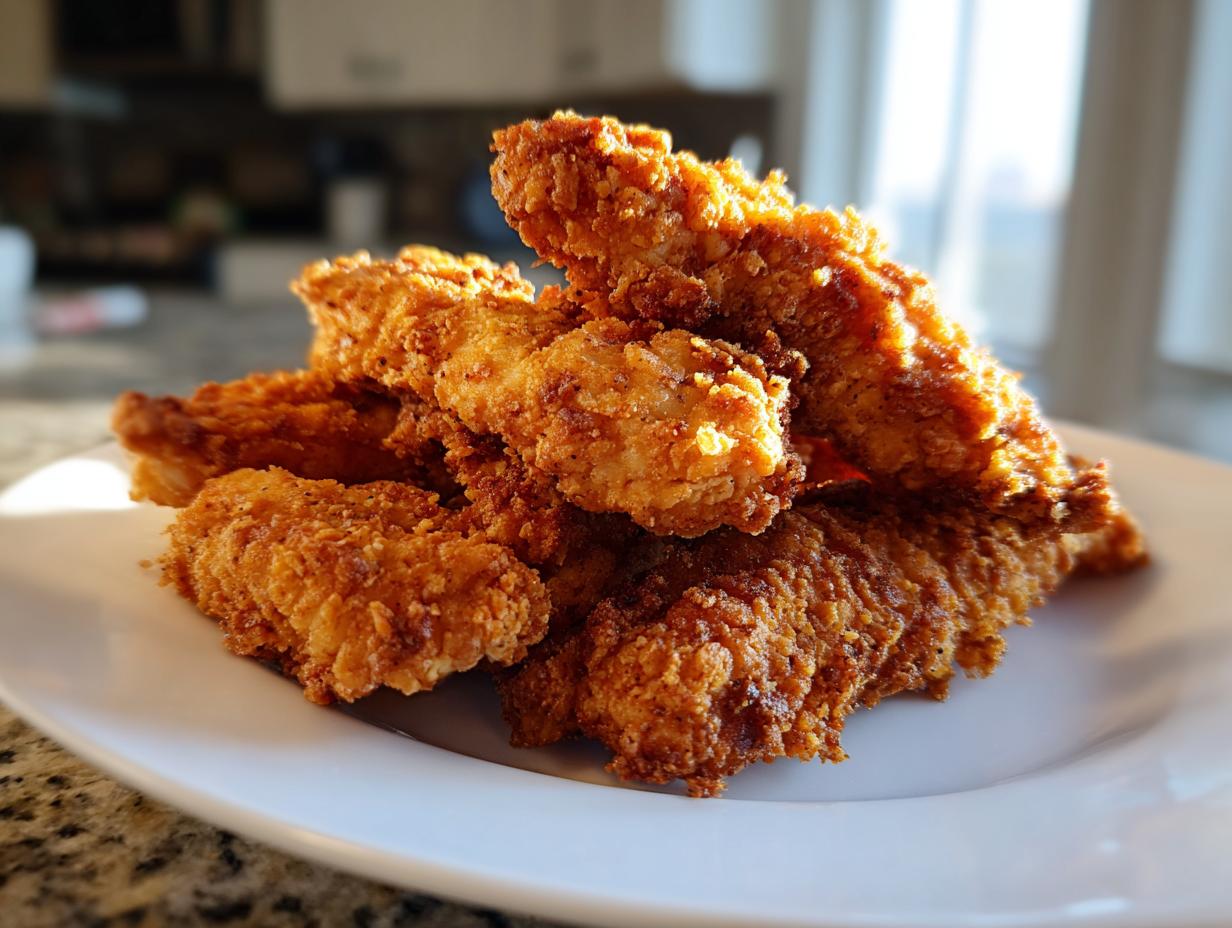
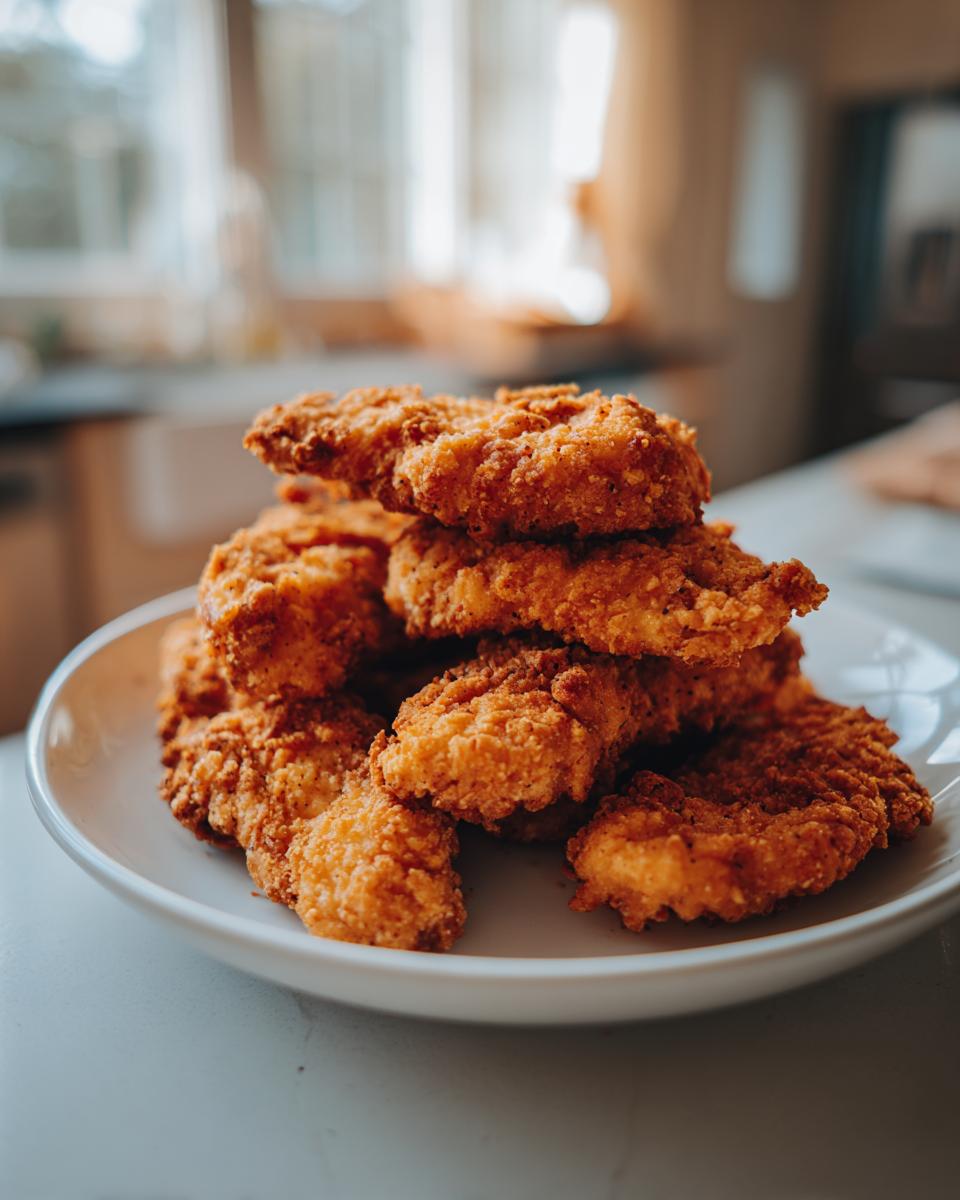
If you’ve ever sighed looking at those perfectly golden, crunchy chicken tenders in a restaurant window and thought, “I could never make that at home,” well, I’m here to show you just how wrong you are! As a former elementary teacher, my goal has always been making complicated things easy, and let me tell you, mastering air fryer chicken tenders is one of the simpler joys in life. This recipe is the breakthrough you need for that satisfying crunch on the outside and that unbelievably juicy center. We’re going to get those tenders done, seasoned right, and ready for a dipping sauce in under 30 minutes. Trust me, this method is foolproof, and I’ll walk you through every simple step.
- Why You Will Make These Air Fryer Chicken Tenders Again and Again
- Essential Ingredients for Perfect Air Fryer Chicken Tenders
- Step-by-Step Instructions for Crispy Air Fryer Chicken Tenders
- Tips for Achieving the Best Air Fryer Chicken Tenders Texture
- Flavor Variations for Your Air Fryer Chicken Tenders
- Serving Suggestions for Air Fryer Chicken Tenders
- Storage and Reheating: Keeping Air Fryer Chicken Tenders Crispy
- Frequently Asked Questions About Air Fryer Chicken Tenders
- Sharing Your Homemade Chicken Tenders
Why You Will Make These Air Fryer Chicken Tenders Again and Again
I know you’re busy balancing life, and that’s why I love this recipe so much. It solves the age-old dilemma: fast food quality without the drive-thru line or the guilt!
- Speedy Dinners: We’re talking about ready-to-eat air fryer chicken tenders in about 25 minutes total. Perfect for those evenings when dinner needs to happen fast.
- The Texture Magic: You get that classic, irresistible crunch from the breading (or just great seasoning if you skip it!) while keeping the inside wonderfully juicy.
- Healthier Choice: Since the air fryer does the heavy lifting, you use barely any oil. It’s a guilt-free fried chicken experience right on your counter.
- Family Favorite Chicken: These are always a hit with the grandkids. If you are looking for great quick healthy lunch ideas, make a double batch!
Essential Ingredients for Perfect Air Fryer Chicken Tenders
When I teach people how to make these homemade chicken tenders, I stress that the ingredient quality sets the stage. You can’t rush this part, even though the total time is quick! We need to make sure the chicken is prepped right so our spice blend really clings. Remember, for anything you want crispy in the air fryer, the moisture has to go!
Core Seasoning and Chicken Prep
This is the flavor base that works whether you bread them or not. It gives you that classic, savory goodness everyone expects from easy chicken tenders.
- 1.5 pounds of boneless, skinless chicken tenderloins (make sure they are trimmed evenly!)
- 1 teaspoon salt
- 1 teaspoon black pepper
- 1 teaspoon garlic powder
- 1 teaspoon onion powder
- 1/2 teaspoon paprika
- Cooking spray or 1 tablespoon of olive oil (this is non-negotiable for that lovely exterior moisture barrier!)
Optional Breading Station Components
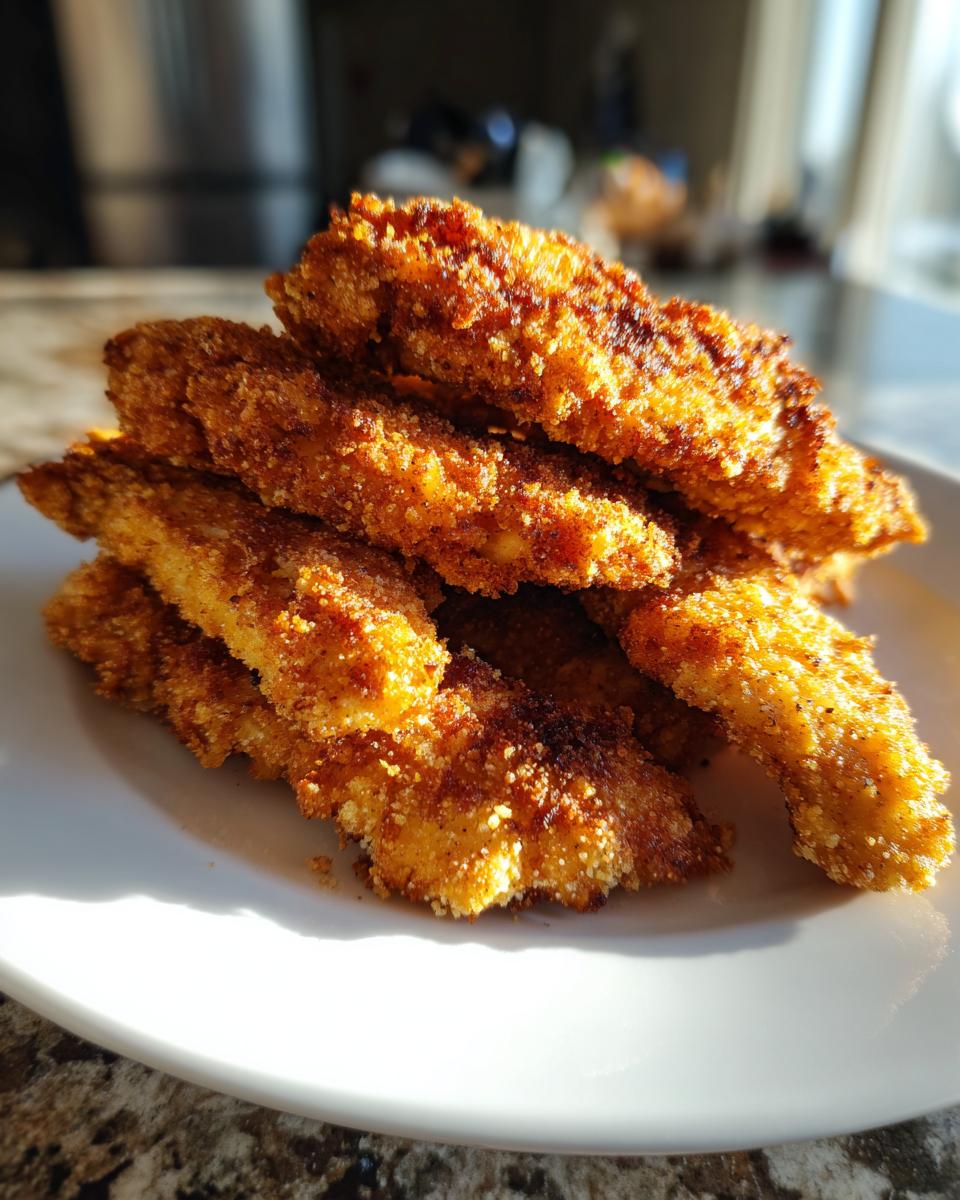
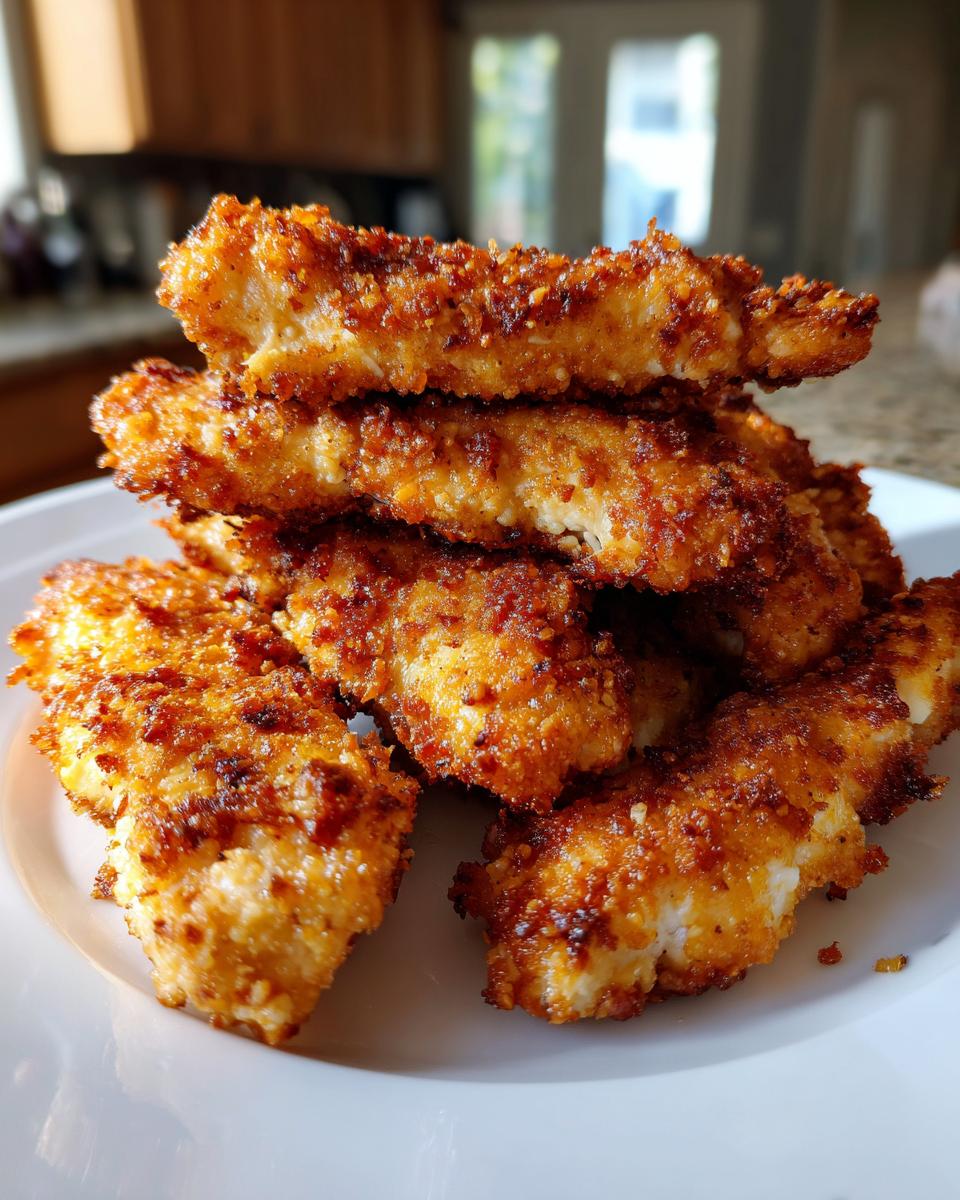
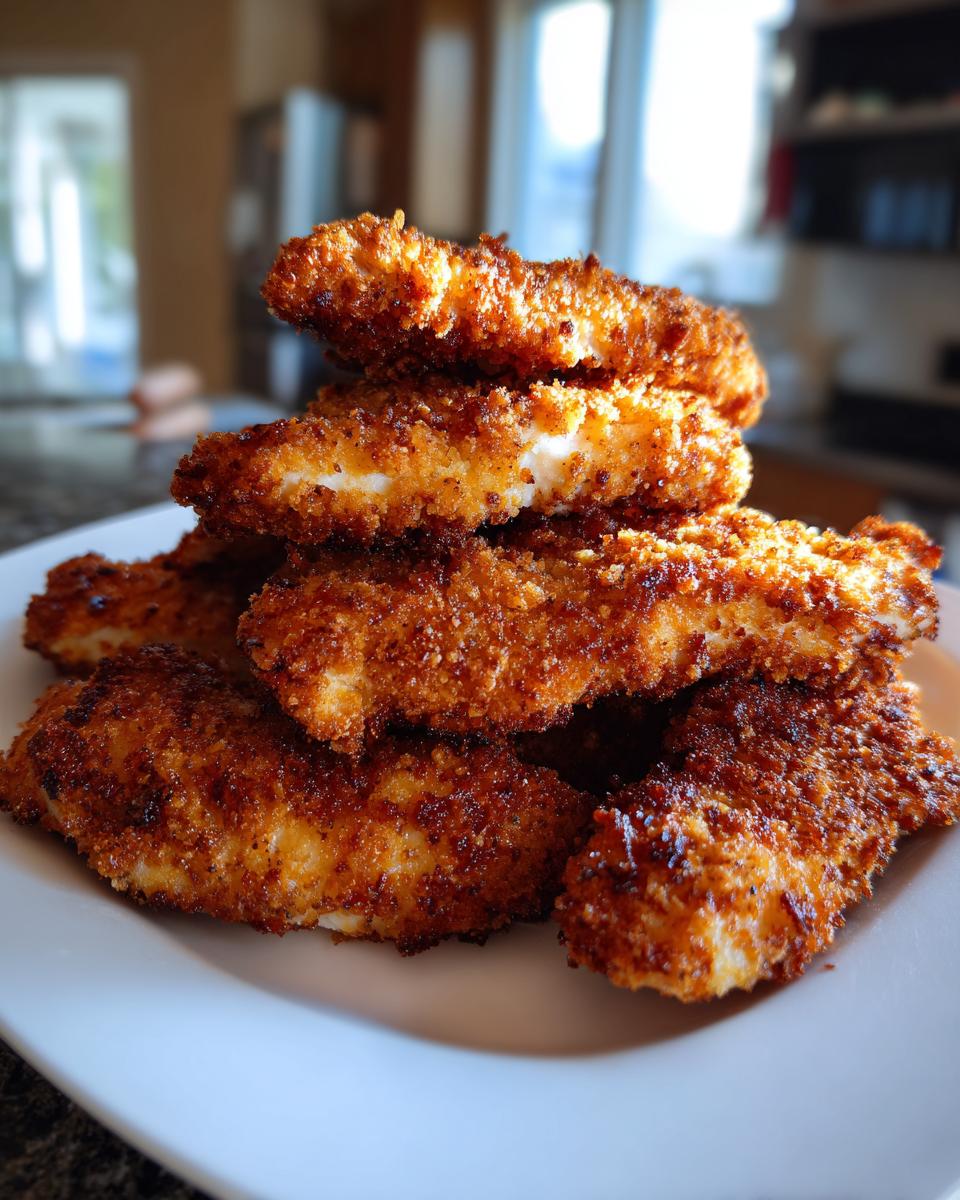
If you want that extra-thick, restaurant-style crunch that makes these air fryer chicken tenders so famous, you’ll need this little setup. Panko breadcrumbs are my absolute favorite here; they give a lighter, crispier texture than regular crumbs, trust me on this one.
- 1/2 cup all-purpose flour
- 1 large egg, beaten well
- 1 cup panko breadcrumbs
Step-by-Step Instructions for Crispy Air Fryer Chicken Tenders
Now we put everything together! Teaching cooking means breaking it down into tiny, manageable steps, so you never feel lost. We are looking for the best quick weeknight dinners here, so efficiency matters. Once you master this flow, you won’t even need the recipe card!
Preparation and Seasoning
The first and most important step for beautiful crispy chicken recipe results is moisture control! Take your 1.5 pounds of chicken tenderloins and place them on a plate lined with paper towels. You need to pat them *aggressively* dry. I mean it—any surface water turns to steam and keeps your crust from getting crisp. Once they are bone dry, toss those naked tenders right into a bowl with your salt, pepper, garlic powder, onion powder, and paprika. Make sure every piece is evenly coated before we move on.
Preparing the Air Fryer Chicken Tenders: Breading or Oiling
You will now choose your path! If you chose the breading option, set up three shallow dishes: one with flour, one with the beaten egg, and one with the panko. Dip the seasoned tender first in the flour, let the excess fall off, then dip it in the egg, and finally, press it firmly into the panko until it’s totally covered. For the no breading option, simply give the seasoned chicken a light spray or brush with your cooking spray or oil.
Air Frying for Maximum Crunch
We always preheat our appliances here! Make sure your air fryer is set to 400°F (200°C) before anything goes in. Place the tenders in the basket in a single layer. If they overlap, they steam instead of crisp, so work in batches if you have to! Air fry for about 10 to 14 minutes total. You must flip them at the halfway mark. My little secret for those breaded air fryer chicken beauties? Give the top of the breading a quick extra mist of oil spray right after you flip them—it helps them turn that perfect golden brown color. You know they are done when they hit 165°F (74°C) internally. Serve immediately with some of my favorite simple weeknight dinners sauce.
Tips for Achieving the Best Air Fryer Chicken Tenders Texture
Listen, achieving that super crispy exterior on your air fryer chicken is where most people trip up. It’s not just about the breading; it’s about airflow! I learned this lesson the hard way years ago when I tried to cram enough chicken in for my entire bridge club in one batch. What I pulled out was soggy and sad—definitely not the crispy chicken recipe I was aiming for!
The absolute key to getting that beautiful, golden texture, whether you went breaded or chose the no breading chicken tenders route, is spacing. You must cook them in a single layer. If those little pieces are touching, steam gets trapped, and you end up boiling the crust instead of crisping it. Pull your batches out and give them distance! This is also why a good quality cooking spray matters if you skip the flour and egg—a fine mist ensures all surfaces get that protective oil layer needed for browning.
For more tricks on how to use your wonderful appliance, check out my main guide on the best air fryer recipes for making sure you get the most out of it every time you cook.
Flavor Variations for Your Air Fryer Chicken Tenders
Now that you have the technique down for wonderfully juicy chicken air fryer tenders, you can really start playing around! The base seasoning is great, but sometimes you need a little zip, especially if you are serving these to adults.
If you want something sweet and savory, toss your cooked tenders in a quick glaze made from honey, melted butter, and garlic. Oh my goodness, it’s amazing! Or, for a little kick, add 1/2 teaspoon of cayenne pepper right into the dry seasoning mix before coating them. If you love Italian flavors, don’t be afraid to dust heavily with dried oregano and basil before they hit the panko. For another fun idea, check out my recipe for hot honey chicken tenders!
If you are looking for ways to use a different sauce, this fantastic article on air fryer chicken tenders gives a few great dipping ideas too.
Serving Suggestions for Air Fryer Chicken Tenders
Because these air fryer chicken tenders cook up so quickly, they pair perfectly with sides that don’t take forever either! For a true kid friendly dinner, you can’t beat serving them alongside some quick oven fries or some steamed broccoli you can toss with a little butter.
If you want something a little heartier for a healthy chicken dinner, a simple, crisp green salad is wonderful. Or, if you are feeling like having mashed potatoes (which are totally worth the effort!), you can drizzle your tenders with some of my creamy easy chicken gravy recipe without drippings for a comforting meal!
Storage and Reheating: Keeping Air Fryer Chicken Tenders Crispy
Nobody likes sad, soggy leftovers, especially when you worked hard to get those perfect air fryer chicken tenders nice and crispy the first time around! The good news is that these are fantastic for leftovers, provided you store them the right way. Honestly, if you can make them ahead of time, that just removes stress from another busy day, right?
When you have extras—and you probably will, because they are addictive—let them cool down completely on a wire rack first. That cools the exterior and stops condensation from forming. Once cooled, pop them into a shallow, airtight container. I try not to stack them too high, maybe just two layers max, to keep them from squishing into each other. Keep them in the fridge for up to three days. If you want to prep these even further, check out my thoughts on make ahead chicken prep!
Now for the reheating magic! Forget the microwave unless you absolutely must; it makes everything rubbery. The air fryer is your best friend here. Set it back to 375°F (or even 400°F if they are totally cold). Pop the tenders in a single layer—yes, spacing matters even for leftovers!—and cook for about 4 to 6 minutes. Give them a shake halfway through. They come out hot, golden, and with almost all of that glorious crunch back. It’s astonishing how well the air fryer can revive a leftover!
Frequently Asked Questions About Air Fryer Chicken Tenders
I know sometimes after reading all those steps, a few little questions pop up. That’s normal! When I was first learning to rely on my air fryer for easy chicken tenders, I had a whole notebook full of scribbled questions myself. Here are the ones that seem to come up most often when folks are making this crispy chicken recipe.
Can I skip oil entirely when making no breading chicken tenders?
You can certainly try! But honestly, for the best results in texture and color, I highly suggest at least a light spray. Without any fat, the seasoning can dry out rather than crisp up, and you lose that lovely golden hue. If you are aiming for truly oil free chicken tenders, you might need slightly less time, but expect a paler color. If you want the best flavor, check out this guide on no breading chicken tenders for tips on maximizing seasoning.
What is the absolute best way to prevent soggy bottoms?
This is the eternal struggle with any Air Fryer Chicken recipe that uses breading! The biggest mistake is overcrowding. If the pieces touch, they steam. Cook in a single layer! Second, if your machine tends to cook unevenly, sometimes flipping is not enough—you might need to gently lift the tenders halfway through so the trapped moisture can escape. Don’t put them on a solid tray underneath; let the air flow freely!
Can I use frozen chicken tenderloins instead of fresh?
It’s really not my favorite way to do it, but I know life happens! If you must use frozen, do not put them straight into the air fryer. You have to thaw them fully first. Start by patting them as dry as possible, then season them—they won’t absorb seasoning well if they are still slightly icy. They will also take longer to cook, so check the temperature carefully (165°F/74°C) and aim for thicker simple chicken bites for better results.
What is the best internal temperature for juicy chicken air fryer?
Safety first, always! Chicken is fully cooked and safe to eat when it reaches an internal temperature of 165°F (74°C). Because the air fryer cooks hot and fast, these little pieces cook so quickly that if you let them go much past 170°F, they will definitely dry out. Pull them right when that thermometer hits 165°F for the juiciest result possible. For more useful information on using your appliance, look through my general air fryer dinner ideas!
Sharing Your Homemade Chicken Tenders
There you have it! Everything you need to know to produce the crispiest, juiciest batch of air fryer chicken tenders your family has ever tasted. This is the kind of recipe—reliable, quick, and delicious—that I live for here in Carla’s kitchen. It’s the food that keeps everyone gathered around the table.
Now that you’ve tried the breaded, or maybe the no breading chicken tenders method, I would just be tickled pink if you came back and let me know how they turned out! Did your kiddos ask for seconds? Did they stay crunchy for your lunch the next day? Please leave a star rating below so other busy cooks know just how dependable this recipe is.
If you are looking for more straightforward, family-approved recipes just like this one, I invite you to visit my About Page to see more about my philosophy on simple, heartfelt home cooking. Happy cooking, everyone!
PrintSuper Crispy Air Fryer Chicken Tenders

Make incredibly crispy and juicy chicken tenders in your air fryer. This recipe provides simple steps for both a lightly breaded version and a no-breading option for a quick, healthy weeknight dinner or snack.
- Prep Time: 10 min
- Cook Time: 14 min
- Total Time: 24 min
- Yield: 4 servings 1x
- Category: Dinner
- Method: Air Frying
- Cuisine: American
- Diet: Low Fat
Ingredients
- 1.5 lbs boneless, skinless chicken tenderloins
- 1 teaspoon salt
- 1 teaspoon black pepper
- 1 teaspoon garlic powder
- 1 teaspoon onion powder
- 1/2 teaspoon paprika
- Cooking spray (or 1 tablespoon olive oil for brushing)
- For Breading Option: 1/2 cup all-purpose flour, 1 large egg (beaten), 1 cup panko breadcrumbs
Instructions
- Pat the chicken tenders completely dry using paper towels. This step helps achieve maximum crispiness.
- In a bowl, toss the dry chicken tenders with salt, pepper, garlic powder, onion powder, and paprika until evenly coated.
- For Breaded Tenders: Set up a dredging station: one shallow dish with flour, one with the beaten egg, and one with panko breadcrumbs. Dip each seasoned tender first in flour (shaking off excess), then in egg, and finally press firmly into the panko breadcrumbs.
- For No Breading Tenders: Lightly spray or brush the seasoned tenders with cooking spray or olive oil.
- Preheat your air fryer to 400°F (200°C).
- Arrange the tenders in a single layer in the air fryer basket. Do not overcrowd the basket; work in batches if necessary.
- Air fry for 10 to 14 minutes, flipping the tenders halfway through the cooking time. Cooking time will vary based on thickness.
- For the breaded option, spray the tops lightly with cooking spray after flipping for extra golden color.
- The chicken is done when the internal temperature reaches 165°F (74°C) and the exterior is golden brown and crispy.
- Serve immediately with your favorite dipping sauce for a family favorite chicken meal.
Notes
- To maximize crispiness, ensure your chicken is very dry before seasoning or breading.
- For the no-breading option, using a light spray of oil is key to getting a good exterior texture.
- These tenders reheat well in the air fryer for a quick lunch the next day.
Nutrition
- Serving Size: 4 tenders
- Calories: 250
- Sugar: 1
- Sodium: 350
- Fat: 6
- Saturated Fat: 1
- Unsaturated Fat: 5
- Trans Fat: 0
- Carbohydrates: 10
- Fiber: 1
- Protein: 38
- Cholesterol: 110