
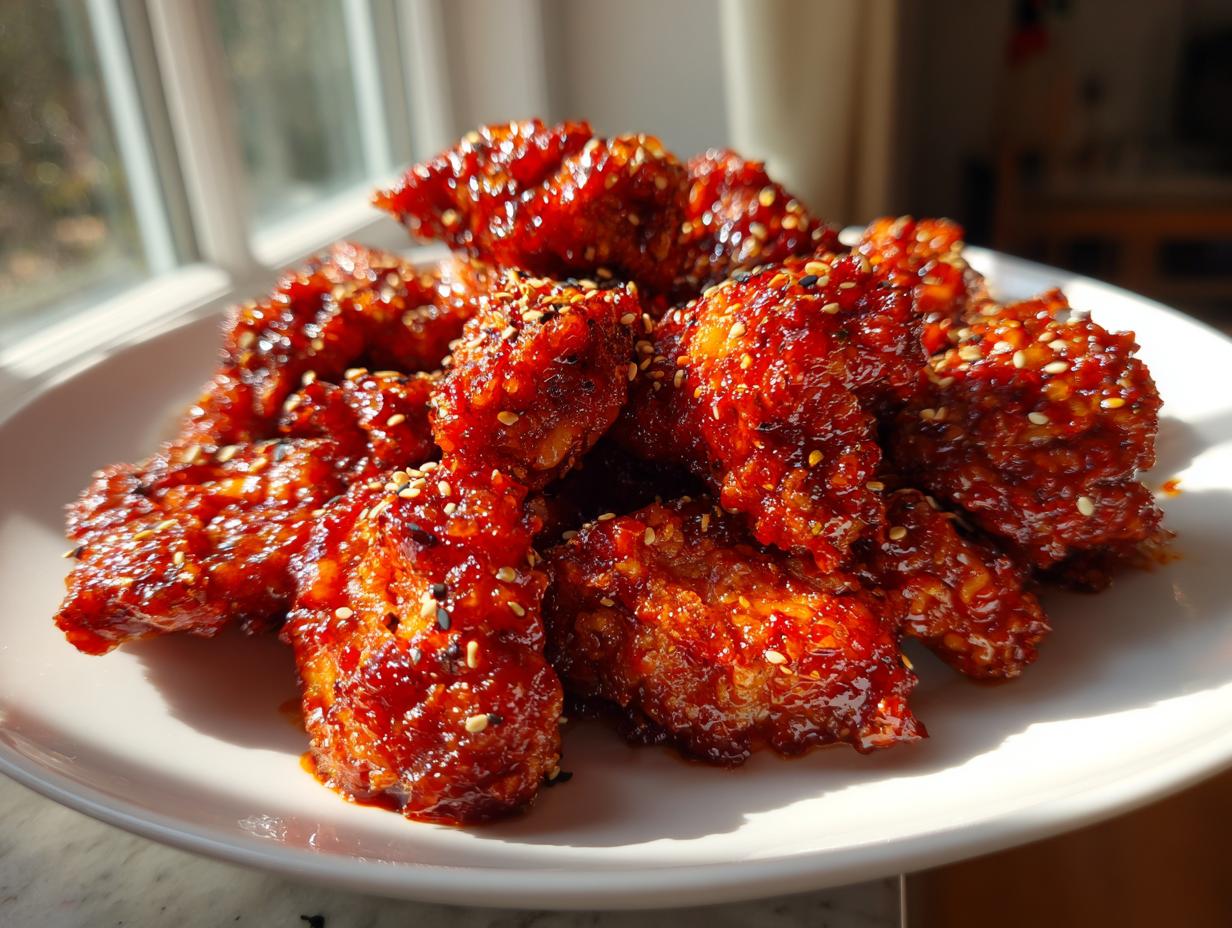
Oh, honey, stop sending your hard-earned money to the takeout places! You know that Korean fried chicken that shatters when you bite into it? The kind that stays perfectly crisp even when it’s drowning in that sticky, sweet heat? I promise you, making the ultimate double-fried Korean fried chicken recipe at home is not only possible, but it’s unbelievably rewarding. After teaching third grade for thirty years, I learned a thing or two about breaking down complicated processes into simple, clear steps. Trust me, mastering the double-fry technique for this dish means you get unbelievably juicy meat surrounded by the crunchiest coating imaginable, every single time. It’s time to bring the best of Seoul right to your dinner table!
- Why This korean fried chicken recipe Delivers Takeout Quality
- Gathering Ingredients for Your korean fried chicken recipe
- Step-by-Step Instructions for the Double Fried Chicken Technique
- Tips for Success with Your Authentic Korean Chicken
- Serving Suggestions for Your Party Chicken Appetizer
- Storage and Reheating Instructions for Crispy Fried Chicken
- Frequently Asked Questions About This korean fried chicken recipe
- Estimated Nutritional Data for This Chicken Recipes with Sticky Sauce
- Share Your Homemade Fried Chicken Crispy Creations
Why This korean fried chicken recipe Delivers Takeout Quality
When you taste this chicken, you’ll see why folks save this recipe again and again. It’s not just about tossing some wings in hot sauce; it’s about technique. As a teacher, I always say that understanding the ‘why’ helps you succeed, and that’s true with frying, too! We are aiming for that legendary crunch that stays firm, not soggy.
- For those melt-in-your-mouth results, we rely on gentle handling and specific temperature controls.
- We use a thin batter mixture that clings just right, creating that paper-thin crust you rarely get at home.
- The payoff for following these steps is the incredibly satisfying sound every time you take a bite!
Achieving Juicy Fried Chicken Inside
The absolute first step, before you even look at the batter, is making sure your chicken pieces are bone-dry. That means using paper towels and really patting them down—moisture is the enemy of crispiness! Our batter is intentionally thin, almost watery. When we start the first fry low and slow at 325°F, that thin coat melts in evenly, allowing the heat to work its way slowly to the center. This cooks the meat perfectly through without letting all the good, natural juices escape.
The Secret to Ultra Crispy Korean Fried Chicken Coating
This is where the magic happens, darling. We aren’t just using flour; the addition of potato starch or cornstarch is non-negotiable. That starch is what gives us that signature, light, shatteringly crisp exterior. But here’s the real trick: you must let the chicken rest on the rack for a good 15 minutes after the first fry. This allows the moisture inside to redistribute and sets that layer firm. When you introduce it back into the hotter oil (375°F), that set coating puffs up and becomes unbelievably crunchy. That rest period is the key to that sought-after, ultra crispy Korean fried chicken coating.
Gathering Ingredients for Your korean fried chicken recipe
Alright, let’s talk about what you need to pull this off! When it comes to serious crunch, the measurements in the batter and the sauce can’t be guesses. We need consistency to ensure everything bakes up just right. You’ll find that using specific ingredients, like potato starch, really changes the texture for the better. Don’t forget to have your quick, healthy lunch ideas ready for leftovers, because you’ll have plenty if you follow these amounts!
For the Chicken and Batter
We start with 3 pounds of chicken pieces—I love using wings and drumettes, but boneless thighs work great too. Just make sure they are cut to a good, consistent serving size. For the coating itself, be precise:
- 1 cup all-purpose flour
- 1/2 cup potato starch or cornstarch (this is important!)
- Salt, pepper, and baking powder for a little lift
- A blend of 1/2 cup cold water mixed with one egg for the liquid anchor
For the Sweet and Spicy Gochujang Glaze
This sauce is what makes it Sweet and Spicy Chicken night! It’s all about balancing that heat with a little sweetness. Make sure your garlic is finely minced—nobody wants big chunks of raw garlic coating their beautiful crust.
- The base is 1/4 cup of that wonderful Gochujang (Korean chili paste).
- Balance the heat with 1/4 cup of honey or brown sugar.
- Add soy sauce, rice vinegar, fresh ginger, and a touch of sesame oil for depth.
Step-by-Step Instructions for the Double Fried Chicken Technique
Now for the fun part—getting that legendary crunch! This is where mastering the Double Fried Chicken Technique comes into play. Don’t worry if your kitchen feels a bit hectic; just move logically from one step to the next. Remember, this method is what keeps the inside juicy while building that incredible golden shell. You can find some great tips for smoother simple weeknight dinners, but this one requires full attention!
Preparing the Batter and Coating
First things first: give those chicken pieces one last pat down with a paper towel. Take your dry and wet ingredients and whisk them together until they are just combined. I’m talking lumpy, slightly thin batter, folks. If you mix out all those lumps, you lose the tiny air pockets that expand in the fryer, leading to a tougher crust. Once you coat the chicken—making sure you let the excess drip off—you are ready for the oil.
The First Fry: Cooking the Chicken to Juiciness
Get your oil heated up to 325°F (160°C). This lower temperature is crucial for cooking the chicken all the way through without burning that delicate first coating. Carefully place your battered pieces in, making sure not to crowd the pot—we need the oil temperature to stay steady! Fry them for about 8 to 10 minutes. Once they look lightly golden, pull them out and place them on a wire rack. Now, this next step is essential: you must let them rest for a full 15 minutes. Don’t skip it!
Making the Gochujang Glazed Chicken Sauce
While the chicken is taking its much-needed rest, stir together all your sauce ingredients in a small saucepan. Bring that mixture to a gentle simmer over medium heat. You are cooking this just until it reduces slightly and coats the back of a spoon—maybe 3 to 5 minutes. As soon as it thickens, pull it right off the heat so it doesn’t burn while you tackle the final fry.
The Second Fry: Creating the Ultimate Crunch
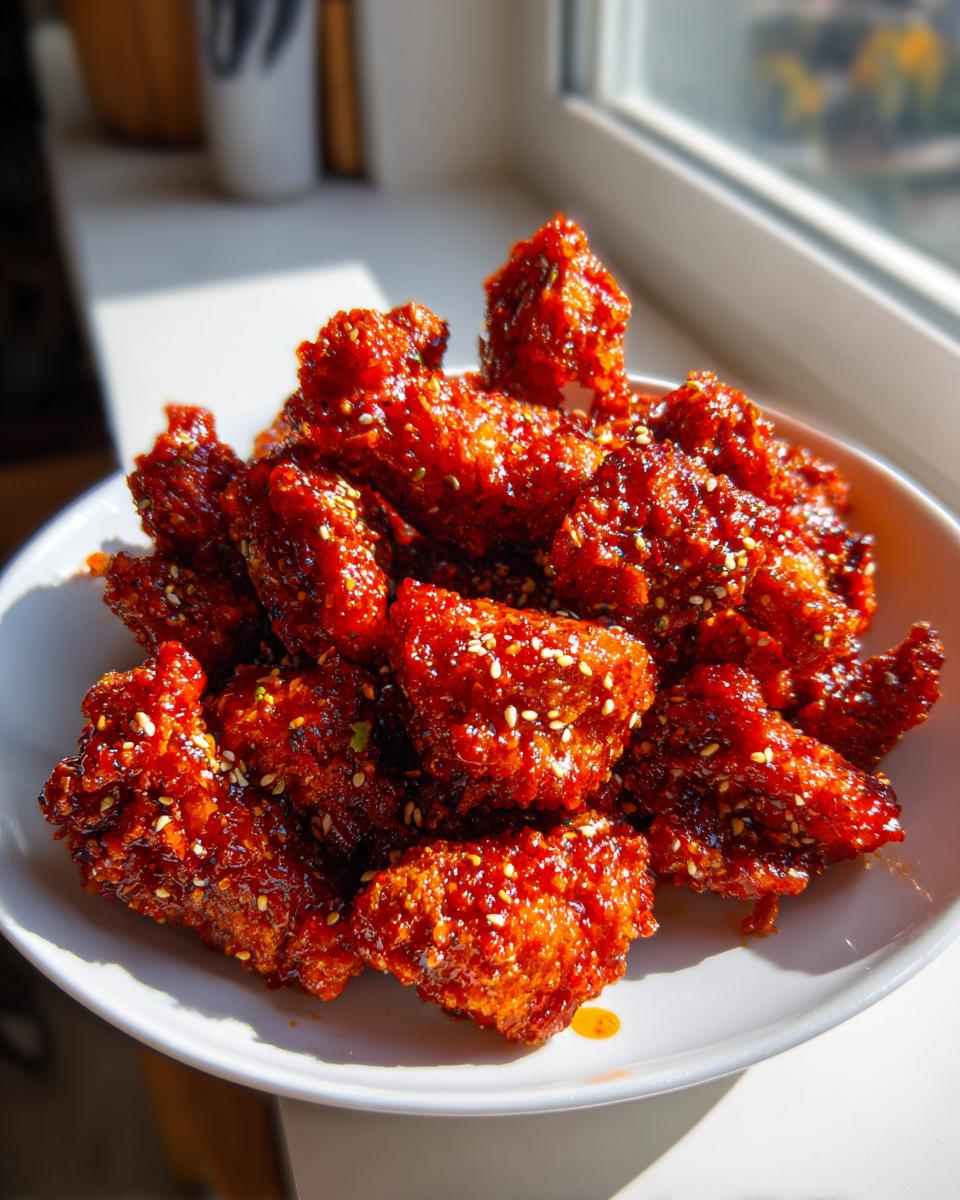
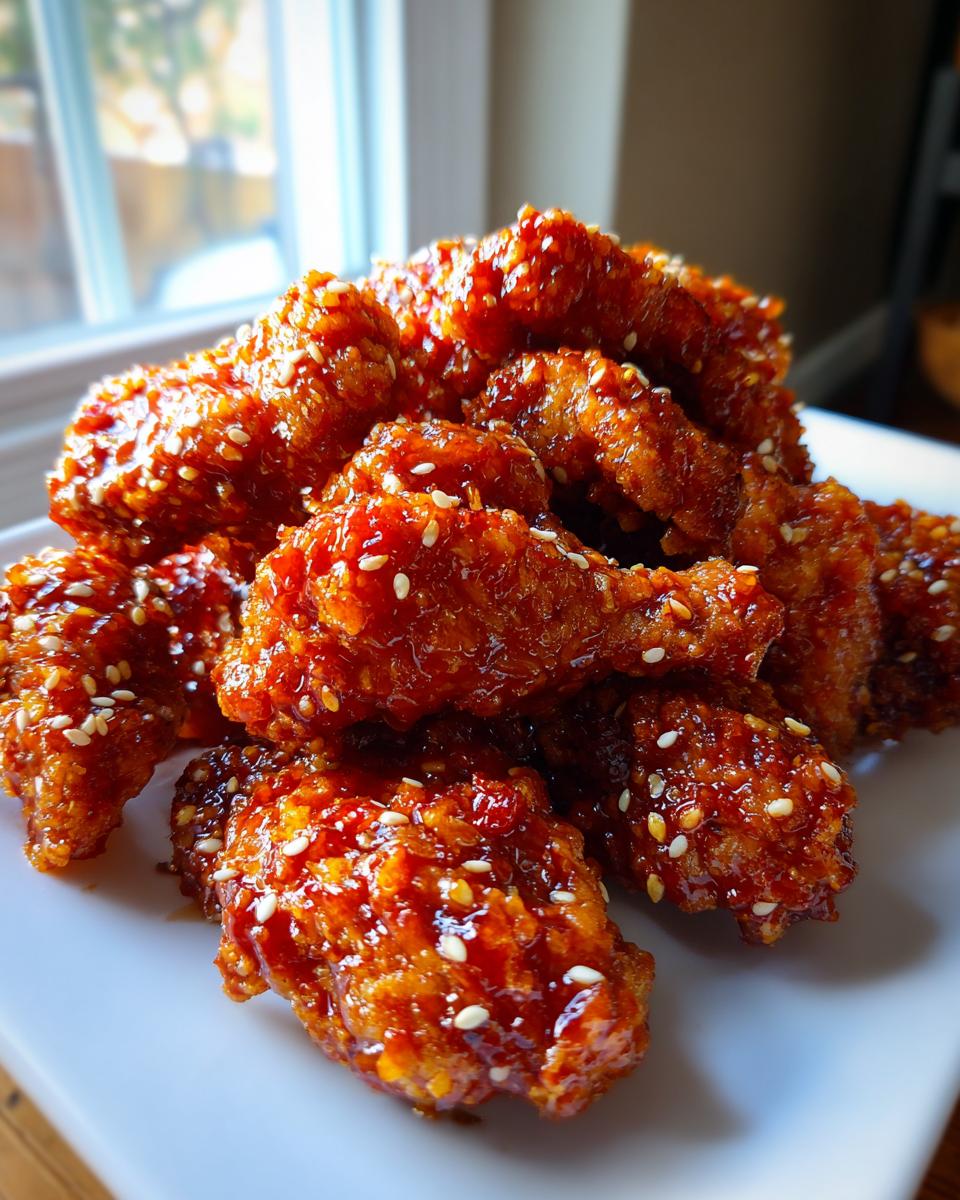
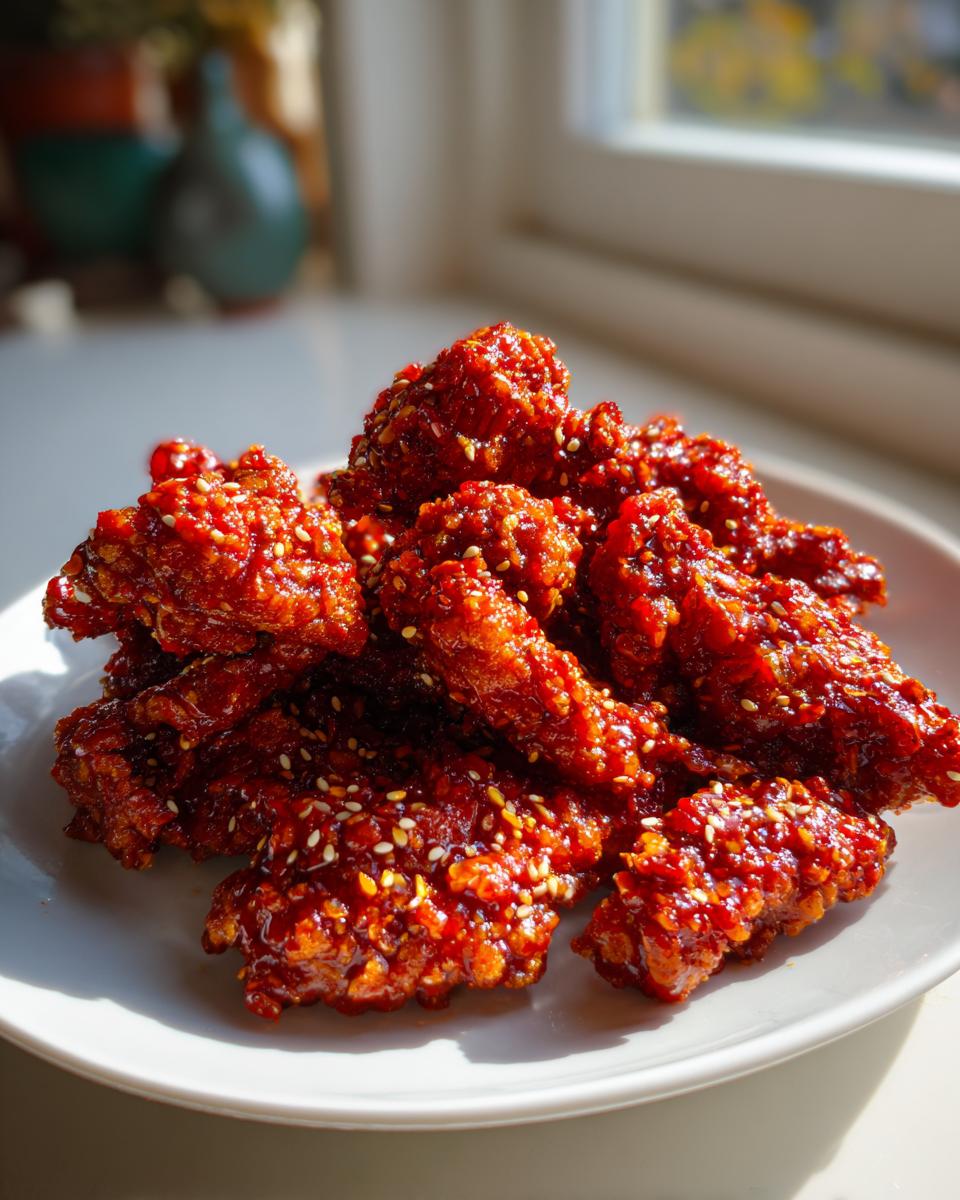
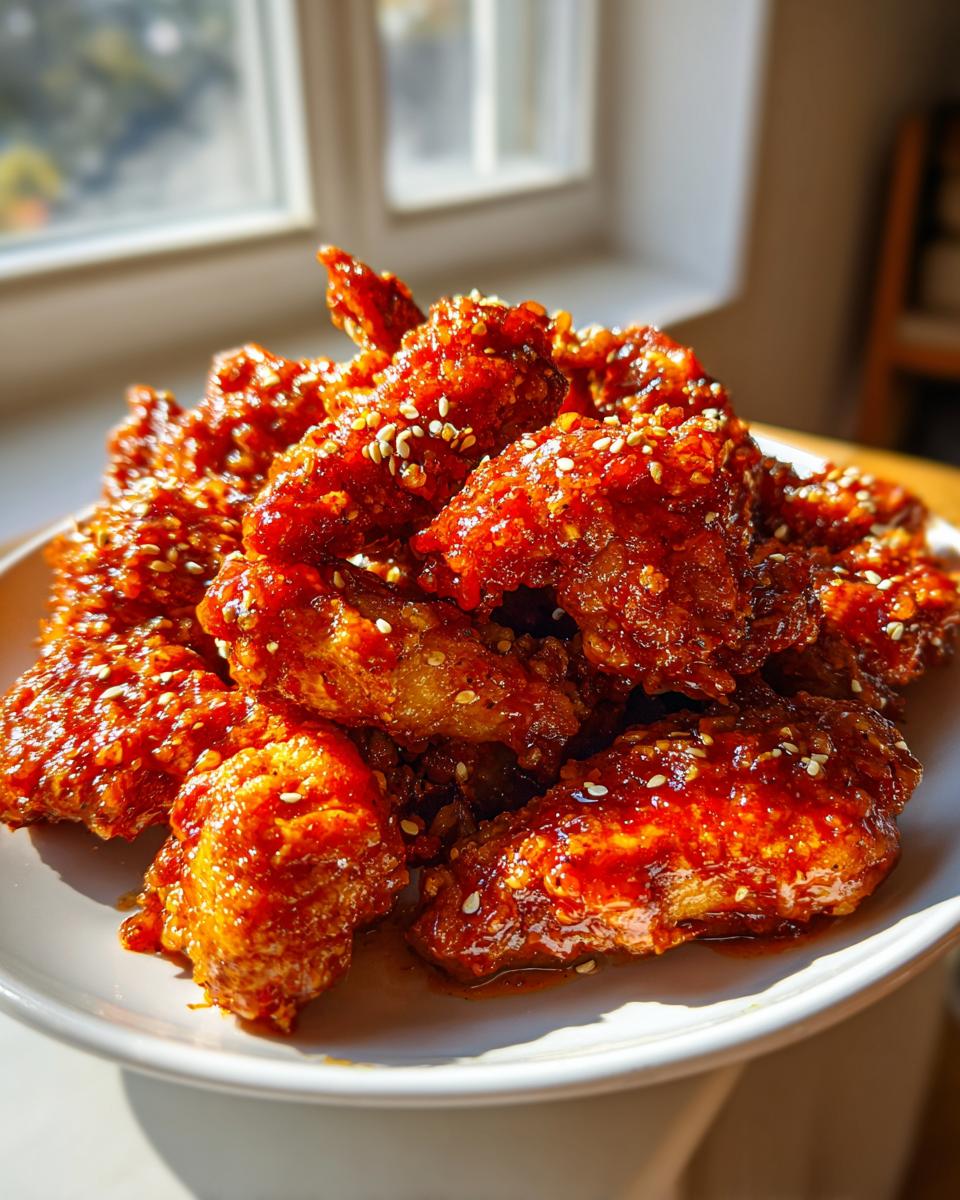
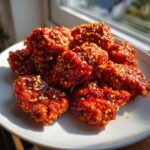
Time to turn up the heat! Raise your oil temperature to a hotter 375°F (190°C). Drop those rested chicken pieces back into the hot oil for just 2 to 4 minutes more. This second fry is incredibly quick; it’s just designed to push out any remaining internal moisture and give you that thin, golden, Homemade Fried Chicken Crispy shell we are famous for. Pull them out, drain quickly, and immediately toss them with your sauce!
Tips for Success with Your Authentic Korean Chicken
Now that you’ve mastered those two crucial frying stages, I want to share a couple of my tried-and-true pointers that elevate this from a good Authentic Korean Chicken attempt to a show-stopping, restaurant-quality wing night. Remember, patience and precision are everything when dealing with hot oil, but these little adjustments make all the difference between merely good fried chicken and the kind that makes people rave!
Oil Temperature Management
If you take one thing away from my teaching career, let it be this: thermometers are your best friend when frying. You absolutely cannot eyeball this step, especially when moving from the 325°F first fry to the 375°F second fry. If your oil isn’t hot enough during that second round, that beautiful crisp coating will absorb oil instead of crisping up, leaving you with a greasy mess. Please, get yourself a good deep-fry thermometer. It’s necessary for that perfect texture.
Alternative Glaze Options
While I just adore that sweet and spicy kick from the Gochujang, I know not everyone in the family is a chili-head! If you need a milder option, I highly recommend using the soy-garlic sauce mentioned in the notes. It’s just as addictive and sticky, but relies on savory and sweet notes instead of intense heat. It’s a great way to make sure everyone gets seconds, even the little ones. You can find a link to another fantastic fried recipe inspiration right here.
Serving Suggestions for Your Party Chicken Appetizer
Those gorgeous pieces of Party Chicken Appetizer are rich, sticky, and wonderfully intense. Since they are so flavorful on their own, the best sides are those that offer a bright, acidic break! They cut right through that richness from the frying oil and balance the sweetness of the glaze beautifully. You don’t want heavy sides here; you want crunch and zing.
I always make a big batch of quick pickles. Seriously, sliced cucumbers or daikon radish tossed with a little rice vinegar, sugar, and salt are the perfect palate cleanser. And of course, you have to have some kind of slaw nearby, right? A simple, crunchy cabbage slaw, maybe with a light dressing, is wonderful. If you are looking for something a little different but still bright, you must try my Mandarin Orange Salad—it’s a surprising hit next to savory dishes!
When serving, put the sticky chicken on a platter lined with parchment paper, and arrange those pickles and slaw around the edges. It looks stunning and tastes even better!
Storage and Reheating Instructions for Crispy Fried Chicken
Oh, the eternal struggle: how do we keep this magnificent Crispy Fried Chicken intact until the next day? Honestly, if you can eat it all right after you toss it in the glaze, that’s the dream! But if you do have leftovers, you need to handle them carefully to preserve that precious crunch.
My biggest piece of advice is to avoid the refrigerator if you can. The steam trapped in the fridge is Kryptonite for a good coating. If you must store it, place the chicken in an airtight container, but try to let it cool slightly first. Never put hot food directly into a sealable container—that’s just asking for a soggy mess the next morning!
When it’s time to reheat, the microwave is absolutely forbidden; it’s just going to steam everything soft again. You want to bring back that crispness! Pop the remaining chicken onto a baking sheet in a preheated 375°F oven for about 8 to 10 minutes. If you have an air fryer, that works beautifully too—just a few minutes at 360°F should get that satisfying crackle back. For more crispy adventures, check out my recipe for crispy air fryer chicken wings!
Frequently Asked Questions About This korean fried chicken recipe
I get so many wonderful emails asking for clarifications about this recipe, especially from folks trying it for the first time. It’s completely normal to have questions when you are tackling deep frying! Don’t hesitate to reach out if you need more help—you can always drop me a line on my contact page. Here are a few things I hear most often about making the best korean fried chicken recipe.
Can I use chicken breast instead of wings or thighs?
You certainly can, but you have to be careful! Boneless chicken thighs are my top choice because they have a bit more fat, which keeps them nice and juicy even after that high-heat double-fry. If you use breast meat, cut it into smaller, uniform pieces—maybe 1-inch cubes—and watch the first fry very closely. Breast cooks faster, so you risk drying it out if you leave it in too long before the second crisping round.
What is the best oil to use for deep frying?
For deep frying, you need an oil that can handle high heat without smoking immediately. I stick with plain old vegetable oil, just like the recipe states, because it has a really high smoke point and a neutral flavor. Canola oil is another excellent, dependable choice. Since we are frying in two stages at two different temperatures, having a neutral oil allows the flavor of the chicken and that spicy glaze to really shine through!
How can I make this an Easy Asian Dinner idea without deep frying?
I understand that deep frying isn’t always practical for an Easy Asian Dinner idea on a Tuesday night! While I must be honest—the signature, paper-thin, shatteringly crisp coating of authentic KFC comes solely from the double-fry method—you can use an air fryer. Just use slightly less batter, coat lightly, and air fry until golden brown. Just know upfront that it will be crunchy, but it won’t have that specific, thin, crackly texture that the oil delivers. It’s a good alternative, but the frying method is still the gold standard!
Estimated Nutritional Data for This Chicken Recipes with Sticky Sauce
Now, I know some of you are watching your macros, and others are just curious! When you’re making something as delightfully rich as this chicken recipe with sticky sauce, it’s good to have an idea of what you’re working with. Since this recipe involves deep frying and a sweet glaze, the numbers will reflect that delicious decadence!
Please keep in mind that these numbers are genuinely estimates. Depending on the cut of chicken you use (wings versus thighs) and the brand of Gochujang or honey you pick up at the store, things can shift just a little bit. This data is calculated based on the recipe as written for four average servings.
- Serving Size: 4 pieces
- Calories: 650
- Fat: 38g (9g saturated fat)
- Carbohydrates: 45g
- Protein: 35g
- Sugar: 22g
- Sodium: 950mg
It certainly is a treat, but one worth making for a special game day or when you want to treat the family! These estimates give you a solid benchmark for enjoying this fantastic indulgence.
Share Your Homemade Fried Chicken Crispy Creations
Oh, I truly hope you gave that double-fry method a real shot! When you sit down with that plate of golden, crackling chicken, I want you to feel proud of the work you put in. This recipe—my homemade fried chicken crispy version—was perfected over many tries on my own stovetop, so I know how exciting it is when it finally works perfectly!
If you made this amazing Korean fried chicken recipe, please hop down to the comments section right below this and let me know how it went! Did that 15-minute rest period make the coating truly shatter? Did the Gochujang glaze stick just right? Leave me a rating—let those stars tell other cooks just how reliable this recipe is. I love seeing your beautiful creations, so please snap a picture and share it on social media! Tag me so I can admire your perfectly double-fried success. You can read a little bit more about my philosophy on family recipes over on my About page.
Every time one of you tries a recipe and shares your results, it just reminds me why I started this little spot online. Happy eating!
PrintUltimate Double-Fried Korean Fried Chicken with Sticky Gochujang Glaze
Make restaurant-quality Korean Fried Chicken at home using the double-fry technique for an ultra-crispy coating. This recipe features juicy chicken tossed in a classic sweet and spicy Gochujang glaze.
- Prep Time: 25 min
- Cook Time: 25 min
- Total Time: 50 min
- Yield: 4 servings 1x
- Category: Dinner
- Method: Deep Frying
- Cuisine: Korean
- Diet: Non-Vegetarian
Ingredients
- 3 lbs chicken pieces (wings, drumettes, or boneless thighs), cut into serving size
- 1 cup all-purpose flour
- 1/2 cup potato starch or cornstarch
- 1 teaspoon salt
- 1/2 teaspoon black pepper
- 1/2 teaspoon baking powder
- 1/2 cup cold water
- 1 large egg
- Vegetable oil, for deep frying
- For the Glaze: 1/4 cup Gochujang (Korean chili paste)
- 1/4 cup soy sauce
- 1/4 cup rice vinegar
- 1/4 cup honey or brown sugar
- 2 tablespoons minced garlic
- 1 tablespoon grated fresh ginger
- 1 teaspoon sesame oil
- 1 teaspoon toasted sesame seeds, for garnish
Instructions
- Prepare the Chicken: Pat the chicken pieces completely dry with paper towels. This step is key for crispiness.
- Make the Batter: In a medium bowl, whisk together the flour, potato starch, salt, pepper, and baking powder. In a separate small bowl, whisk the cold water and egg. Pour the wet ingredients into the dry ingredients and mix until just combined; the batter should be thin and lumpy. Do not overmix.
- Coat the Chicken: Dip each piece of chicken into the batter, allowing excess to drip off. You want a thin, even coat.
- First Fry (Cooking the Chicken): Heat about 3 inches of vegetable oil in a heavy-bottomed pot or deep fryer to 325°F (160°C). Carefully place chicken pieces into the oil, ensuring you do not overcrowd the pot. Fry for 8 to 10 minutes until the chicken is cooked through and lightly golden. Remove the chicken and place it on a wire rack set over a baking sheet. Let the chicken rest for at least 15 minutes.
- Make the Glaze: While the chicken rests, combine the Gochujang, soy sauce, rice vinegar, honey/sugar, minced garlic, ginger, and sesame oil in a small saucepan. Bring the mixture to a simmer over medium heat, stirring constantly until the sauce thickens slightly, about 3 to 5 minutes. Remove from heat.
- Second Fry (Crisping the Coating): Increase the oil temperature to 375°F (190°C). Return the rested chicken pieces to the hot oil in batches. Fry for an additional 2 to 4 minutes until the crust is deep golden brown and extremely crispy. This double-fry technique creates the signature crunch. Remove and drain briefly on the wire rack.
- Toss and Serve: Place the hot, crispy chicken into a large bowl. Pour the prepared Gochujang glaze over the chicken and toss quickly until every piece is evenly coated. Garnish immediately with toasted sesame seeds. Serve hot.
Notes
- For the best results in achieving that paper-thin, shatteringly crisp coating, use a mix of all-purpose flour and potato starch in your batter.
- If you prefer a milder flavor, substitute the Gochujang glaze with a simple soy-garlic sauce made from 1/2 cup soy sauce, 1/4 cup water, 1/4 cup sugar, 2 tablespoons minced garlic, and 1 teaspoon ginger, simmered until reduced.
- Serve this party chicken appetizer with quick-pickled radishes or a simple cabbage slaw to balance the richness.
Nutrition
- Serving Size: 4 pieces
- Calories: 650
- Sugar: 22
- Sodium: 950
- Fat: 38
- Saturated Fat: 9
- Unsaturated Fat: 29
- Trans Fat: 0
- Carbohydrates: 45
- Fiber: 2
- Protein: 35
- Cholesterol: 110