
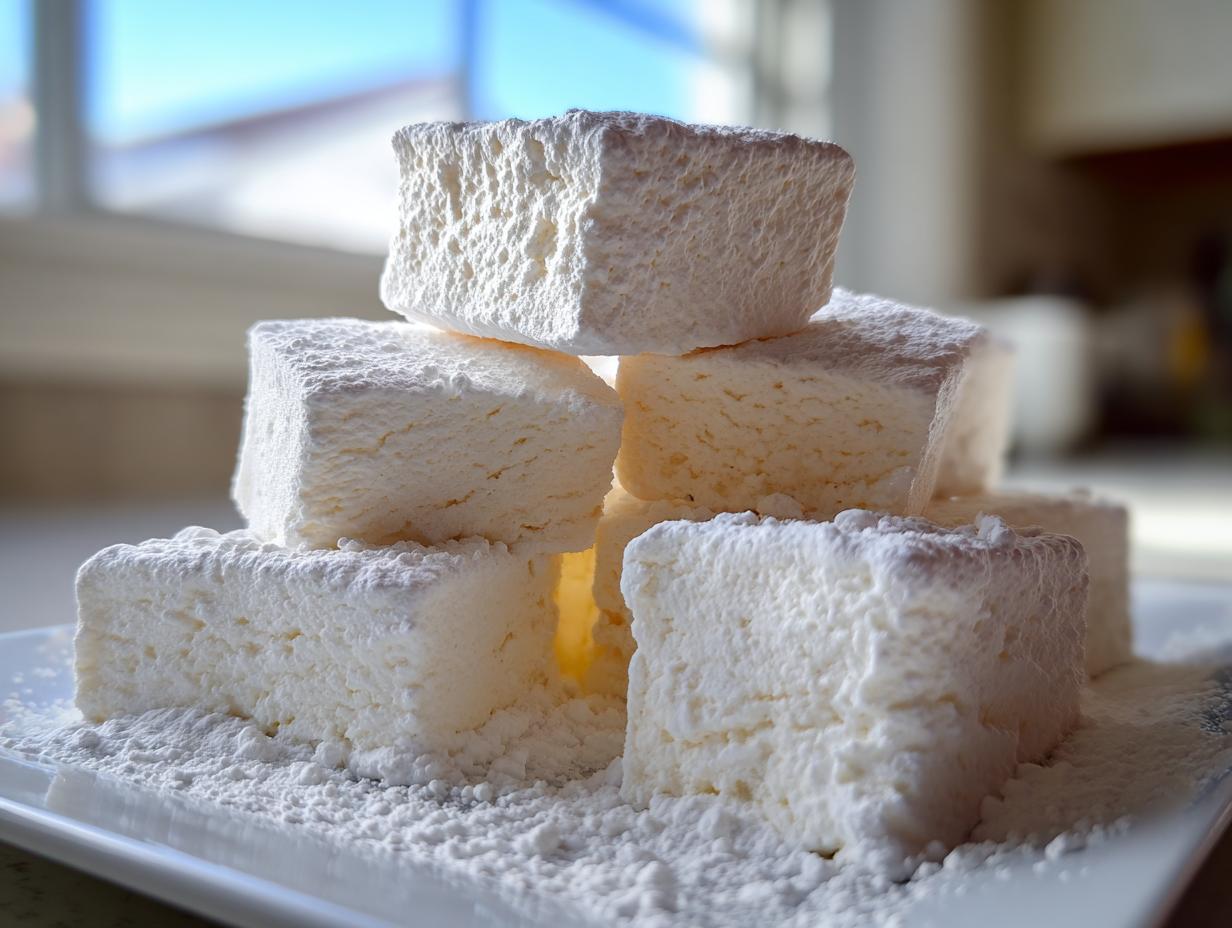
Oh, friends, let me tell you a secret: picking up a bag of those pink and white squishy things at the store is fine, but they just don’t hold a candle to what you can create right here in your own kitchen! There is nothing more satisfying than pulling apart a warm, freshly cut square of candy that you made yourself. This recipe for the best easy homemade vanilla marshmallows turns that candy-making ambition into reality. They come out so soft and gloriously fluffy—truly melt-in-your-mouth perfection. I absolutely adore making candy around the holidays. It feels so special, and trust me, making your own homemade marshmallows is easier than you think, and the flavor is just spectacular.
Once you try your first batch, you’ll never look back. We’ll use this simple recipe to make sure every piece is pillowy and delightful. If you enjoyed learning about my easy peanut butter fudge, you are going to adore the magic of making these soft delights!
- Why This is the Best Homemade Marshmallow Recipe
- Gathering Your Ingredients for Homemade Marshmallows
- How to Make Fluffy Homemade Marshmallows Step-by-Step
- Tips for Perfect Homemade Vanilla Marshmallows
- Creative Uses for Homemade Marshmallows
- Ingredient Notes and Substitutions for Homemade Marshmallows
- Storage and Keeping Homemade Marshmallows Fresh
- Frequently Asked Questions About Making Homemade Marshmallows
- Estimated Nutritional Information for Homemade Marshmallows
- Share Your Homemade Marshmallows Creations
Why This is the Best Homemade Marshmallow Recipe
Honestly, there is no comparison between the spongy, often stale texture of the store brands and what happens when you make these at home. This truly is the best homemade marshmallow recipe because we focus on achieving that cloud-like, pillowy soft texture—and we do it simply! Achieving that dream texture really comes down to one non-negotiable step: temperature. Relying strictly on your candy thermometer for that syrup is the secret to success here, not guessing!
Once you master that simple temperature check, you’ll be turning out gourmet treats that simply blow the pre-packaged stuff away. You can learn even more great candy-making tips from others who love this process, like those found over at The Flavor Bender.
Gathering Your Ingredients for Homemade Marshmallows
Now, for the simple magic! Making homemade marshmallows from scratch is surprisingly straightforward because the ingredient list isn’t long. We need two distinct groups of items: the things we use to make the actual fluff, and the coating we use to stop them from sticking to everything we own. Don’t use ‘marshmallow fluff recipe homemade’ substitutes here; this list is what yields that superior, pillowy bite.
Coating Mixture Ingredients
- 1/2 cup powdered sugar (for dusting)
- 1/2 cup cornstarch (for dusting)
Remember to whisk these together really well before you use them to coat the pan. A good, even dusting is your insurance policy against a sticky mess!
For the Homemade Vanilla Marshmallows
- 3 tablespoons unflavored gelatin powder
- 1/2 cup cold water (for blooming the gelatin)
- 1 1/2 cups granulated sugar
- 1 cup light corn syrup
- 1/2 cup water (for the syrup)
- 1/4 teaspoon salt
- 1 tablespoon pure vanilla extract
I always splurge on pure vanilla extract, as it makes these taste like a true gourmet homemade candy, rather than just sweet fluff.
How to Make Fluffy Homemade Marshmallows Step-by-Step
Alright, dear cooks, this is where the real fun begins! You asked how to make fluffy marshmallows, and I’m going to walk you through every single toss and whip. These steps are designed to give you those gorgeous soft and pillowy marshmallows, so listen closely, especially when we hit that syrup temperature. Remember, these homemade marshmallows are mostly made by the machine, but you provide the watchful eye!
Preparing the Pan and Blooming Gelatin
First things first, get your 9×13 pan ready. You must grease it well and line it with parchment paper, making sure you leave an overhang on the long sides. That overhang is going to be your handle later! Now, take that powdered sugar and cornstarch coating mixture we talked about and dust that whole bottom and those sides generously. Don’t be shy—this is your protection against sticking!
Next, in your stand mixer bowl, sprinkle that gelatin powder over the 1/2 cup of cold water. We let this sit quietly for about 5 to 10 minutes while the gelatin ‘blooms.’ It will turn into a jiggly, solid mass, and that’s exactly what we want before the hot syrup hits it.
Cooking the Syrup to Soft-Ball Stage
While the gelatin is blooming, go to the saucepan. Combine your sugar, corn syrup, salt, and the other 1/2 cup of water. Stir this gently over medium heat only until the sugar dissolves. Once it starts bubbling, stop stirring completely! We need that heat to work its magic. Cook this syrup until your candy thermometer reads exactly 240 degrees Fahrenheit. That 240 mark tells us we have reached the perfect soft-ball stage, which is crucial for airy softness. If you don’t have a thermometer, you’ll end up with sticky goo or hard candy instead of sweetened deliciousness!
Whipping for Soft and Pillowy Marshmallows
The moment you pull that 240° syrup off the heat, turn your stand mixer (with the bloomed gelatin in it) on low speed. Very slowly, pour that hot syrup down the side of the bowl, making sure it misses the whisk attachment completely. Safety first, that stuff is scorchingly hot! Once all the syrup is in, crank that mixer up to high speed. You must whip this for a good 12 to 15 minutes. Trust me on the time! You are looking for it to turn unbelievably glossy, thick, and snowy white, holding stiff peaks when you lift the whisk. The bowl should feel only warm to the touch when you’re done whipping.
Once it looks appropriately fluffy, turn the speed down and beat in that gorgeous vanilla extract until it’s just blended in. Check the great advice on timing and technique shared by the folks at Six Dollar Family if you’re wondering about timing!
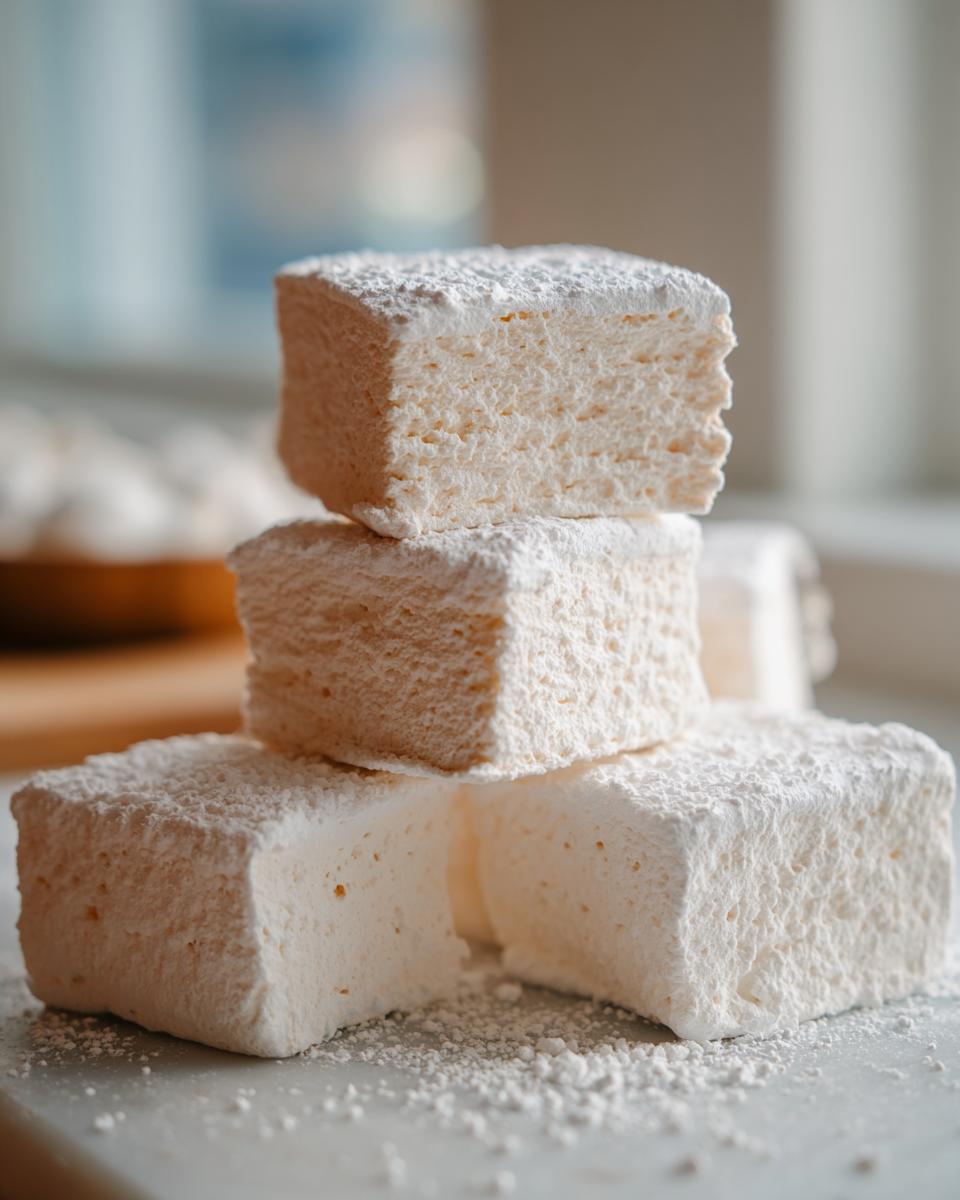
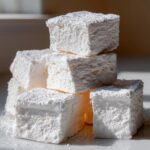
Setting and Cutting Your Homemade Marshmallows
Now work quickly because this mixture sets fast! Scoop all that thick marshmallow mass into your prepared, coated pan. Use a spatula that you’ve barely oiled to gently push it to the edges evenly. Don’t press too hard, or you’ll deflate that wonderful air! Dust the top one last time with the coating powder.
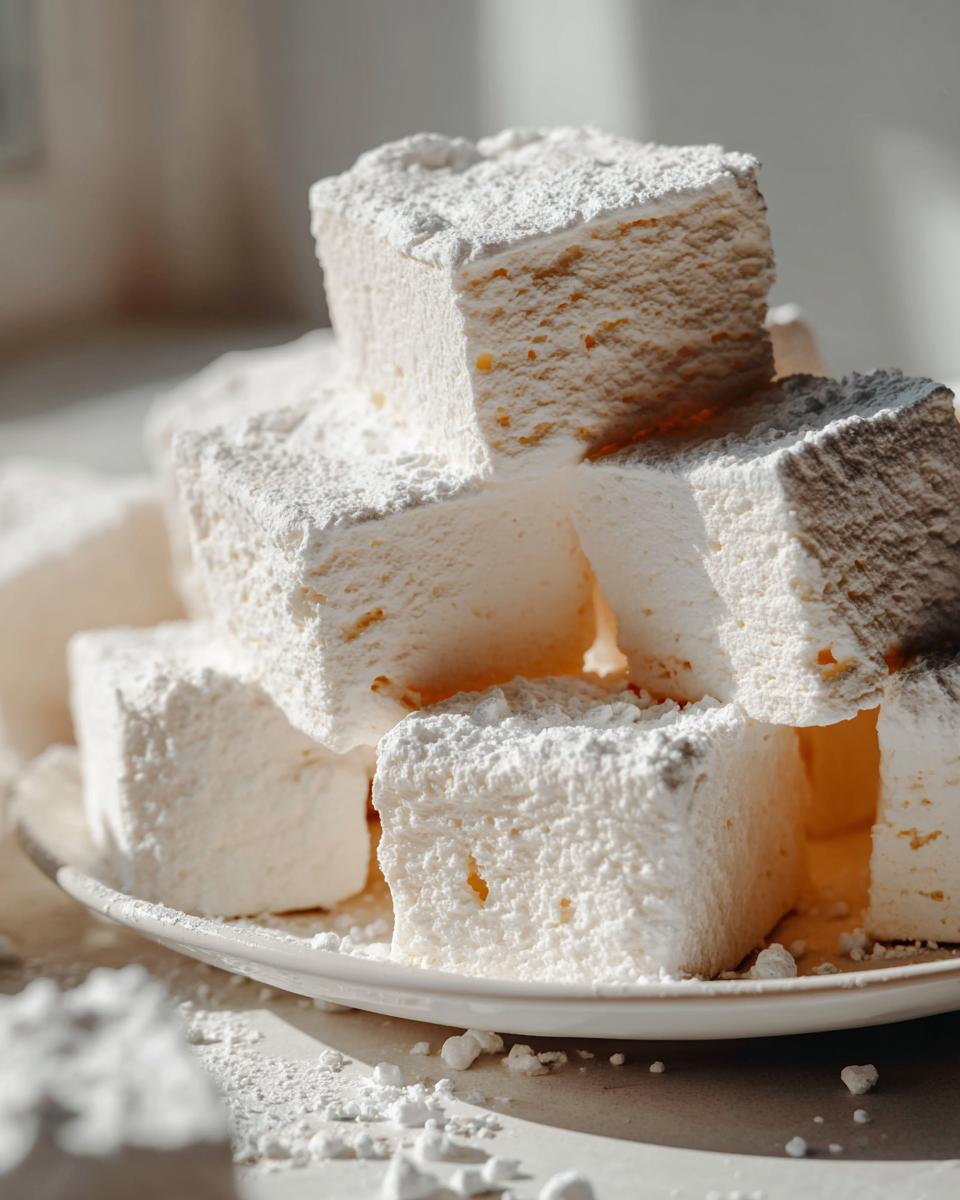
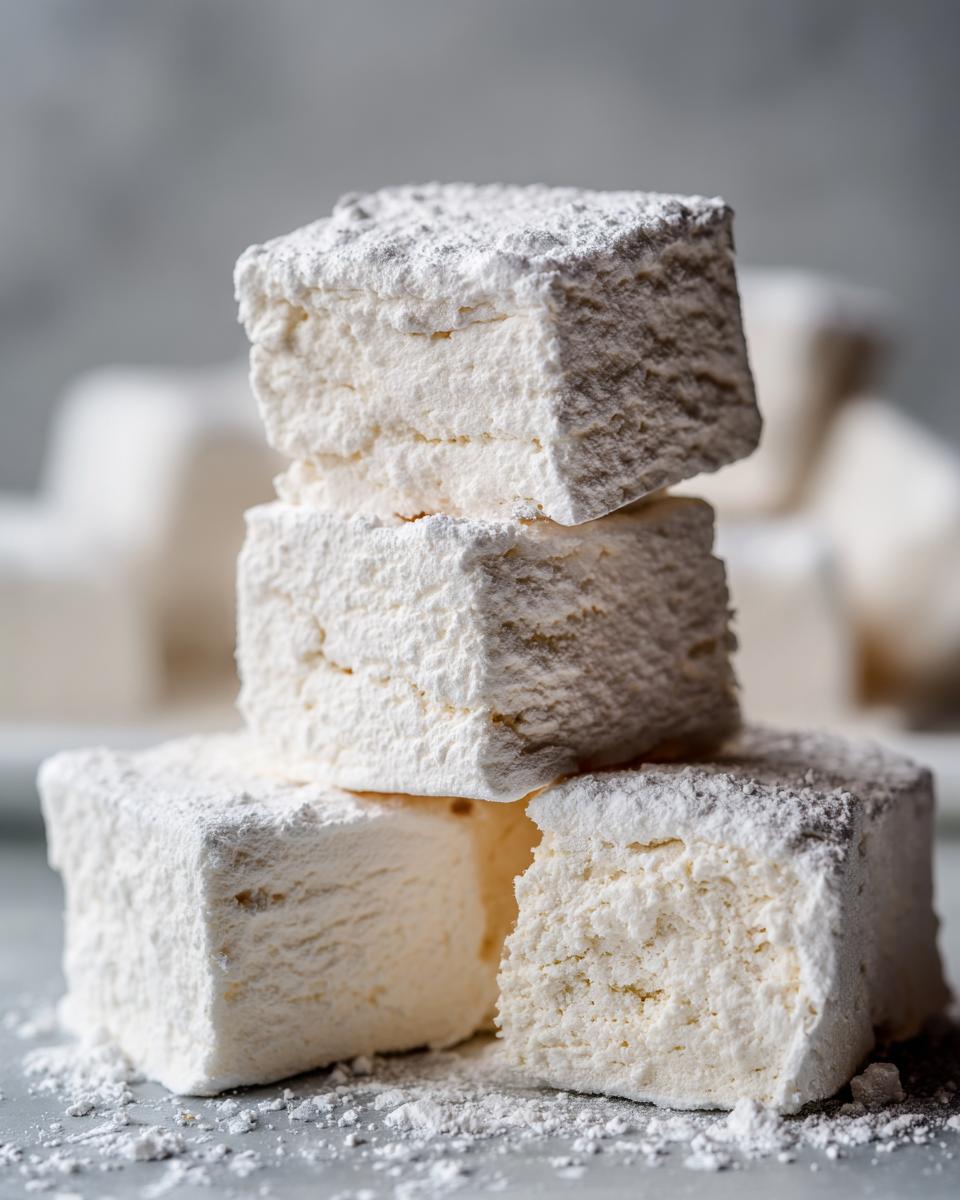
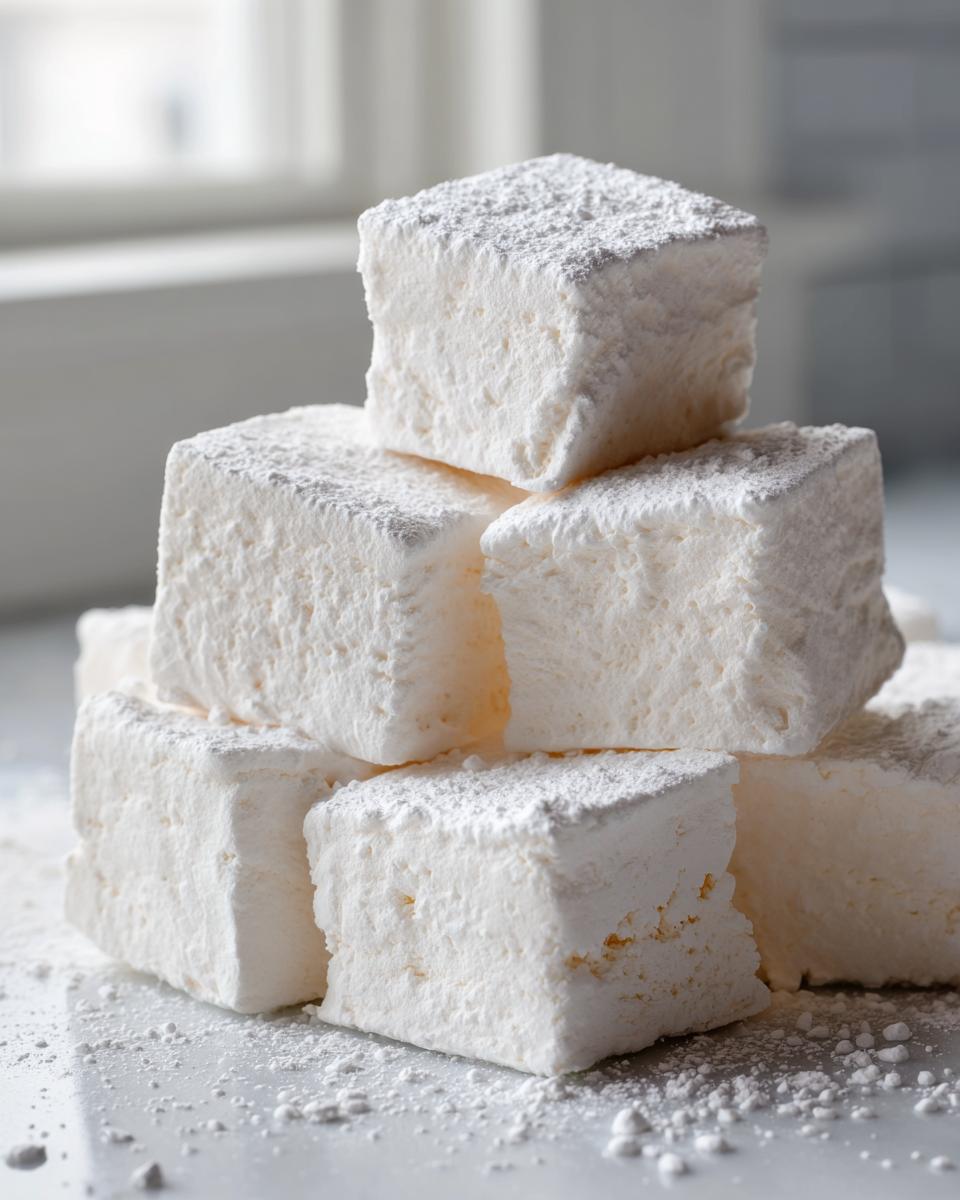
Now comes the hardest part: waiting! Let them sit, just uncovered, for at least four hours, but honestly, overnight is best. When they are completely set, use the parchment overhang to lift the whole slab onto a clean, dusted cutting board. Use a big, sharp knife—and I mean sharp! I wipe mine with a damp cloth between cuts—to slice them into squares. Don’t forget to toss the cut sides of your finished homemade marshmallows in the remaining coating mix so they don’t weld themselves together!
Tips for Perfect Homemade Vanilla Marshmallows
Making these homemade marshmallows is a real treat, and I want your experience to be wonderful! Since these are a bit different from your usual easy dessert projects, here are a couple of little tricks I always use. When you go to cut your set marshmallow, forget those dull butter knives! The cleanest cuts come from a long, sharp chef’s knife. Make sure you wipe the blade with a tiny bit of oil or just dust it heavily with that coating mix between every single slice. This prevents the sticky sides from pulling the square out of shape.
And remember that coating mixture? If your marshmallows seem clingy after they’ve set, don’t worry! Just toss them gently again in the excess powder until they stop feeling tacky. This recipe makes wonderful treats, and you can see how I use simple ingredients again in my easy French toast recipe!
Creative Uses for Homemade Marshmallows
Once you have this big slab of spongy goodness ready, you might wonder what to do with them all, but trust me, they disappear fast! These aren’t just for snacking straight from the pan, though I certainly do that. They make the absolute best topping for a rich, creamy drink; nothing beats dropping one of these pillowy clouds into a mug of homemade hot chocolate. For a real treat, especially as the nights get cooler, these are the essential marshmallows for hot chocolate.
Of course, we can’t forget s’mores! When you use your own light, airy squares for classic s’mores ingredients, it elevates the whole experience. They toast up perfectly. Or, if you’re looking for an easy coating for another dessert, I hear they are fantastic dipped in chocolate and then rolled in sprinkles before they fully firm up. Check out how others use these gourmet delights over at Best Christmas Desserts!
Ingredient Notes and Substitutions for Homemade Marshmallows
When making any gourmet homemade candy, the ingredients matter! People often ask about swapping out the light corn syrup, and that is honestly a tricky spot. That syrup keeps our homemade marshmallows from turning into a grainy mess because it stops crystallization, so I really encourage you to try it as written first. It performs a very specific job here!
If you want different flavors, that’s much easier! The pure vanilla extract is wonderful, but don’t be afraid to swap it out for peppermint extract for a lovely holiday swap, much like some folks do when looking for homemade marshmallows without corn syrup recipes. It’s a quick way to change up the flavor profile for any occasion.
Storage and Keeping Homemade Marshmallows Fresh
Now that you’ve made these beautiful, soft squares, you need to keep them happy! Like most fresh candies, these homemade marshmallows don’t like to hang around forever, but they certainly last longer than you might expect if you treat them right. I find that they taste absolutely best within the first three days, but they should be perfectly fine for up to two weeks if stored properly.
The key is keeping the air out! You need an airtight container. Plastic containers with good snap lids work perfectly. Before you put them in, make absolutely sure they are coated well with that powdered sugar and cornstarch mix. If you skip that dusting, they will melt into one giant, sticky blob, and nobody wants a gourmet homemade candy meltdown overnight!
If you are looking for other easy treats that don’t need the oven, you can check out my collection of easy no-bake dessert recipes for some other simple ideas. But honestly, these marshmallows are so good, you likely won’t have any left to save!
Frequently Asked Questions About Making Homemade Marshmallows
I know when you try a new candy recipe, questions pop up! That’s perfectly normal, and I’m happy to walk you through any little hurdles so you succeed with these easy marshmallow recipes. We want every bite to be soft and dreamy!
Can I make homemade marshmallows without a stand mixer?
Oh, bless your heart, you surely can try! But let me warn you, whipping this mixture for 15 minutes straight is tough work by hand. If you only have a hand mixer, make sure it’s a strong one, and get ready to hold on tight! The main thing is time; you might need to whip it for closer to 20 minutes to hit that stiff, glossy peak stage required for truly fluffy homemade marshmallows.
Why are my homemade marshmallows sticky after setting?
This happens to the best of us! Usually, it means the coating mixture wasn’t applied heavily enough on the cut sides. Marshmallows have natural moisture that wants to seep out, and that coating mixture—the cornstarch and powdered sugar blend—is there to stop them from clinging to each other or the container. If they feel sticky when you go to cut them, just dust everything heavily again! They look best when coated!
How long does it take to make marshmallows from scratch?
It’s important to know the difference between active time and resting time when you’re planning an easy dessert project like this. The hands-on work—blooming, cooking syrup, and whipping—is only about 35 to 40 minutes. However, you must let them sit completely undisturbed for at least four hours, but overnight is truly best for them to fully set up. Don’t rush that setting time if you want those perfect squares!
You can find more helpful tips regarding these DIY sweet treats right here on my site, like in my guide to other easy dessert projects!
Estimated Nutritional Information for Homemade Marshmallows
When we cook at home, we like to know what we are serving everyone. Since these homemade treats are so simple, they are surprisingly low in fat, which is a nice bonus! I want to be clear that this information is just an estimate, based on the ingredients I used—yours might vary just a little bit depending on the exact brands of syrup or sugar you grab.
This data applies to a serving size of about 4 squares, which makes a generous pile of fluffy candy!
- Serving Size: 4 squares
- Calories: 150
- Sugar: 35g (Yes, it’s high because it’s candy, but oh, it’s worth it!)
- Sodium: 10mg
- Fat: 0g
- Protein: 2g
- Carbohydrates: 38g
Please remember these figures are estimates based on the recipe provided. When you are making gourmet homemade candy like this, the enjoyment factor often outweighs worrying about the exact numbers, but it’s good to have a baseline!
Share Your Homemade Marshmallows Creations
Now that you know how easy it is to make these wonderfully soft and pillowy marshmallows, I truly hope you give them a try! There’s nothing that warms my heart more than hearing from you all about your kitchen successes.
If you followed along and ended up with a tray of gorgeous, fluffy homemade vanilla marshmallows, please take a moment to come back here and rate the recipe. Did the candy thermometer work perfectly for you? Were they the perfect texture for your hot cocoa?
And if you snap a picture of your finished squares—maybe toasted over a campfire or just piled high in a candy dish—I would love to see them! Feel free to share your successes in the comments below, or tell me what flavor you plan to try next. I’m always learning new things from this wonderful community. You can learn more about my approach to home cooking over on my About page!
PrintEasy Homemade Vanilla Marshmallows
Make soft, fluffy, and pillowy homemade vanilla marshmallows. This straightforward recipe shows you how to create gourmet candy that tastes much better than store-bought versions, perfect for hot chocolate or s’mores.
- Prep Time: 20 min
- Cook Time: 15 min
- Total Time: 4 hr 35 min
- Yield: About 4 dozen squares 1x
- Category: Candy
- Method: Whipping/Setting
- Cuisine: American
- Diet: Vegetarian
Ingredients
- 3 tablespoons unflavored gelatin powder
- 1/2 cup cold water (for blooming gelatin)
- 1 1/2 cups granulated sugar
- 1 cup light corn syrup
- 1/2 cup water (for syrup)
- 1/4 teaspoon salt
- 1 tablespoon pure vanilla extract
- 1/2 cup powdered sugar (for dusting)
- 1/2 cup cornstarch (for dusting)
Instructions
- Lightly grease a 9×13 inch baking pan. Line the pan with parchment paper, leaving an overhang on the long sides. Mix the powdered sugar and cornstarch together in a small bowl. Dust the bottom and sides of the prepared pan generously with this mixture.
- In the bowl of a stand mixer fitted with the whisk attachment, sprinkle the gelatin over the 1/2 cup of cold water. Let it sit for 5 to 10 minutes to bloom.
- While the gelatin blooms, combine the granulated sugar, corn syrup, 1/2 cup water, and salt in a medium saucepan. Stir over medium heat until the sugar dissolves. Stop stirring once it boils.
- Cook the syrup without stirring until it reaches 240 degrees Fahrenheit on a candy thermometer. This is the soft-ball stage.
- Once the syrup reaches 240 degrees F, carefully remove the saucepan from the heat. Turn the stand mixer on low speed and slowly pour the hot syrup down the side of the bowl into the bloomed gelatin. Be careful not to pour it onto the whisk.
- Increase the mixer speed to high. Whip the mixture for 12 to 15 minutes until it is very thick, glossy, white, and holds stiff peaks. The outside of the bowl should feel warm, not hot.
- Stop the mixer. Beat in the vanilla extract on low speed until just combined.
- Working quickly, pour the marshmallow mixture into your prepared pan. Use a lightly oiled spatula to spread it evenly into the pan.
- Dust the top surface generously with the remaining powdered sugar and cornstarch mixture. Let the marshmallows set, uncovered, at room temperature for at least 4 hours, or preferably overnight.
- Once set, use the parchment paper overhang to lift the marshmallow slab out of the pan onto a cutting board dusted with more of the coating mixture.
- Use a large, sharp knife (lightly oiled or dusted) to cut the slab into squares. Toss the cut sides of the marshmallows in the coating mixture to prevent sticking.
Notes
- For the best results when cutting, use a pizza cutter or a large knife that you wipe clean between cuts.
- If you plan to use these for s’mores ingredients, cut them into thick squares before they fully dry out.
- You can substitute the vanilla extract with 1 teaspoon of peppermint extract for a holiday treat.
Nutrition
- Serving Size: 4 squares
- Calories: 150
- Sugar: 35g
- Sodium: 10mg
- Fat: 0g
- Saturated Fat: 0g
- Unsaturated Fat: 0g
- Trans Fat: 0g
- Carbohydrates: 38g
- Fiber: 0g
- Protein: 2g
- Cholesterol: 0mg