
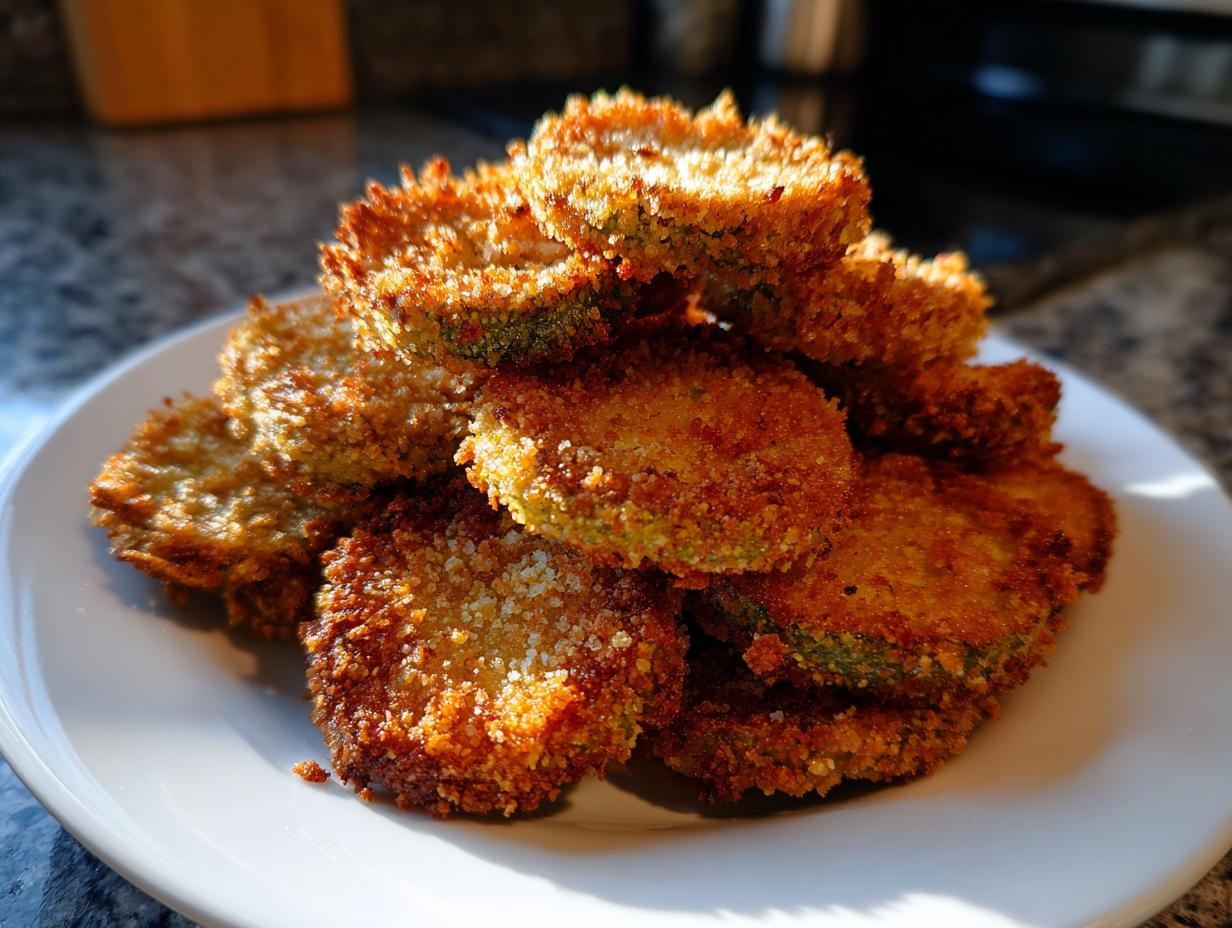
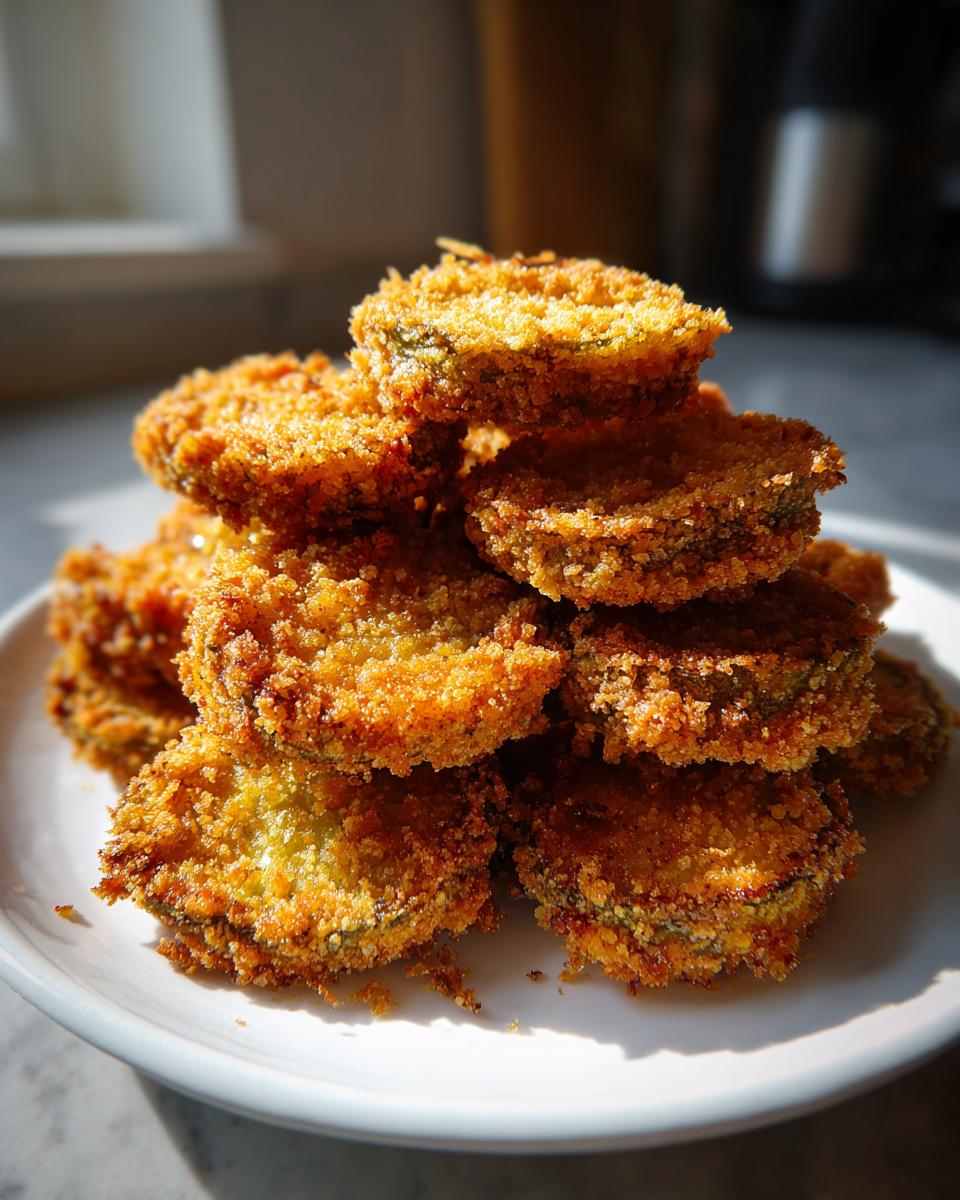
Oh, isn’t there anything better than that first crunch when you bite into something perfectly fried? I swear, it just speaks right to my soul! Here at Cooking by Carla, we’re celebrating that satisfying sound today with what I promise is the ultimate guide for making perfect Fried Pickles at home. We all love that tangy, salty bite wrapped up in a crunchy, golden pillow, don’t we? This recipe works magic whether you prefer the rich, bubbly texture of classic deep-fried versions or are looking for a lighter, crispier snack made right in the air fryer. My grandkids always demand these whenever they come over for a weekend gathering; they disappear faster than you can pour the ranch!
If you’re ready to conquer the secret to making these restaurant-worthy at home, you can find my complete, tested instructions right here. And if you want more simple, crowd-pleasing inspiration, pop over to see my collection of easy appetizers and snacks!
- Why You Will Make These Crispy Fried Pickles Again and Again
- Gathering Ingredients for Homemade Fried Pickles Recipe
- The Step-by-Step Guide to Perfect Fried Pickles
- Cooking Methods: Deep Fried Pickles Versus Air Fryer Fried Pickles
- Tips for Making Texas Roadhouse Fried Pickles Copycat Flavor
- The Essential Fried Pickle Dipping Sauce
- How to Make Fried Pickles Crispy: Troubleshooting Common Issues
- Serving Suggestions for Your Tangy Pickle Snacks
- Storing and Reheating Leftover Fried Pickles
- Frequently Asked Questions About Fried Pickles
- Estimated Nutritional Data for Crispy Fried Pickles
- Share Your Homemade Fried Pickles Experience
Why You Will Make These Crispy Fried Pickles Again and Again
I truly believe these are the absolute best Fried Pickles you’ll ever make at home. Truly! They’re just wonderful because they tick every single box a good appetizer should. Trust me when I say you’ll want to keep this method locked away!
- They deliver unbelievably Crispy Fried Pickles texture, even the air-fried ones.
- The seasoning blend provides that perfect tangy-salty balance you crave.
- You get two options: the classic deep-fried joy or a lighter air-fried version.
- They are incredibly fast; you can whip up a batch when you need a quick snack recipe.
- The crunchy coating actually sticks beautifully to the pickle—no sad, empty shells!
- They are the star of any party or gathering, making them the best fried pickles appetizer.
Honestly, once you master the drying step, the rest is smooth sailing. You’ll be making these tangy pickle snacks all the time!
Gathering Ingredients for Homemade Fried Pickles Recipe
Before we even think about oil or the air fryer basket, we have to talk about ingredients, because this Homemade Fried Pickles Recipe hinges on preparation! My biggest tip, honestly—and remember, I learned this the hard way early on—is making sure those pickles are as dry as a bone before they hit any batter. Moisture is the enemy of crispiness, period. We’re using Panko here, not the regular crumbs, because you deserve that spectacular, shatteringly crunchy exterior every single time you make these Fried Pickles!
Ingredients for the Crunchy Pickle Coating
This flour mixture is where all the upfront flavor lives. It clings to the pickle while also giving us a nice, even base for everything else.
- 1 cup all-purpose flour
- 1 teaspoon salt
- 1 teaspoon black pepper
- 1 teaspoon garlic powder
- 1 teaspoon paprika
- 1/2 teaspoon cayenne pepper (Use this if you like a little kick!)
Wet Mixture and Panko for the Best Fried Pickles
The egg wash is the glue that holds our lovely spice blend on, and Panko is what makes these crunchy pickle chips so special compared to the kind you get at your average pub. Panko breadcrumbs are flakier and lighter, meaning they absorb less oil and get noticeably crispier!
- 2 large eggs
- 1/2 cup milk
- 1 cup panko breadcrumbs
The Step-by-Step Guide to Perfect Fried Pickles
Now that we have all our components ready—the salty, savory spices, the wet binder, and the crunchy Panko—it’s time to put this Easy Fried Pickle Recipe into action! I want these to be the crispiest, most satisfying bites you’ve ever made, which is why we follow these steps religiously. Remember, your success as a home cook comes down to respecting these small but mighty details. We’re aiming for golden domes of deliciousness perfect for snacking or your next party!
Preparing the Pickles: The Secret to Crispy Fried Pickles
This is non-negotiable, friends! If you want those gorgeous Golden Fried Pickles, you have to get the water out. Take your drained pickles and lay them out on a sturdy stack of paper towels. Then, put another layer of paper towels right on top. Now, press down firmly—I mean really press! You want to soak up as much vinegar liquid as possible before they ever see the flour mixture. This simple habit makes all the difference between tender and soggy.
Setting Up Your Dredging Station for Easy Fried Pickles
We need three stations ready to go. Think of it like an assembly line for perfect coating. Dish one gets your seasoned flour blend. Dish two holds your egg and milk wash. And dish three needs that beautiful Panko breadcrumbs. Make sure they are spread out nicely so the pieces don’t overlap too much.
Coating Technique for Crunchy Pickle Chips
It’s a three-step dance! Take one pickle chip at a time—don’t rush this part. First, roll it completely in the flour, making sure every bit is covered, and shake off the extra dust. Next, dunk it quickly into that egg bath, letting the excess drip off. Finally, press it hard into the Panko. I mean really push that breading onto the pickle with your fingers! This ensures the coating adheres beautifully and won’t fall off when it hits the hot oil. Place those fully coated beauties on a clean plate and get ready to cook. If you master this coating process right here, you are ready for the big show! For more great snack ideas, check out my full collection of easy appetizers and snacks!
Cooking Methods: Deep Fried Pickles Versus Air Fryer Fried Pickles
Alright, now for the fun part—the cooking! This is where we turn those perfectly breaded slices into that irresistible, crispy snack we’ve been dreaming about. Since I know some folks prefer the rich flavor of a deep fryer while others are leaning toward making Healthy Fried Pickles, I’ve made sure this recipe works like a charm for both methods. Don’t sweat it if you’re new to frying; I’ve walked through every step below to make sure your results are golden and stay crisp.
Achieving Golden Fried Pickles with Deep Frying
If you want that genuine, pub-style experience, this is your route! You need a nice, heavy pot, and you’re looking to heat about two inches of vegetable oil until it hits that magic temperature: 375°F. If your oil isn’t hot enough, those pickles will just soak up fat instead of crisping up, and we certainly don’t want that! Drop your breaded beauties in small batches—don’t crowd the pot! We only need about 1 to 2 quick minutes until they turn that perfect golden brown. Use a slotted spoon to scoop them out and place them on a rack immediately. It moves fast!
For more simple, game-day friendly options, remember to check out my full guide on easy appetizers and snacks!
Making Healthy Fried Pickles using the Air Fryer
For those days when I want that crunch without the big pot of oil, the air fryer is simply magic. It gives you a very nice version of these Fried Pickles, and honestly, they come out stunningly crisp! Before you start, make sure you preheat your air fryer to about 380°F (195°C). Spray that basket lightly with cooking spray—this helps with browning. Arrange your breaded pickles in a single layer; this is another crucial step for crispiness, so you’ll have to work in batches. Then, give the tops a good misting of spray, too. They only take about 8 to 10 minutes total, but you must flip them halfway through so they brown evenly on both sides. This is how we get those great results you see over at sites that focus on air frying!
Tips for Making Texas Roadhouse Fried Pickles Copycat Flavor
Now, if you are anything like me, sometimes you just want that specific flavor that reminds you of your favorite diner or pub! Everyone seems to know and love the famous version, right? Well, achieving that wonderful Texas Roadhouse Fried Pickles Copycat taste is quite easy using the seasoned flour mix we already prepared. It really just needs two tiny additions to give it that extra zing!
Take your dipping bowl with the flour, salt, and spices, and just mix in an extra 1/2 teaspoon of dried oregano and just a tiny pinch—about 1/4 teaspoon—of onion powder. Trust me on the oregano; it really helps mimic that distinctive flavor profile that makes their version so addictive.
Use that seasoned flour exactly as written in the main recipe steps, coating your pickles beautifully. Serve these up alongside your homemade dipping sauce, and I guarantee your family won’t know the difference! For more simple, game-day perfect bites, be sure to check out my full list of easy appetizers and snacks. You can also peek over at this popular recipe source to see how others tackle this favorite!
The Essential Fried Pickle Dipping Sauce
A plate of crispy, golden Fried Pickles just isn’t complete without a proper companion to dip them into, is it? Salt and tang are great, but they need something cool and zesty in that mix. For me, the absolute perfection comes from a homemade spiced ranch. You don’t need a fancy jarred sauce when you have ranch dressing sitting in the fridge already—we’re just jazzing it up!
This is so simple, I almost feel silly calling it a recipe. It’s basically ranch dressing dressed up for a party! You can use your favorite store-bought ranch—don’t feel like you need to make the ranch from scratch unless you want to, which you certainly can do if you check out my guide on making creamy homemade sauces!
For a truly exceptional Fried Pickle With Ranch experience, just grab about a half cup of your good ranch dressing. Now for the fun part: stir in just about a half teaspoon of your favorite hot sauce—whatever heat level you prefer works—and then add a little pinch of black pepper right at the end. That’s it! The hot sauce cuts through the fat beautifully when you’ve deep-fried them, or it balances the air fryer dryness perfectly if you went that route.
Mix it well until it’s uniform, put it in a cute little bowl right next to your hot-from-the-fryer batch, and get ready for those tangy pickle snacks to disappear in seconds. Truly, this simple sauce makes the whole dish!
How to Make Fried Pickles Crispy: Troubleshooting Common Issues
Oh, I wish I could tell you that every time I set out to make Fried Pickles, they came out golden and crunchy on the first try! Truthfully, learning how to make Fried Pickles Crispy is a skill built on avoiding a few common pitfalls. If you ever end up with sad, limp, oily pickles, it almost always comes down to one of three simple things. When you get these basics right, you’ll skip the sogginess every single time, and that makes all the difference in the world!
Don’t worry if your first batch ever turns out a little soft; we can fix it! Let’s chat about the issues that cause the dreaded soggy bottom on our crunchy pickle chips, and how we can nudge them toward perfection.
Problem 1: Too Much Moisture Hiding in the Pickles. This is honestly the number one culprit. If the pickles aren’t bone-dry before they hit the flour, the water steams off in the oil, creating steam pockets that push the coating right off. The fix? You absolutely must go hard on that paper towel pressing step we talked about in the prep section. Don’t just dab them; really squeeze them dry!
Problem 2: Oil Temperature Isn’t Hot Enough. If you’re deep frying and your oil is sluggish—say, below 350°F—the breading just sits there soaking up oil instead of instantly sealing up and crisping. That slow soak leads to a heavy, greasy coat. You need that high heat (look for 375°F). If you’re using an air fryer, make sure you give it the full preheating time so the air is already hot when the pickles drop in.
Problem 3: Overcrowding the Basket or Pot. When you put too many breaded pickles in the hot oil (or the air fryer basket!) at once, the temperature of the oil plummets instantly. This acts just like the low temperature issue above—it leads to soggy, unevenly cooked food. Work in small batches! It takes an extra minute or two, but ensuring each piece has room to breathe and crisp up is essential for that perfect, airy crunch we are aiming for. Trust Carla on this one; patience during the cooking stage pays off!
Serving Suggestions for Your Tangy Pickle Snacks
Once you’ve pulled those glorious, golden rounds from the fryer or air fryer, the fun is just beginning! These aren’t just appetizers you serve and forget; they make a wonderful centerpiece for snacking. Especially when they’re as delightful as these Tangy Pickle Snacks—they need to be showcased!
Of course, that homemade spiced ranch we whipped up is the classic partner, but don’t stop there! When I make these for game day, I usually put out a few different options because people love to dip and explore different flavors. It just makes the whole spread feel a little more special.
Here are a few ways I love to serve up our perfect Fried Pickles:
- The Classic Platter: Set them out hot alongside a bowl of ranch and maybe a side of honey mustard for those who like sweet and savory together.
- Game Day Spread: They are fantastic next to sliders, on a platter with wings, or even tucked alongside some crunchy onion rings. They add the perfect bright, acidic counterpoint to richer meats.
- Sandwich Upgrade: Forget placing a few plain pickles on the side of your burger or pulled pork sandwich. Stack a few of these on there instead! The crunch holds up surprisingly well, provided you drain them properly. They really take a simple weeknight meal to a fun level. You know, if you need more ideas for simple dinners, I keep a whole section dedicated to simple weeknight dinners!
- Taco Night Twist: Seriously, try them! A couple of these crunchy pickle chips alongside a spicy fish taco gives you the best salty, tangy bite you didn’t know you were missing.
However you serve them, make sure they are still warm. These absolutely must be eaten fresh for that ultimate crisp experience. Enjoy making your snacks the star of the show!
Storing and Reheating Leftover Fried Pickles
Now, I have to be perfectly honest with you all, just like I always tell my grandkids: nothing, and I mean *nothing*, beats a plate of these golden Fried Pickles piping hot, straight out of the fryer or the air fryer basket. That crunch fades fast, and we want you to have the best experience possible!
That said, if you managed to have any left over—which is a true feat if you served these at a party because they are truly addictive—we can absolutely bring them back to life! The microwave is probably your worst enemy here; it’s just going to steam the coating and turn everything mushy in seconds. We want to avoid that gummy sadness at all costs!
If you are hoping to save these delicious Tangy Pickle Snacks for later in the day or the next evening, here is my tried-and-true reheating method. It requires just a little bit of patience, but it truly pays off in keeping your coating crispy.
The Best Way to Store Your Fried Pickles
First things first: make sure they are completely cool before storing them. If you seal them up while they are still warm, the trapped steam will ruin the texture immediately. Once they are totally cooled down, lay them out in a single layer on a clean plate, cover them lightly with a paper towel, and pop them into a resealable bag or container. You don’t want them stored right next to your dipping sauce, either; keep those separate!
Honestly, they are best eaten within 24 hours, but if sealed tightly, they will be fine for two days. Any longer than that, and the pickle itself starts to get overly soft, and no amount of reheating will fix that natural softening.
Reheating for Maximum Crispness
Forget about standing over the stove; we want dry heat to draw that residual moisture out of the coating. My go-to tool for reviving these is the air fryer. It’s fast and efficient!
If you are using the air fryer, spread your leftover Fried Pickles in a single layer—again, no overlapping allowed! Set the temperature to about 375°F. You only need about 3 to 5 minutes. Keep an eye on them, as they will heat up quickly because the breading is already dry.
If you don’t have an air fryer handy, the conventional oven works beautifully too. Preheat your oven to 375°F—make sure it’s fully hot! Lay the pickles on a baking sheet (a wire rack placed on top of the sheet works even better for air circulation) and heat them for about 6 to 8 minutes. That dry, steady heat mimics the frying process just enough to bring that lovely crunch back to your delicious snack.
Serve them right away once they are heated through! And don’t forget to whip up a fresh batch of that spiced ranch recipe while they are crisping up again!
Frequently Asked Questions About Fried Pickles
I know sometimes recipes bring up little questions right when you’re standing there with your ingredients out! That’s completely normal, and I’m happy to walk you through any last-minute concerns you have about making the perfect batch of Fried Pickles. Cooking should be fun, not stressful, so let’s clear these up quickly so you can get back to that delicious crunch!
Can I use pickle spears instead of chips for Fried Pickles?
You absolutely can use spears! The main difference is simply cooking time. Since spears are much thicker than our crunchy pickle chips, they will need an extra minute or two in the hot oil or air fryer to ensure that the center gets warm all the way through without burning the coating. Just keep a close eye on them!
What is the best oil for Deep Fried Pickles?
For deep frying, we need a neutral oil that can handle high heat without smoking or breaking down too fast. I always recommend using plain old vegetable oil because it’s affordable and works wonderfully, but canola oil or peanut oil are also fantastic choices because they have high smoke points. Remember, we want that oil nice and hot—around 375°F—to seal that beautiful Panko coating instantly!
How long can the breaded Fried Pickles sit before cooking?
This is an important timing question! Once you have your pickles fully coated in that flour, then egg, then Panko, you don’t want them waiting around too long. I suggest letting them sit for no more than about 15 to 20 minutes maximum while you finish the rest of the batch or get your oil up to temperature. If they sit much longer than that, the moisture from the pickle starts to wick into the breading, and you might see the coating start to soften or even fall off when it hits the heat. Get them cooking relatively quickly for the best texture!
If you’re looking for more easy appetizer ideas for game day or any gathering, don’t forget to explore more reliable recipes over on my easy appetizers and snacks page!
Estimated Nutritional Data for Crispy Fried Pickles
Now, I always get asked about the nutrition details, and in my busy home kitchen, I certainly don’t weigh every pinch of paprika! But I do want you to have a general idea of what you’re eating when you enjoy these scrumptious treats. This information is based on a serving size of one-quarter of the recipe recipe, but please remember these are just estimates, dear readers.
The numbers look quite different depending on whether you chose the deep-fried route or if you went with the much lighter preparation in the air fryer. Portion control is always a good idea when we’re talking about something this delicious, but knowing where you stand is helpful!
- Serving Size: 1/4 of recipe
- Calories: Estimated at 250 (This will climb higher if deep-fried!)
- Fat: Around 15 grams
- Saturated Fat: About 3 grams
- Carbohydrates: Around 24 grams
- Protein: Roughly 4 grams
- Sodium: This is the highest number, around 650 mg, since we are using pickles!
If you opt for my Healthy Fried Pickles air fryer method, you’ll notice the fat content drops significantly compared to deep frying. Either way you make them, they are meant to be savored, not wolfed down in one sitting. Enjoy every crunchy, tangy bite!
Share Your Homemade Fried Pickles Experience
Oh, I always say cooking is a conversation, and I really want to hear from you now that you’ve made these amazing Fried Pickles! I put my heart and soul into making sure these instructions are reliable—from getting those pickles perfectly dry to choosing Panko over regular crumbs—but the real magic happens when you bring them to your own table.
Did you try the air fryer method? Did you sprinkle in that extra oregano for a true Texas Roadhouse copycat taste? Or maybe you came up with your own brilliant dipping sauce instead of my spiced ranch? I absolutely want to know! Please take a moment to leave a review or star rating right down in the comments below. Your feedback helps other folks in our wonderful cooking community feel confident trying the recipe for the first time.
Don’t forget, if you are looking for more simple, crowd-pleasing bites that are perfect for game day or just a Tuesday night snack craving, I have a whole collection ready for you. You can find lots of reliable favorites over on my page for easy appetizers and snacks. Happy cooking, dear ones, and I hope these crispy pickles bring as much joy (and crunch!) to your home as they do to mine!
PrintCrispy Southern Fried Pickles Recipe (Restaurant-Style & Air Fryer)
Make perfectly crispy, golden fried pickles at home. This recipe gives you the classic deep-fried version and a lighter air fryer option for a tangy, addictive snack perfect for game day.
- Prep Time: 15 min
- Cook Time: 10 min
- Total Time: 25 min
- Yield: 4 servings 1x
- Category: Appetizer
- Method: Deep Frying or Air Frying
- Cuisine: American
- Diet: Vegetarian
Ingredients
- 1 jar (16 ounces) dill pickle chips or slices, drained well
- 1 cup all-purpose flour
- 1 teaspoon salt
- 1 teaspoon black pepper
- 1 teaspoon garlic powder
- 1 teaspoon paprika
- 1/2 teaspoon cayenne pepper (optional, for heat)
- 2 large eggs
- 1/2 cup milk
- 1 cup panko breadcrumbs (for extra crunch)
- Vegetable oil, for frying (or cooking spray for air fryer)
Instructions
- Prepare the pickles: Place the drained pickle slices between several layers of paper towels. Press down firmly to remove as much moisture as possible. This step is key for crispy fried pickles.
- Set up the dredging station: In one shallow dish, whisk together the flour, salt, black pepper, garlic powder, paprika, and cayenne pepper. In a second dish, whisk the eggs and milk together. In a third dish, place the panko breadcrumbs.
- Coat the pickles: Take a batch of dried pickle slices and dredge them first in the flour mixture, shaking off any excess. Dip them into the egg mixture, letting any extra drip off. Finally, press them firmly into the panko breadcrumbs until fully coated. Place the coated pickles on a clean, dry plate. Repeat with all pickles.
- For Deep Frying: Heat about 2 inches of vegetable oil in a heavy-bottomed pot or deep fryer to 375°F (190°C). Carefully drop the breaded pickles into the hot oil in small batches, ensuring you do not overcrowd the pot. Fry for 1 to 2 minutes, or until golden brown and crisp. Remove with a slotted spoon and place on a wire rack or paper towel-lined plate to drain excess oil.
- For Air Frying (Healthy Fried Pickles): Preheat your air fryer to 380°F (195°C). Lightly spray the air fryer basket with cooking spray. Arrange the breaded pickles in a single layer in the basket (work in batches). Lightly spray the tops of the pickles with cooking spray. Air fry for 8 to 10 minutes, flipping halfway through, until golden and crunchy.
- Serve immediately with your favorite dipping sauce.
Notes
- For a Texas Roadhouse Copycat flavor, add 1/2 teaspoon dried oregano and 1/4 teaspoon onion powder to the flour mixture.
- The best dipping sauce is a simple spiced ranch made by mixing 1/2 cup ranch dressing with 1/2 teaspoon hot sauce and a pinch of black pepper.
- If you skip the panko and use only regular breadcrumbs, you will get a slightly less crunchy but still good result.
Nutrition
- Serving Size: 1/4 of recipe
- Calories: 250
- Sugar: 3
- Sodium: 650
- Fat: 15
- Saturated Fat: 3
- Unsaturated Fat: 12
- Trans Fat: 0
- Carbohydrates: 24
- Fiber: 1
- Protein: 4
- Cholesterol: 55