
Do you ever crave those stunning, golden appetizers you get at a fancy Chinese restaurant? I swear, I always thought making perfect shrimp toast at home was impossible—you know, the kind where the bread is impossibly crisp and the topping is bursting with fresh seafood flavor. Well, I spent some time figuring out the true secrets, and I finally nailed it! This recipe is for the truly Crispy Fried Shrimp Toast that melts in your mouth. As a former teacher, my goal is to make sure every single person can cook this dependably, so forget confusing steps. We’re getting that restaurant-wow factor right here on your own table. If you’re looking for simple yet spectacular easy appetizers, you’ve found your winner.
- Why This Crispy Fried Shrimp Toast Recipe Works (Easy Party Food)
- Ingredients for Perfect Restaurant Style Shrimp Toast at Home
- Step-by-Step Instructions for Crispy Fried Shrimp Toast
- Serving Suggestions for Your Shrimp Toast Appetizers
- Making Baked Shrimp Toast: A Healthier Alternative
- Storage and Make Ahead Party Bites Tips for Shrimp Toast
- Frequently Asked Questions About Shrimp Toast
- Estimated Nutritional Data for Shrimp Toast
- Share Your Crispy Shrimp Toast Creations
Why This Crispy Fried Shrimp Toast Recipe Works (Easy Party Food)
When I serve these, they disappear fast! That’s because this recipe nails the three things we need in a great appetizer: total crunch, incredible flavor, and simplicity. It’s honestly one of my favorite Crispy Appetizers to whip up when company is coming over, making it truly Easy Party Food. I promise you don’t need a culinary degree for this, just a little attention to a couple of steps.
- It’s lightning fast—ready from prep to plate in under 30 minutes!
- The shrimp mixture is savory, bright, and incredibly succulent.
- You get that deep, golden, restaurant-quality crunch every single time.
Achieving Maximum Crispiness in Your Shrimp Toast
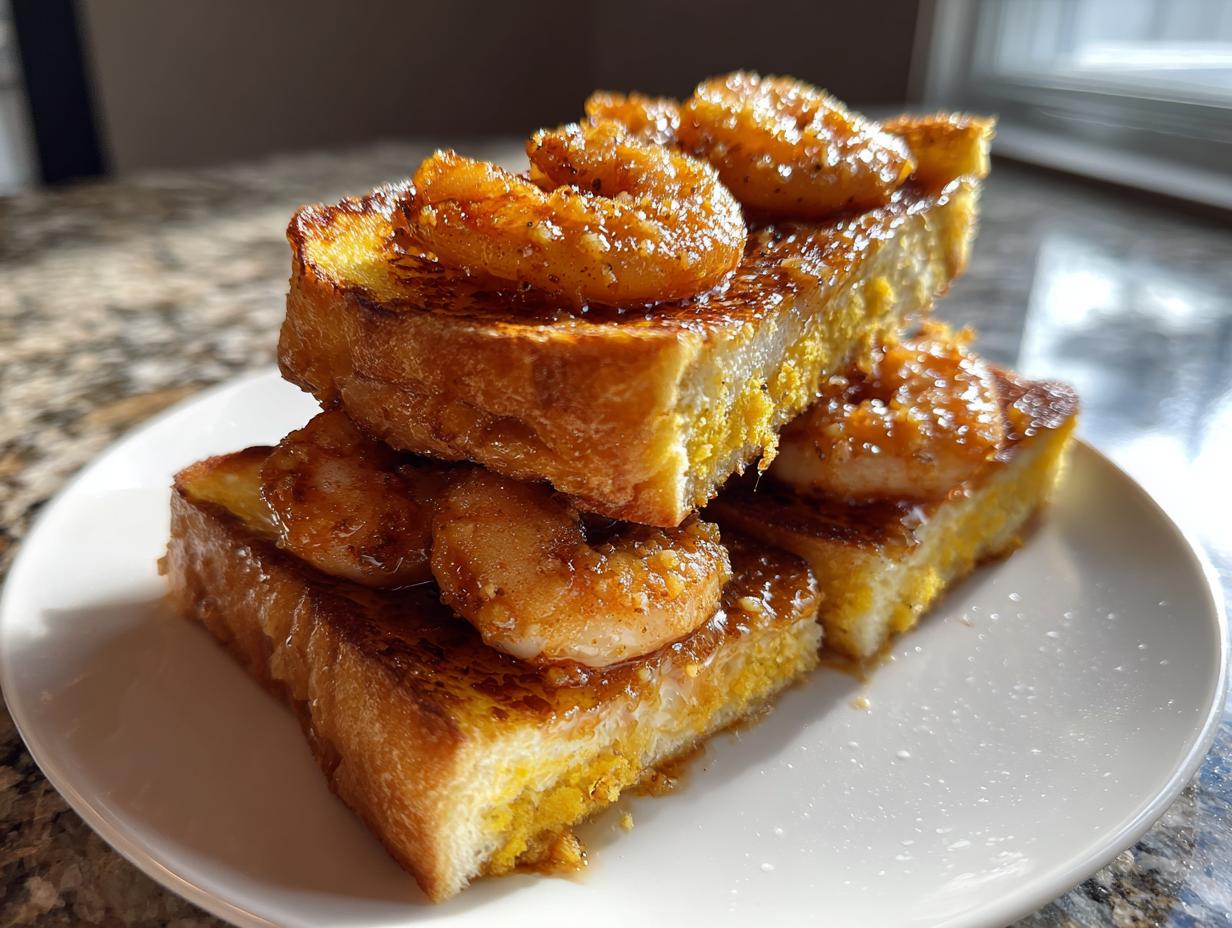
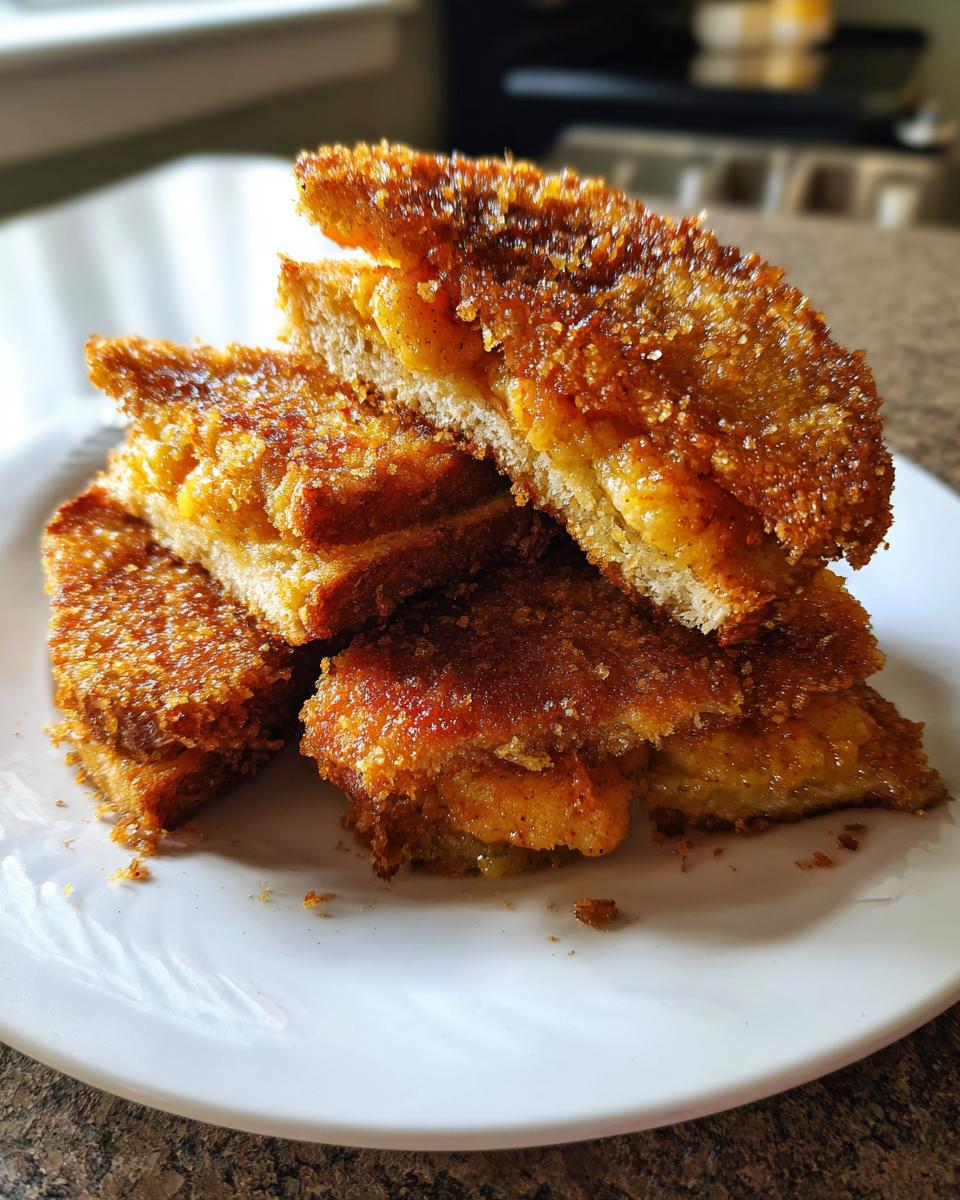
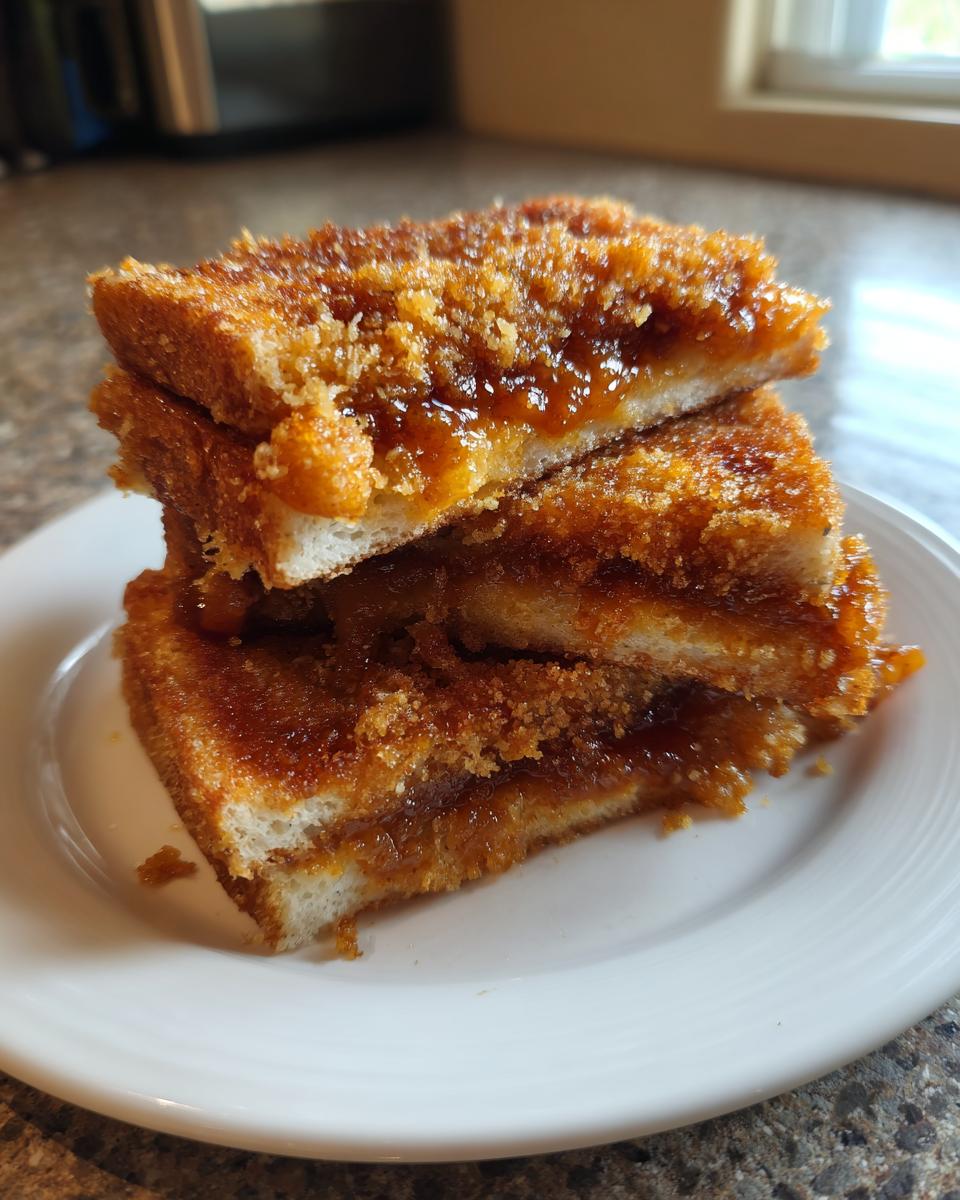
Listen, if the bread isn’t crunchy, we’ve failed! The secret here is temperature control. You absolutely must keep your oil steady at 350°F. If it’s too cool, the bread soaks up grease and becomes sadly soggy. If it’s smoking hot, the bread burns before the shrimp cooks. My expert tip? Ditch the paper towels when they come out! Paper towels trap the steam underneath, which makes the bottom soggy again. Instead, pull them straight out and set them directly onto a wire rack. This lets air circulate all around, guaranteeing those satisfyingly Crunchy Toasts.
Succulent Shrimp Topping Flavor Profile
We aren’t messing around with bland seafood here; we want that beautiful Asian Seafood Bites profile. The flavor comes from building simple layers. That fresh ginger and garlic bring the sharpness, but the sesame oil is what gives it depth—that hint of nuttiness that makes everyone ask what your secret ingredient is! Make sure you don’t run your food processor too long, though. We want a thick, sticky paste that holds its shape when you spread it, not a thin, runny liquid. That stickiness helps the topping set up beautifully when it hits the hot oil.
Ingredients for Perfect Restaurant Style Shrimp Toast at Home
Okay, the ingredient list for our shrimp toast is short, which I love! When the ingredients are simple, you know they have to be high quality, and the technique has to be spot on. This recipe gives us about 16 lovely appetizer pieces, perfect for sharing, although I sometimes find it hard to share them myself!
Here is exactly what you need:
- 1 pound raw shrimp, peeled and deveined (this is non-negotiable for the best texture!)
- 4 slices white bread, crusts removed
- 2 tablespoons cornstarch
- 1 tablespoon soy sauce
- 1 teaspoon sesame oil
- 1 teaspoon grated fresh ginger
- 1 clove garlic, minced
- 1 egg white
- 1/4 teaspoon white pepper
- Vegetable oil, for frying (you’ll need about 1 inch deep in your skillet)
You can find more tips on great easy appetizers over on my snacks page, but these ingredients are truly the core for that fantastic flavor.
Ingredient Notes and Substitutions for Shrimp Toast
Even with a small list, a few details make a huge difference here. First, the bread. Please use good, soft white sandwich bread. The softness absorbs the shrimp mixture nicely and fries up beautifully. If you try a crusty artisan bread, the base will be too hard and won’t absorb the flavors right. We’re going for a fluffy interior and a crisp exterior!
Next, that cornstarch—don’t skip it! It’s not just there to prevent burning; it acts as the primary binder for the minced shrimp. It’s what helps create that smooth, springy texture in the topping so it doesn’t just fall apart when you fry it. If you happen to be out of commercial vegetable oil, canola oil works just as well for frying this up. Remember, we need that neutral oil so the shrimp flavor really shines through!
Step-by-Step Instructions for Crispy Fried Shrimp Toast
Now we get to the fun part—putting it all together! Following these steps exactly is how we ensure you get those incredible Fried Shrimp Recipes results that look like they came straight from a high-end spot. This whole process is surprisingly fast once your oil is hot, so have everything ready to go before you start mixing the shrimp! You can find more serving hacks over on my easy appetizers page, but right now, focus on this technique.
Preparing the Succulent Shrimp Topping Mixture
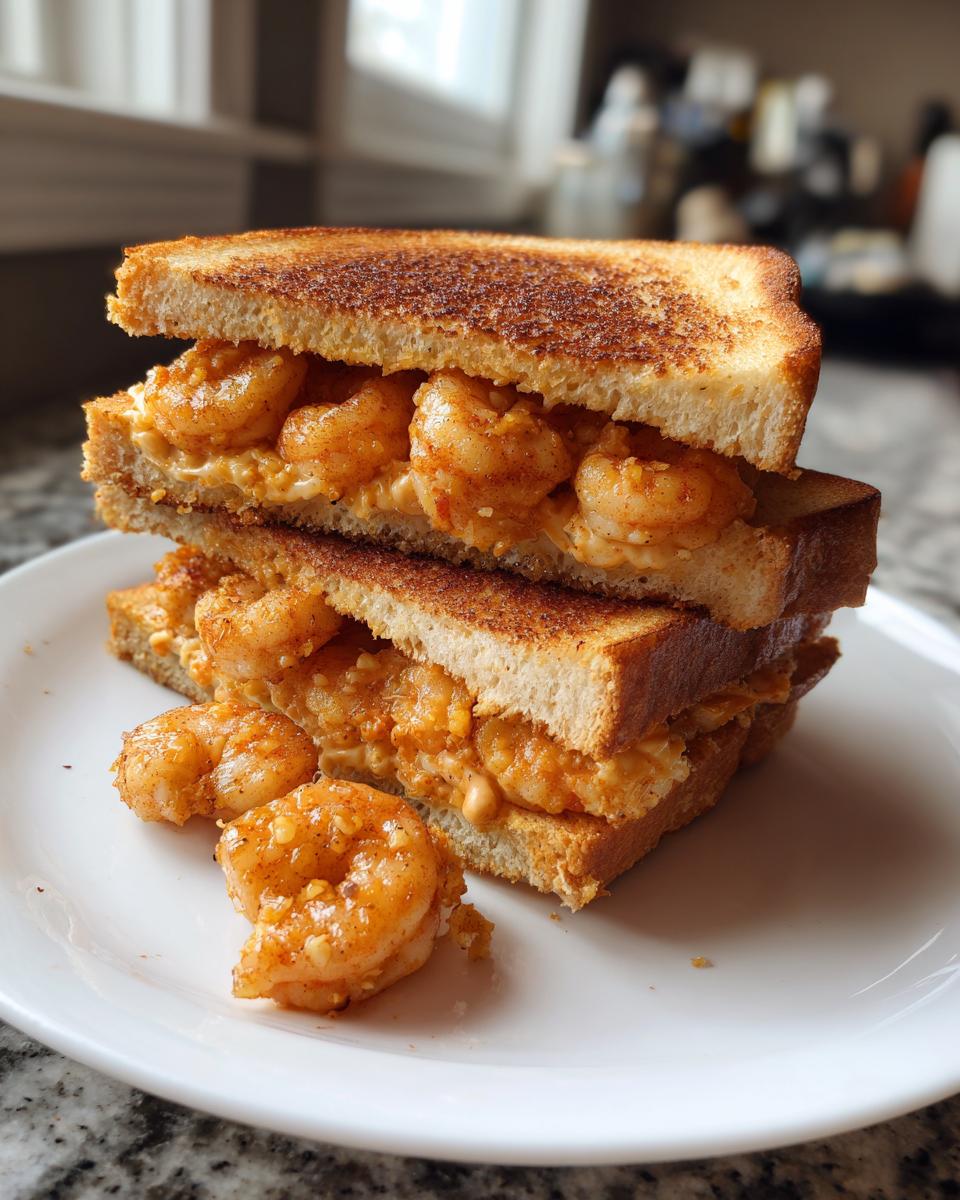
First things first, let’s make that topping! You need to mince your raw shrimp until it forms a rough paste. If you use a food processor, pulse it—just a few quick taps! If you run it too long, it gets watery, and we want structure here. If you don’t have a processor, grab your sharpest knife and chop it finely by hand. Honestly, chopping by hand sometimes gives the best texture because you can truly feel when it’s paste-like but still a little chunky, which is great.
Once it’s minced, toss it into a bowl with the cornstarch, soy sauce, sesame oil, ginger, garlic, egg white, and pepper. Mix it up really well until it feels sticky. This stickiness is key to keeping the topping attached to the bread later on. See? Easy enough!
Frying Technique for Golden Shrimp Toast
Time to heat that oil! You need about an inch of vegetable oil in a deep skillet or pot, and it has to hit 350°F. Don’t guess this temperature; if you have a thermometer, use it! Once it’s ready, carefully lay your bread slices down, making sure the shrimp side goes into the hot oil first. This seals the topping immediately!
Let them fry shrimp-side down for about 2 to 3 minutes until that shrimp layer is golden brown and firm—you’ll see it turn opaque. Then, flip them carefully to crisp the bread side until it’s golden, usually another minute or two. If the oil stays steady, your shrimp toast will be perfectly cooked through and golden. Pull them out straight onto that wire rack we talked about so they stay crunchy!
Serving Suggestions for Your Shrimp Toast Appetizers
You’ve made this perfect, crispy shrimp toast—now what do you serve it with? Honestly, these are so flavorful on their own that they don’t *need* anything else, but presentation is everything when you entertain! I always like setting out a few dipping options so guests can customize their bites. People gravitate toward anything that complements that savory, slightly sweet shrimp filling.
Best Shrimp Dipping Sauces to Pair with Shrimp Toast
When thinking about the best shrimp dipping sauces, you want something with tang or sweetness to cut through the richness of the fried bread. Keep these super simple so you aren’t spending all day in the kitchen when you should be visiting with your guests!
Here are my absolute favorites:
- Sweet Chili Sauce: This is a classic for a reason! The heat and sugar combination clings beautifully to the crispy edges. You can buy a great jarred version, or just mix a little chili paste with honey and a splash of rice vinegar for a quick homemade version.
- Simple Soy-Ginger Dipper: If you want something sharper, mix together a few tablespoons of soy sauce (I like low-sodium here), a teaspoon of fresh grated ginger, and a tiny squeeze of fresh lime juice. It really brings out the Asian profiles in the toast topping.
- Plum Sauce: This adds a wonderful, deep fruitiness that pairs surprisingly well with the savory shrimp. It’s a thicker option, so it sits nicely on the plate without running everywhere. Perfect for a bolder dipping experience!
Serving any of these in small, pretty bowls makes the whole appetizer look instantly elevated. It turns a simple snack into a real spread!
Making Baked Shrimp Toast: A Healthier Alternative
I know that frying is where we get that perfect, unbeatable crunch, but sometimes you need something a little lighter, especially if you’re having a big dinner later or if you just want to feel less guilty about eating half the batch! Don’t worry, you can absolutely make this shrimp toast recipe work as wonderful Baked Seafood Snacks.
It’s a simple switch, but you have to adjust your expectations slightly. The bread won’t get that deep-fried bubble structure, but it will still get beautifully crisp and golden brown if you follow these quick steps. I trust you’ll find this method still delivers big on flavor, even without the oil submersion.
Instead of heading for the deep-fryer, you’ll want to set your oven up for success. Preheat your oven to a solid 400°F. Before spreading that delicious shrimp topping onto your crustless bread slices, you need to prepare the bread base. Lightly brush both sides of the bread with a neutral oil, maybe avocado or canola oil. This helps simulate that initial crisping action that happens in the fryer and really helps with browning. Another great trick, which I love for preventing any stickiness, is to line your baking sheet with parchment paper—you can find more tips on preparing pans for sticking over on my easy appetizers guide.
Spread the shrimp paste thinly and evenly just like we did for the fried version. Bake them for about 8 to 10 minutes, keeping a close watch! You need to flip them halfway through so both sides toast up nicely. You are looking for the bread edges to be deeply golden and the shrimp topping to be firm to the touch. If they look pale, give them another minute or two, but watch out for drying them out, as that can happen when you skip the oil bath. For a super handy reference on baked versions, sometimes I check out inspiration from friends like the folks over at Whisky Sweetly when I’m testing out new home methods!
Storage and Make Ahead Party Bites Tips for Shrimp Toast
Oh, I wish I could tell you that leftover shrimp toast is amazing the next day, but truly, it’s just not the same. That perfect, shatteringly crisp crunch turns immediately soft once it’s cooled down and stored, even overnight. These are absolutely best eaten piping hot right out of the oil. However, that doesn’t mean we can’t use some smart planning for your next big gathering! If you’re hosting, preparation is everything, and this recipe lets us get ahead on a few key steps for fantastic Make Ahead Party Bites.
Here is where you can save yourself a ton of time when you’re entertaining:
- The Shrimp Mixture: This is your MVP for prepping ahead! You can mix up the entire shrimp topping—everything short of the bread and the oil—and store it in an airtight container in the refrigerator for up to 24 hours. It’s great because that resting time actually lets those ginger and garlic flavors really bloom!
- The Bread Prep: If you’re using standard sandwich bread, you can trim the crusts off the day before and keep the slices stacked (maybe with a small square of parchment paper between them) in a Ziploc bag on the counter. Just make sure they are totally dry and protected from humidity.
When it’s party time, you just pull the chilled topping out, spread it quickly onto the fresh bread, and fry immediately. You still get that fresh-from-the-pan flavor without scrambling around right when your guests walk in the door! That’s how we keep things relaxed around here.
Frequently Asked Questions About Shrimp Toast
I know when you’re trying a new recipe, especially one that promises that perfect restaurant texture, you have questions! I always did when I was first learning, too. That’s why I put together this little FAQ section. We want every batch of your shrimp toast to be a resounding success!
Can I use pre-cooked shrimp for shrimp toast?
Oh, that is a very common question, and I have to tell you, the answer is a firm no, dear cook. You must use raw shrimp for this recipe! When we mince the raw shrimp and mix it with the binders like cornstarch and egg white, those ingredients cook together to create that signature bouncy, succulent texture in the topping. If you use pre-cooked shrimp, it will just shred and dry out when you try to mix or fry it, and you won’t get that wonderful springiness that makes this appetizer amazing. Stick to the raw, peeled, and deveined shrimp, and trust me on this!
What is the best way to cut shrimp toast before serving?
Presentation matters when you’re serving finger foods for entertaining! For the best look and the easiest handling, wait until the toast is completely cooled for just a minute after draining it on the rack. Then, take a sharp knife and slice each piece diagonally across the middle, turning one large square into two perfect triangles. This gives you four triangles per original slice of bread. They are the perfect size for dipping and for guests to grab easily. If you try to cut them before frying, the shrimp topping becomes a huge sticky mess!
I also have a few other quick tips on presentation for all my easy appetizers collection if you want to see how I plate things up for parties!
Estimated Nutritional Data for Shrimp Toast
I always get asked about the numbers, and while I focus more on flavor than counting every little thing—because who has time for that when you’re baking?—I want to give you a general idea of what’s in this treat! Remember, this is just how the recipe comes out when I make it, and those numbers can wiggle around depending on the oil you use or if you decide to swap in a different type of bread.
For a standard serving of 4 pieces (which is half a slice of bread), here is the ballpark estimate:
- Serving Size: 4 pieces
- Calories: 250
- Fat: 15g
- Carbohydrates: 15g
- Protein: 14g
- Sodium: 350mg (Keep that in mind if you’re heavy-handed with the soy sauce in the mix!)
It’s important to remember that since this shrimp toast is fried, the fat content will be higher than if we used those baked alternatives we talked about earlier. This is a treat, not an everyday snack! Take these figures as a helpful guide, not a hard-and-fast rule. When you’re cooking at home, you’re in charge of the ingredients, so you control the final tally!
Share Your Crispy Shrimp Toast Creations
Well, that’s it, my friends! You now have all the knowledge—the secret temperature, the foolproof technique, and Carla’s personal tips—to make the most amazing, crispy, restaurant-quality shrimp toast right in your own kitchen. Now for my favorite part: hearing from you!
When I was teaching elementary school, the best part of the day wasn’t the lesson plan; it was seeing that lightbulb moment when a concept finally clicked for a student. I get that same thrill every time I hear that someone tried one of my recipes and it turned out perfectly. So please, don’t be shy!
If you take the plunge and make this batch of crispy appetizers, you absolutely have to come back here and tell me how it went. Did it stay super crispy? Did your family devour them before you could get enough dipping sauce on the table? Let me know! Drop a five-star rating below, and please leave a comment telling me your biggest takeaway from the process. If you’re comfortable sharing photos of your golden bites, I’d love to see them!
You can always send me a note through the contact form if you have any secret sauce recipes of your own to share. Happy cooking—I’m sending you all the encouragement to get deep-frying (carefully!)!
PrintCrispy Fried Shrimp Toast

Make restaurant-style shrimp toast at home. This recipe yields golden, crispy bread topped with a flavorful, succulent shrimp mixture, perfect as an appetizer or party bite.
- Prep Time: 15 min
- Cook Time: 10 min
- Total Time: 25 min
- Yield: 16 pieces 1x
- Category: Appetizer
- Method: Frying
- Cuisine: Asian
- Diet: Low Lactose
Ingredients
- 1 pound raw shrimp, peeled and deveined
- 4 slices white bread, crusts removed
- 2 tablespoons cornstarch
- 1 tablespoon soy sauce
- 1 teaspoon sesame oil
- 1 teaspoon grated fresh ginger
- 1 clove garlic, minced
- 1 egg white
- 1/4 teaspoon white pepper
- Vegetable oil, for frying
Instructions
- Mince the shrimp finely in a food processor or by hand until it forms a paste. Do not over-process into a liquid.
- In a bowl, combine the minced shrimp, cornstarch, soy sauce, sesame oil, ginger, garlic, egg white, and white pepper. Mix well until the mixture is sticky and uniform.
- Spread a thin, even layer of the shrimp mixture onto one side of each slice of bread.
- Heat about 1 inch of vegetable oil in a deep skillet or pot to 350°F (175°C).
- Carefully place the bread slices, shrimp-side down, into the hot oil. Fry for 2 to 3 minutes per side until the bread is golden brown and crispy and the shrimp is cooked through.
- Remove the shrimp toast from the oil and place it on a wire rack or paper towel-lined plate to drain excess oil.
- Cut each slice into quarters diagonally before serving.
Notes
- For maximum crispiness, ensure your oil temperature remains steady during frying.
- Serve immediately while hot for the best texture.
- Consider serving with a sweet chili dipping sauce for added flavor.
Nutrition
- Serving Size: 4 pieces
- Calories: 250
- Sugar: 1
- Sodium: 350
- Fat: 15
- Saturated Fat: 3
- Unsaturated Fat: 12
- Trans Fat: 0
- Carbohydrates: 15
- Fiber: 1
- Protein: 14
- Cholesterol: 120