
Oh, morning chaos! If you’ve ever stared down a hungry crowd, or maybe just your own tired self needing breakfast for five days ready to go, you know the struggle of standing over a skillet that just won’t stretch far enough. Well, forget the frantic flipping and the messy stovetop! I want to share my favorite secret weapon for taking charge of breakfast: my super easy, hands-off recipe for sheet pan eggs. I learned a lot about clear instructions balancing my thirty years as a teacher and feeding my own large family as a grandmother. This method lets the oven do all the heavy lifting, giving you tender, fluffy egg perfection that’s perfect for feeding a crowd or making a big batch for meal prep. It really is a game-changer for busy mornings! For more foolproof starts to the day, check out all my easy breakfast recipes.
- Why This Sheet Pan Eggs Recipe Works for a Crowd
- Gathering Ingredients for Your Sheet Pan Eggs
- Step-by-Step Instructions for Perfect Sheet Pan Eggs
- Customizable Sheet Pan Breakfast Ideas
- Serving Sheet Pan Eggs for Breakfast Sandwiches
- Storage and Make Ahead Egg Bake Tips
- Essential Equipment for Sheet Pan Cooking
- Frequently Asked Questions About Sheet Pan Eggs
- Share Your Sheet Pan Eggs Success
Why This Sheet Pan Eggs Recipe Works for a Crowd
Honestly, when I have to feed more than just my immediate family, the stovetop just shuts down for me. That’s why this technique for sheet pan eggs is such a lifesaver. You’re spreading out the work, not just the ingredients. It’s all about making your life simpler!
- It cooks such a large volume all at once, which is just wonderful for weekend brunches.
- You can stir in cheeses and meats right into the batter, customizing it for everyone.
- It bakes up beautifully, making cleanup so much easier than scrubbing multiple frying pans.
Hands Free Egg Cooking
The best part is setting the timer and walking away! This is true hands free egg cooking because the oven handles everything. You don’t have to stand there stirring constantly, worrying about scorching the bottom layer while the top is still runny. This frees you up to make the coffee, set the table, or just enjoy a quiet ten minutes before the rush hits.
Meal Prep Eggs Recipe Success
This is my absolute favorite part, especially for my grandkids during the school year. Once baked, these eggs set up firm but stay moist, meaning they slice up perfectly into neat squares. It’s a perfect meal prep eggs recipe because you can cool them, stack them in containers, and they reheat like a charm all week long. If you’re looking for more ways to save time during the week, take a peek at some of my quick healthy lunch ideas!
Gathering Ingredients for Your Sheet Pan Eggs
Let’s gather what you need to create this big batch of goodness! You’ll notice we use a full dozen eggs here, which is just the starting point—you can always scale this up later by adding another half batch if you have a huge crew. We need the right carriers for the fluffiness, too, so grab the milk or half-and-half before you start cracking.
Ingredient Notes and Substitutions
When you are making a big batch, the small details matter! For the creamiest texture, I always reach for half-and-half, but regular milk works just fine if that’s what you have. If you are adding meats like bacon or sausage, please make sure it is already fully cooked and crumbled up before it goes into the bowl. Nobody wants raw meat baked into their breakfast!
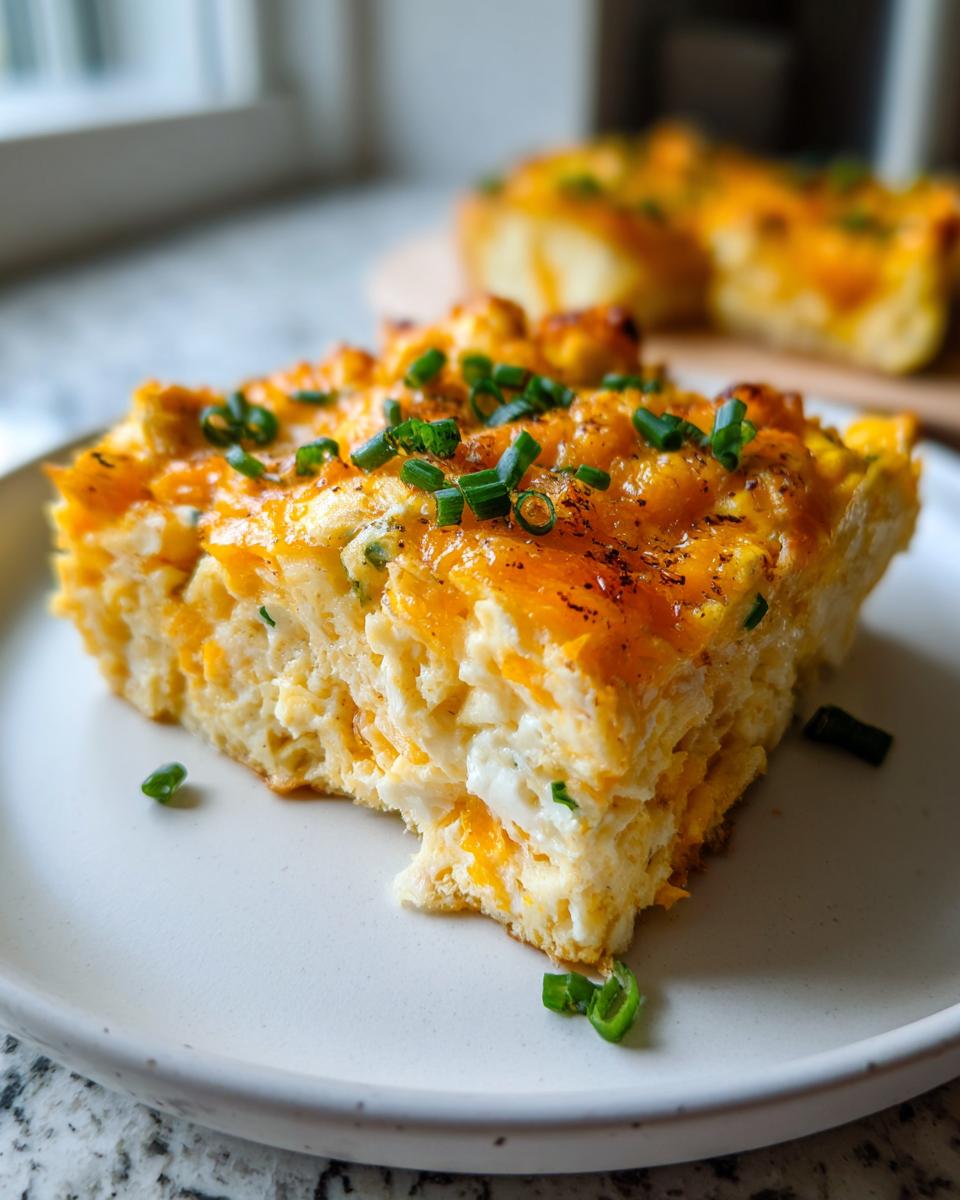
And cheese? Always use shredded because it melts evenly into the egg mixture while it bakes. If you use soft cheese like goat cheese, I would crumble it in right at the end so it just gets warm instead of completely melting away.
Step-by-Step Instructions for Perfect Sheet Pan Eggs
Okay, let’s get this show on the road! This is where the rubber meets the oven, and trust me, it’s seriously simple. We are aiming for that fluffy texture that makes these sheet pan eggs so famous. Make sure your oven is set before you start mixing anything!
Preparing the Pan and Whisking the Sheet Pan Eggs Base
First things first: preheat that oven to 375°F (190°C). Don’t try to rush this part; good baking starts with a properly heated oven. Next, grab your big 18×13 inch rimmed sheet pan—you need the sides so nothing leaks out onto the floor of your oven! Give it a good, generous greasing. I use cooking spray, but if you prefer butter or oil, make sure it covers every inch.
In a large bowl, crack all those eggs! Add your milk, salt, and pepper. Now, whisk these together until they look totally uniform and maybe just a little bubbly on top. Then, stir in your cheese and any meats you decided on. Don’t over-whisk once the cheese is in; we want it mixed, not whipped like meringue!
Baking Time and Checking Doneness for Fluffy Baked Eggs
Pour that whole mixture evenly spread out onto your greased pan. It will look a little thin, but that’s fine, that helps them cook evenly! Slide it gently into the hot oven. You’re looking at 15 to 20 minutes total. Keep an eye on it after 15 minutes.
To check if they are done, poke gently near the center. If it sets right away and doesn’t look liquidy or wet, they are ready to come out. We want them set but still tender—no dry edges here! For reheating later, let them cool slightly before you slice them into squares. This technique results in the best fluffy baked eggs, ready for grabbing later in the week. For more helpful timings and simple dishes, you can always check out my easy weeknight dinners section!
Customizable Sheet Pan Breakfast Ideas
The beauty of using a big sheet pan for your eggs is that you can turn it into whatever kind of breakfast you need that day! Once you master the basic technique, these sheet pan eggs become the perfect canvas for whatever you have on hand. Whether you need a protein boost to keep you full until lunch or just want to clear out the crisper drawer, we have options!
Making High Protein Sheet Pan Eggs
If you are watching your macros, this recipe is wonderful because it’s naturally high in protein, but we can boost that even more! Try adding about half a cup of cottage cheese—I know it sounds funny, but trust me, it whisks right in and makes the eggs incredibly soft and adds a huge protein punch. You could also swap out bacon for finely diced, pre-cooked turkey sausage or ham to keep those savory flavors high-protein.
Sheet Pan Eggs with Cheese and Veggies
Veggies are mandatory in my house! When you’re adding vegetables, make sure they offer moisture or are already cooked down a bit. Soft spinach wilts perfectly if you toss it in right before baking. For things like mushrooms or onions, give them a quick sauté in a separate pan first. If you add them raw, they release too much water while baking and can make the edges of your eggs a little rubbery instead of tender. If you love veggies, you might also enjoy my broccoli cheese casserole!
Serving Sheet Pan Eggs for Breakfast Sandwiches
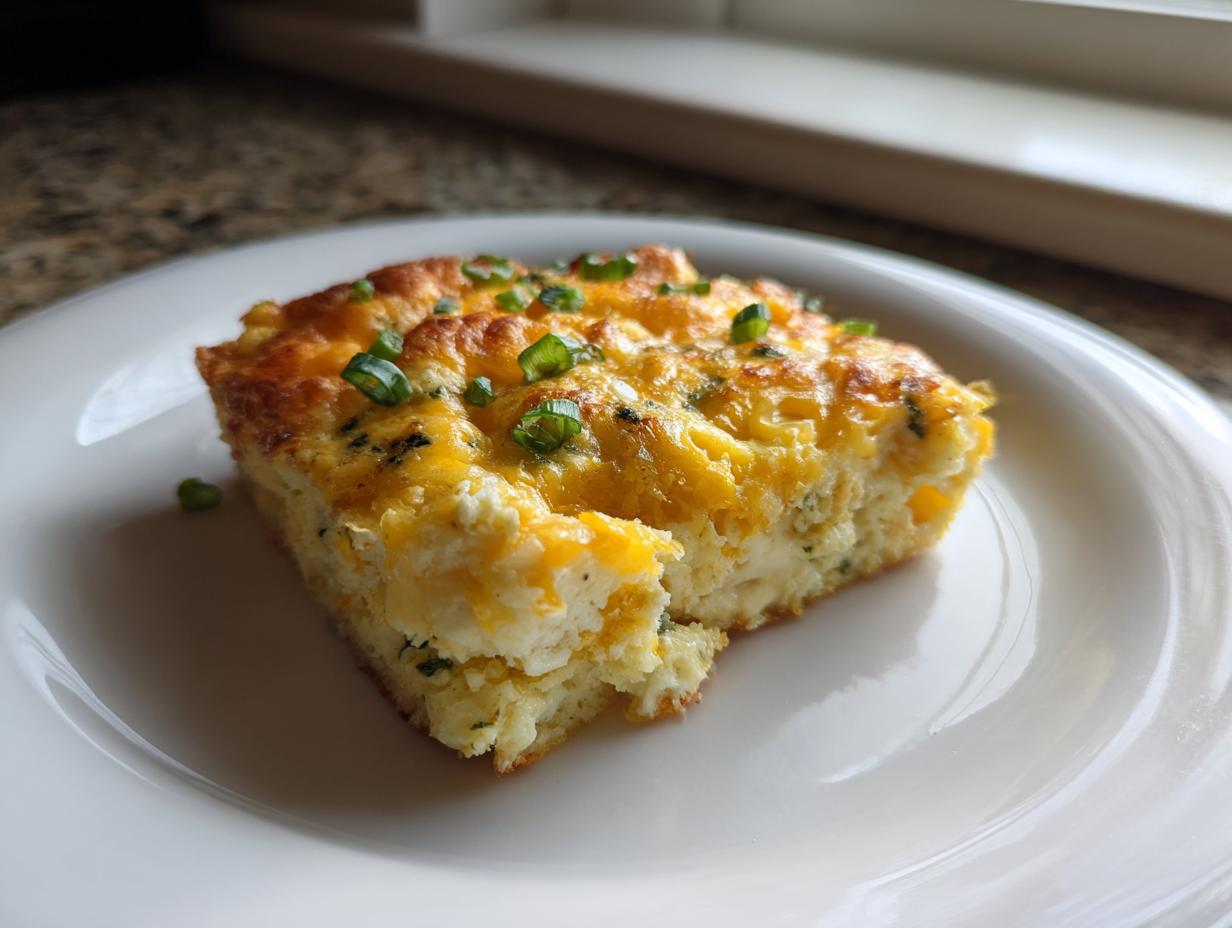
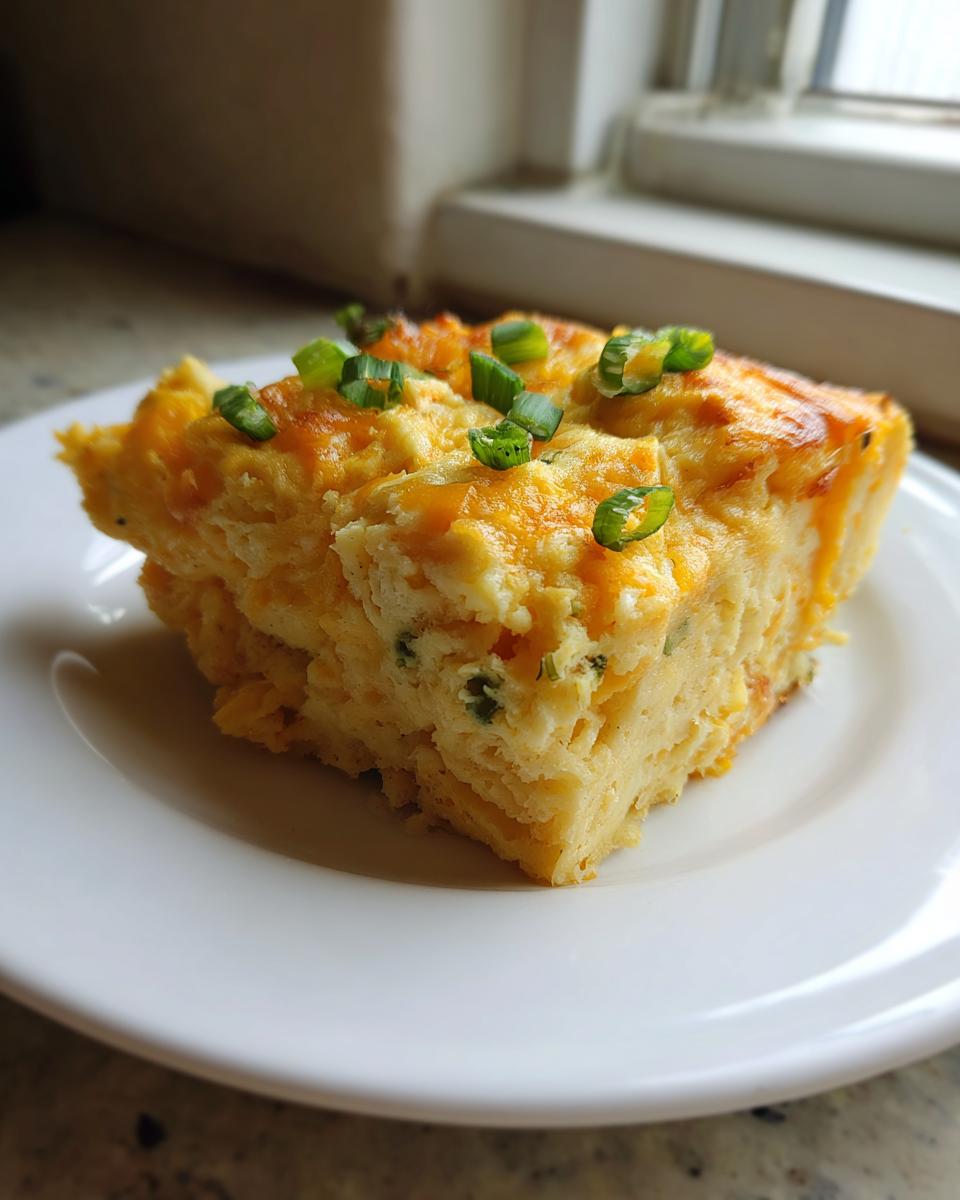
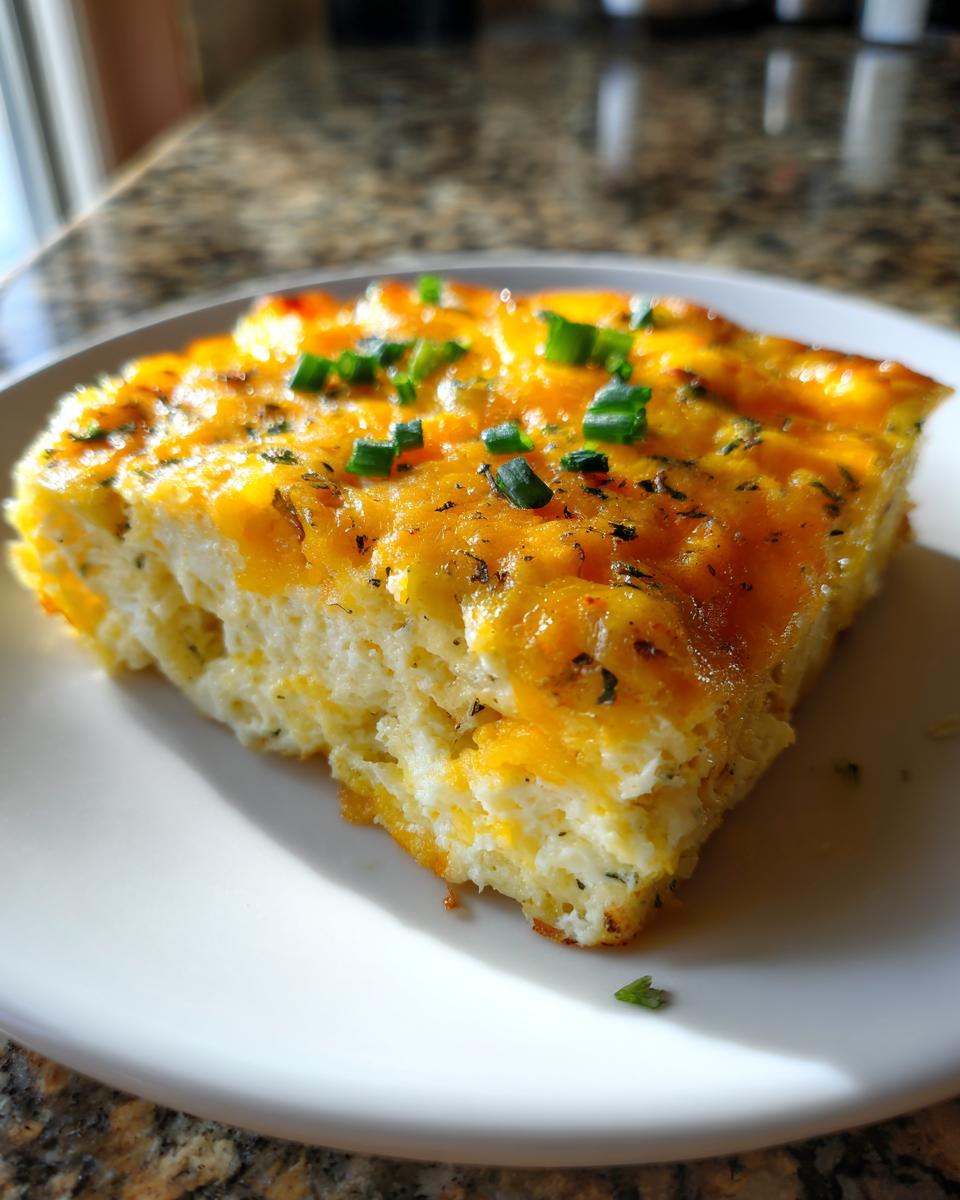
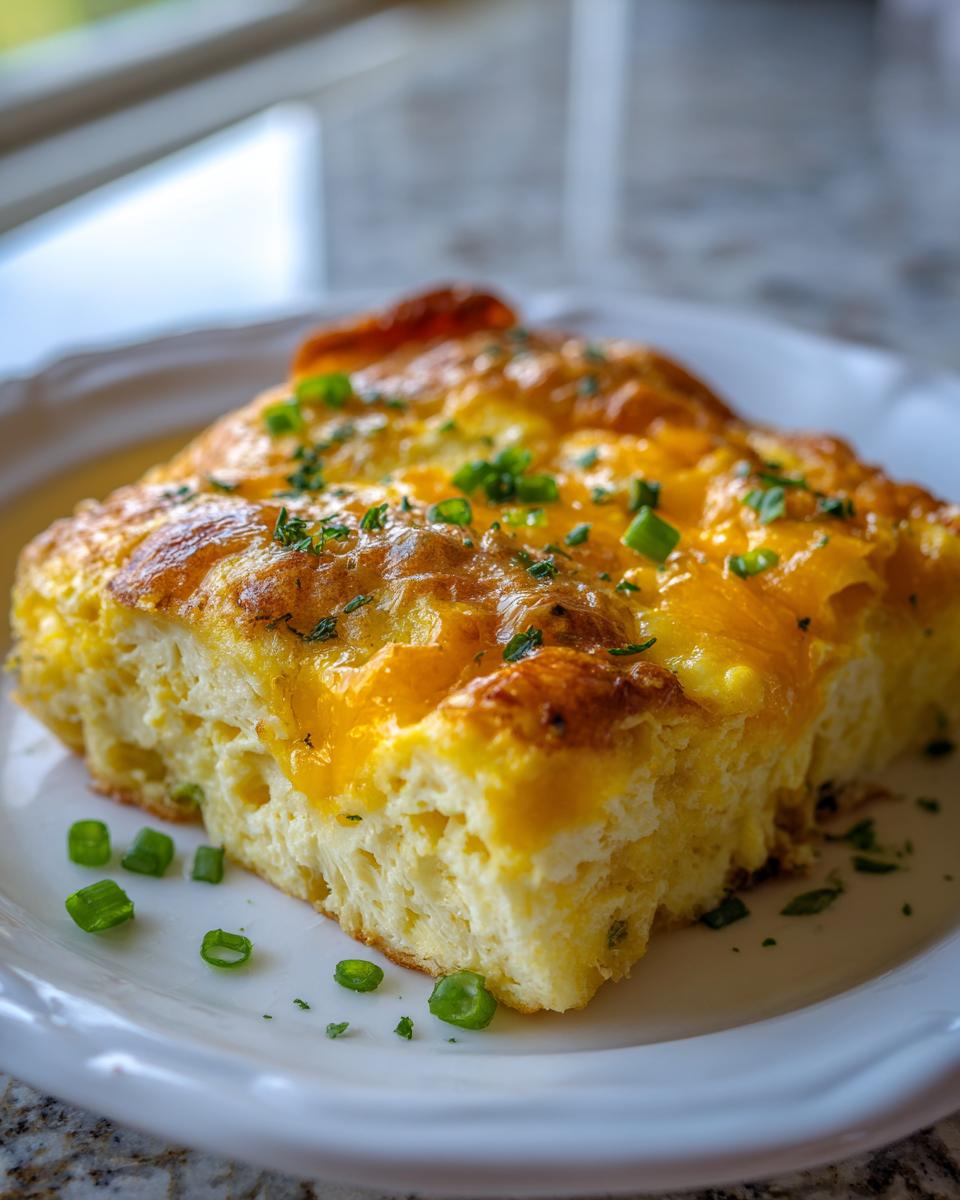
Now that you have this huge, beautiful slab of perfect eggs, what are you going to do with it? For me, 90% of the time, these go straight into making grab-and-go breakfast sandwiches! Because we baked them flat on a sheet pan, they slice into these wonderful, sturdy squares. This is so much better than trying to scoop out a floppy mound of scrambled egg from a skillet.
Here’s my tip for getting the perfect fit for your bread: measure! If you’re using standard square toast or English muffins, try to cut the baked egg into squares that match that size. If you’re using round Kaiser rolls, just use a large cookie cutter or a wide-mouth glass to cut perfect circles right out of the baked top layer. That easy slicing is what truly makes these sheet pan eggs shine for hurried mornings. It’s all about making the assembly quick! If you are looking for other sandwich filler ideas, check out my recipe for a great chicken salad sandwich filling.
Storage and Make Ahead Egg Bake Tips
I know how hectic life gets, so I’m thrilled to tell you that this recipe is built for planning ahead. Once these sheet pan eggs cool down a bit right there on the pan, they hold their shape so beautifully. Don’t be shy about making a double batch because leftovers are fantastic!
The most important step here is to let them cool completely before you wrap them up. If you wrap them warm, you’re just trapping steam, and we don’t want soggy eggs the next day! I slice them into the squares or rectangles I know I’ll need for my breakfast. For the fridge, wrap individual portions tightly in plastic wrap or parchment paper, then layer them in an airtight container. They stay perfectly fine in the refrigerator for about four or five days.
And for those weeks when you just know you won’t have time? You can absolutely freeze them! Cool them completely, wrap them up well—I suggest putting them into a freezer-safe bag after wrapping—and they keep wonderfully for up to a month. When you need one, just pop it in the microwave for about 45 seconds. It’s such a lifesaver to have something this healthy and quick ready to go. If you are interested in freezing other things for later, you can see some of my tips for easy homemade crispy corn dogs too!
Essential Equipment for Sheet Pan Cooking
You don’t need a whole host of fancy gadgets to make these eggs, which really keeps the cleanup quick! But there are a few tools I insist on using every single time I make a big batch of sheet pan eggs. If you skip these, you’re just making life harder for yourself later.
The star, of course, is your baking sheet. You absolutely must use a 18×13 inch rimmed baking sheet. Please, please don’t try to use a flat cookie sheet, even if it’s the only one you have clean! When you pour the liquid egg mixture onto a flat surface, it spreads too thin and bakes unevenly, and worse, it often runs right over the edge in the oven. That messy cleanup is not worth saving one pan!
Besides the trusty pan, you definitely need a large mixing bowl—you have to get air into those eggs when you whisk them, so small bowls just won’t cut it. A good heavy-duty whisk helps incorporate everything nicely, and when they come out hot from the oven, a sturdy, wide spatula is your key friend for slicing them into neat, clean squares for serving.
Frequently Asked Questions About Sheet Pan Eggs
I always get so many wonderful questions after people try this recipe for the first time! It’s so adaptable, so it makes sense that folks wonder about tweaking it. Here are some of the most common things I hear people asking when they are planning their own sheet pan breakfast ideas.
Can I cook sunny side up eggs on a sheet pan?
That’s a great question! This specific recipe is designed to be a baked, set casserole, which means we scramble the eggs first. If you want sunny side up, you absolutely *can* do that on a sheet pan—it’s one of those fantastic oven baked eggs tricks. What you need to do is grease a pan really well, or use parchment paper, and then crack each egg individually right onto the paper. They won’t take nearly as long, maybe 10 to 12 minutes at 375°F. Keep a close eye on them because the edges cook faster than the yolks!
What is the best way to reheat these oven eggs?
Because this is a wonderful time saving breakfast recipe, you’ll want the reheating to be fast too! For the quickest results, definitely use the microwave—just a quick 30 to 45 seconds per square should warm them up nicely. If you have a little more time and you want to crisp up the edges again, you can absolutely use the toaster oven or even a regular oven set to about 300°F for about seven minutes. They come out soft and fluffy every time!
Can I use different types of cheese in this recipe?
Oh yes, cheese makes everything better! Most firm, block cheeses you shred yourself—like Monterey Jack, Pepper Jack, or Swiss—will work beautifully in this simple egg casserole recipe. They melt evenly and hold up well during the bake time. My only word of caution is with really soft, fresh cheeses like fresh mozzarella or goat cheese. They tend to release a lot of extra liquid when they cook, which can make that section of your eggs a little wet. I suggest crumbling those softer kinds over the top just for the last five minutes of baking instead.
If you have any other questions at all, please don’t hesitate to reach out to me through my contact page!
Share Your Sheet Pan Eggs Success
Well, that’s it! We’ve conquered breakfast chaos together. I truly hope having this big tray of perfectly baked sheet pan eggs sitting in your fridge makes your next few mornings a breeze. Seriously, if you try this out, I would be so excited to hear what you thought!
Did you try adding smoked paprika? Or maybe you went all out with ham and peppers? Let me know what mix-ins you loved most in the comments below! I always love seeing what combinations my readers dream up. And tell me, how did you use them? Were they an easy addition to Sheet Pan Breakfast Sandwiches, or did you just slice them up for a quick, high-protein snack?
If this recipe made your life even a little bit easier, please leave a little star rating right below this section. It helps other busy cooks find reliable meals!
For more recipes rooted in real, home cooking that prioritize ease and flavor, you can always learn more about my philosophy over on my About page. Happy cooking, friends!
PrintEasy Sheet Pan Scrambled Eggs for Meal Prep and Crowds

Make a large batch of fluffy scrambled eggs baked on a sheet pan. This hands-off recipe is perfect for feeding a crowd, meal prepping for the week, or assembling quick breakfast sandwiches.
- Prep Time: 10 min
- Cook Time: 20 min
- Total Time: 30 min
- Yield: 12 servings 1x
- Category: Breakfast
- Method: Baking
- Cuisine: American
- Diet: Vegetarian
Ingredients
- 18 large eggs
- 1/2 cup milk or half-and-half
- 1 teaspoon salt
- 1/2 teaspoon black pepper
- 1 cup shredded cheddar cheese
- 1/2 cup cooked, crumbled bacon or diced ham (optional)
- 1/4 cup chopped green onions (optional)
Instructions
- Preheat your oven to 375°F (190°C). Lightly grease a standard 18×13 inch rimmed baking sheet.
- In a large bowl, whisk together the eggs, milk, salt, and pepper until the mixture is uniform and slightly frothy.
- Stir in the shredded cheese and any optional cooked meats or vegetables you are using.
- Pour the egg mixture evenly onto the prepared sheet pan. Spread it out gently.
- Bake for 15 to 20 minutes, or until the eggs are set in the center and no longer liquid. The cooking time depends on your oven.
- Remove the pan from the oven. Sprinkle the green onions over the top, if using.
- Let the eggs cool slightly on the pan for about 5 minutes.
- Use a large spatula to cut the eggs into squares or desired serving sizes.
Notes
- For breakfast sandwiches, slice the baked eggs to fit your bread or English muffins.
- You can freeze portions of the cooked eggs. Cool completely, wrap individually, and store in a freezer-safe container for up to one month. Reheat in the microwave.
- This recipe scales well; double the ingredients for two sheet pans if you need more servings.
Nutrition
- Serving Size: 1 square
- Calories: 120
- Sugar: 1
- Sodium: 250
- Fat: 8
- Saturated Fat: 4
- Unsaturated Fat: 4
- Trans Fat: 0
- Carbohydrates: 1
- Fiber: 0
- Protein: 10
- Cholesterol: 200