
Oh, that smell! You know the one I mean—that intoxicating perfume of warm butter melting into spicy cinnamon that slowly creeps through the house early in the morning? That is the smell of pure happiness, and I promise you, it’s coming from your oven next time you try these. For years, people told me that making a truly soft, bakery-quality **cinnamon roll** was too fussy, but that’s simply not true! This foolproof recipe ensures even if it’s your first time working with yeast, you’ll get those tender, gooey layers every single time. Honestly, this is the yeast roll recipe my grandkids demand for every special weekend breakfast!
- Why This is the Best Cinnamon Roll Recipe You Will Ever Make
- Gathering Supplies for Your Cinnamon Roll Baking Project
- Step-by-Step Guide to Making the Cinnamon Roll Dough
- Assembling and Shaping the Perfect Cinnamon Roll Log
- Baking Your Cinnamon Roll to Golden Perfection
- Crafting the Cream Cheese Icing for Your Cinnamon Roll
- Serving Suggestions and Storing Your Cinnamon Roll Leftovers
- Frequently Asked Questions About Making Cinnamon Rolls
- Share Your Cinnamon Roll Creations
Why This is the Best Cinnamon Roll Recipe You Will Ever Make
I’ve tinkered with so many sweet breakfast recipes over the years, but I always come back to this exact method. Why? Because it delivers the promise every single time. We aren’t aiming for flat, tough rolls here; we are aiming for that pillow-soft, pull-apart texture you usually only find at fancy bakeries. If you want to know more about the philosophy behind my time-tested recipes, you can always read my story here.
- The filling is rich with brown sugar and softened butter, creating a cascade of caramelization in the center.
- This is a completely trusted **homemade pastry** method, proven over two decades of family brunches.
- The second rise is short but crucial, which means less waiting time for you!
If you follow these steps precisely, you have found your forever recipe.
Achieving That Perfect Soft Dough for Your Cinnamon Roll
Expertise comes from understanding why small steps matter, especially with yeast. You absolutely must check your milk temperature—too cold and the yeast sleeps; too hot and you cook it! You want that beautiful froth after five minutes, which confirms your yeast is awake and ready to work its magic.
Then comes the kneading. Don’t quit early! Those eight minutes of kneading aren’t just about muscle; they are building the gluten structure that traps the gases from the yeast. That’s what gives you height and that airy, fluffy structure. Trust me, this slow method guarantees the **best cinnamon roll** texture possible.
Gathering Supplies for Your Cinnamon Roll Baking Project
Before we get into the fun part (the rolling and the piling on of icing!), we need to make sure we have everything ready to go. Baking yeast dough takes a little planning, and having your tools lined up makes the whole process feel relaxed, not rushed. When you see all the ingredients laid out, you’ll realize just how simple this truly **easy cinnamon rolls** recipe is.
Essential Equipment for Easy Cinnamon Rolls
You don’t need fancy commercial equipment, but a few basics really help cement your success here. Have these ready to go before you start: a sturdy large mixing bowl, a good, long rolling pin, a reliable instant-read thermometer for that milk, and of course, the baking vessel itself—a standard 9×13 inch pan.
Ingredients for the Soft Yeast Roll Recipe
Make sure you grab the right butter—you need some softened for the dough and some softened again for that delicious filling later. Remember that milk needs to be warm, not hot, hitting that perfect 105°F to 115°F sweet spot to wake up the yeast. Double-check you have all your wet and dry components measured out so that mixing is a breeze!
Step-by-Step Guide to Making the Cinnamon Roll Dough
Okay, time to get our hands dirty! First things first: our yeast needs a gentle wake-up call. Warm your milk gently—I want that temperature between 105°F and 115°F. If you don’t have a thermometer, test it against your wrist; it should feel pleasantly warm, not hot. Stir in that active dry yeast and let that mixture sit for about five minutes until it gets nice and foamy on top. When you see those tiny bubbles, you know you are good to go!
In your big mixing bowl, stir together that foamy yeast mixture with the sugar, the softened butter for the dough, your egg, and the salt. Get it just combined. Now, start adding your flour gradually. Mix on low speed or by hand until a soft, shaggy dough starts to form. Don’t panic if it looks a little sticky!
This is where the magic happens: kneading! Turn that dough out onto a lightly floured surface. You need to work it for a solid eight minutes. My mom always taught me this trick: if the dough feels too sticky, dust your hands lightly instead of dumping more flour into the dough itself. That keeps the final product light. You’re looking for a smooth, elastic ball when you’re done. Then, pop it into an oiled bowl, turn it to coat, cover it up tight, and let it rest in a warm spot for about an hour and a half, or until it feels puffy and doubled in size. That yeast is doing all the heavy lifting!
Assembling and Shaping the Perfect Cinnamon Roll Log
Once your dough has doubled, it’s time to make the amazing filling! While that’s resting, just whisk together the remaining sugar, that full tablespoon of ground cinnamon, and the second portion of softened butter in a small bowl. You want a thick, spreadable paste. Don’t worry if it looks a bit chunky; that just adds texture later!
Gently punch down your beautifully risen dough and turn it out onto a surface dusted lightly with flour. Roll it out into a big rectangle—aim for about 12 inches by 18 inches. Spread that glorious cinnamon-butter mixture evenly over the dough, but stop short of leaving about an inch bare along one of the long edges. This empty border is your seal, so don’t skip it!
Starting from the opposite long edge—the one completely covered—roll that dough up as tightly as you can, like a jelly roll. You want a nice, snug log. Pinch that empty seam securely shut! This whole process transforms simple dough into a spectacular **sweet breakfast recipe** later on.
Pro Tips for Rolling and Cutting Your Cinnamon Roll
Cutting the log evenly is the secret to beautiful, uniform rolls. Forget a standard knife if you want clean edges; I always sneak a piece of unflavored dental floss! Slide it under the log and cross the strings over the top, pulling sharply together. It gives you these magazine-worthy cuts without squishing the beautiful layers you just worked so hard to create.
Once cut into 12 rolls, place them snugly, cut-side up, into your greased pan. Now, cover them again and let them rest for just 30 minutes for their final proof. This is the perfect window to get your oven heating up to 375°F. Those short rises are what make this method so much faster than older recipes!
Baking Your Cinnamon Roll to Golden Perfection
Once those rolls have puffed up beautifully after their second short rest, it’s showtime! Slide that pan into the 375°F oven. You’re looking for a baking time between 20 and 25 minutes, but you have to watch them! We aren’t looking for dark brown, just lovely and golden on top, smelling absolutely heavenly.
If you’re worried about the very center, skip the toothpick test—it can tear the delicate crumb. Instead, watch the edges; when the rolls have pulled just slightly away from the sides of the pan, they are usually done. They should feel slightly firm when you gently press the top. Pull them out right then, and we’ll get that icing on fast while they are still warm!
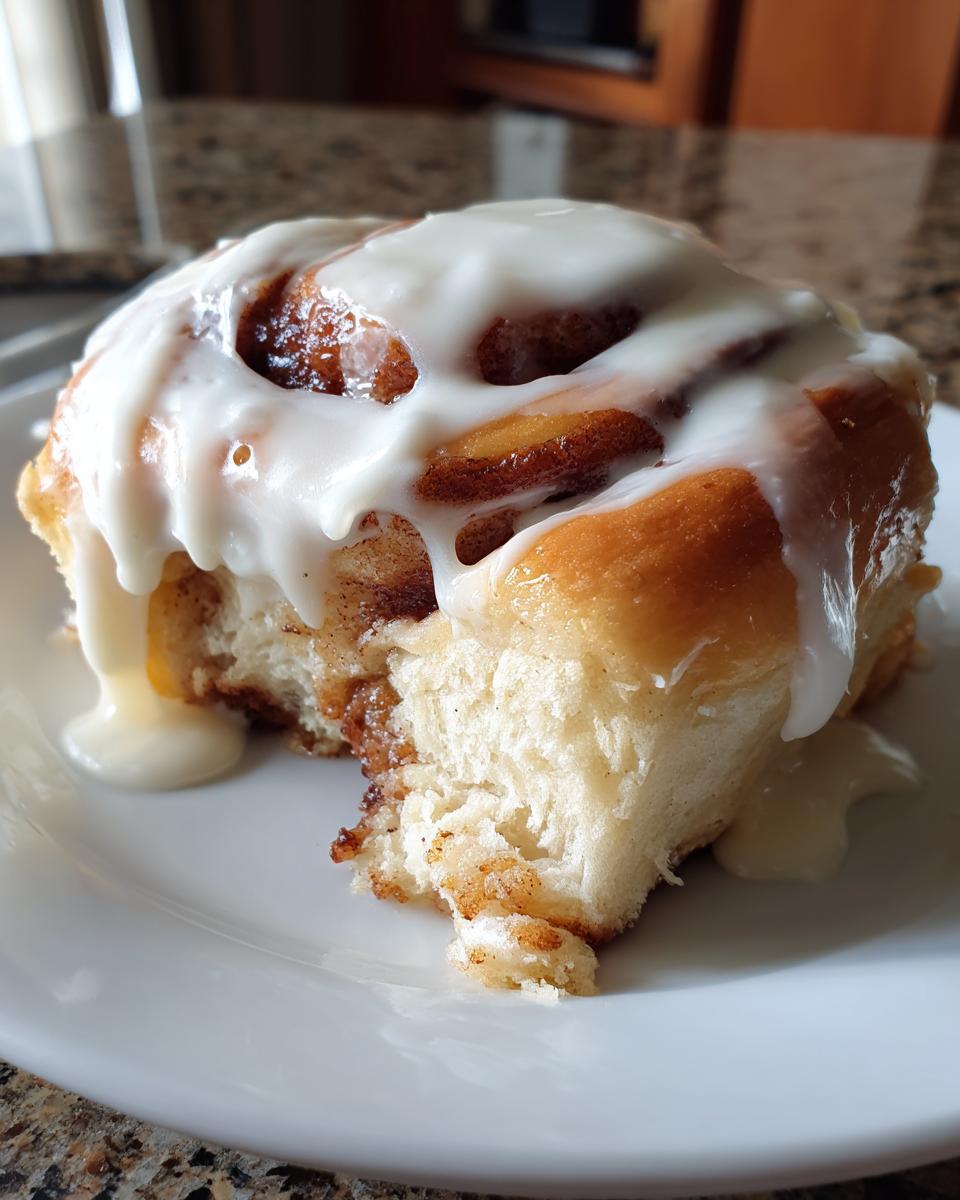
Crafting the Cream Cheese Icing for Your Cinnamon Roll
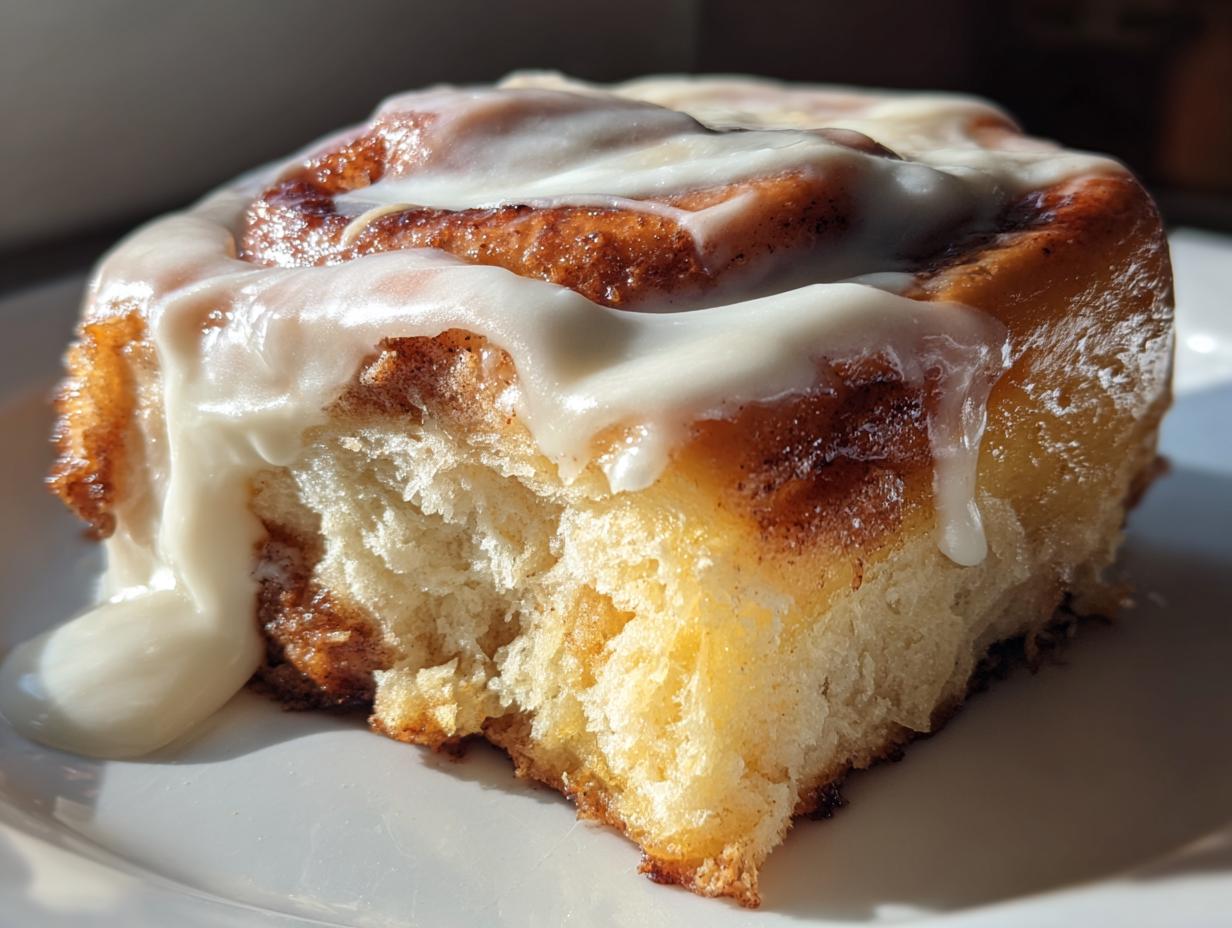
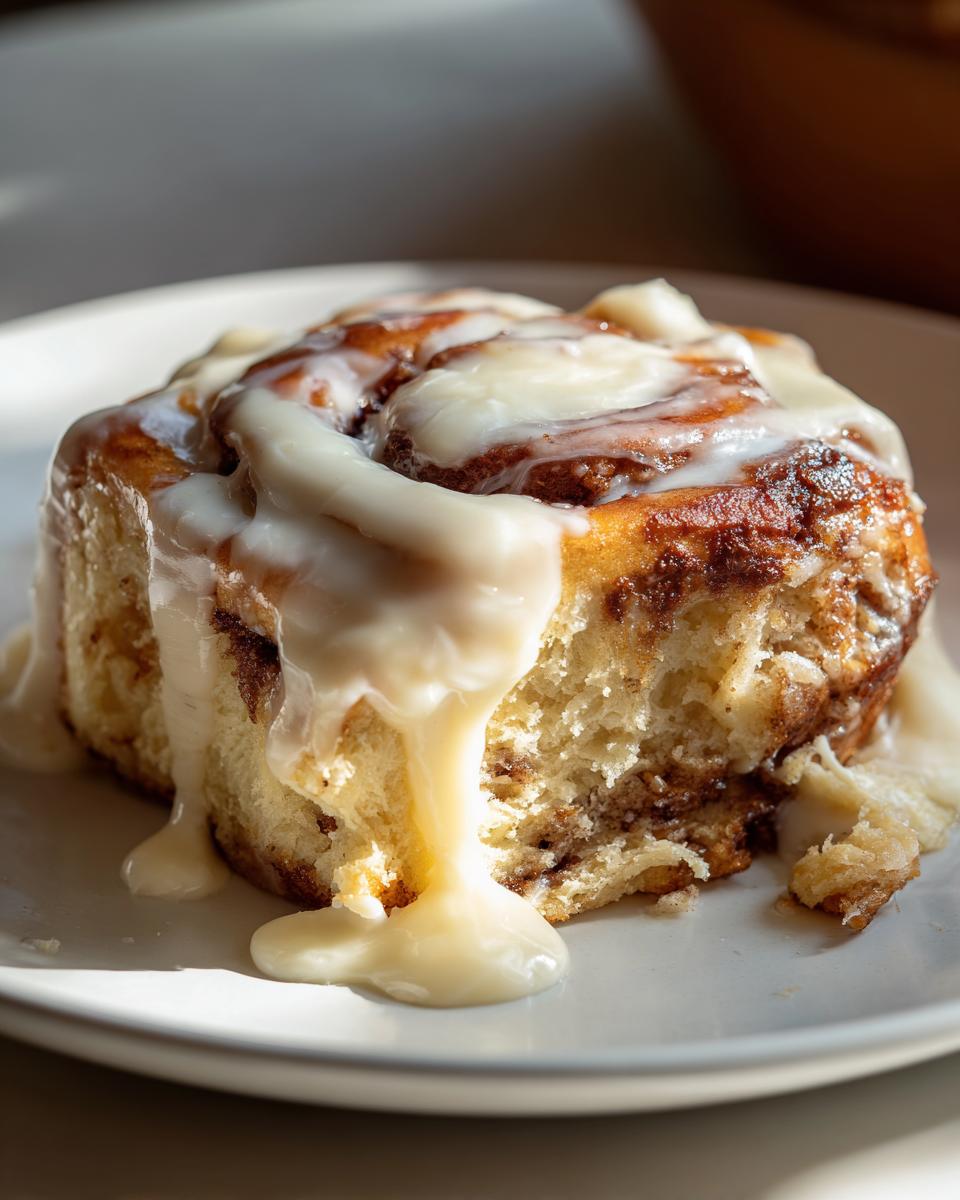
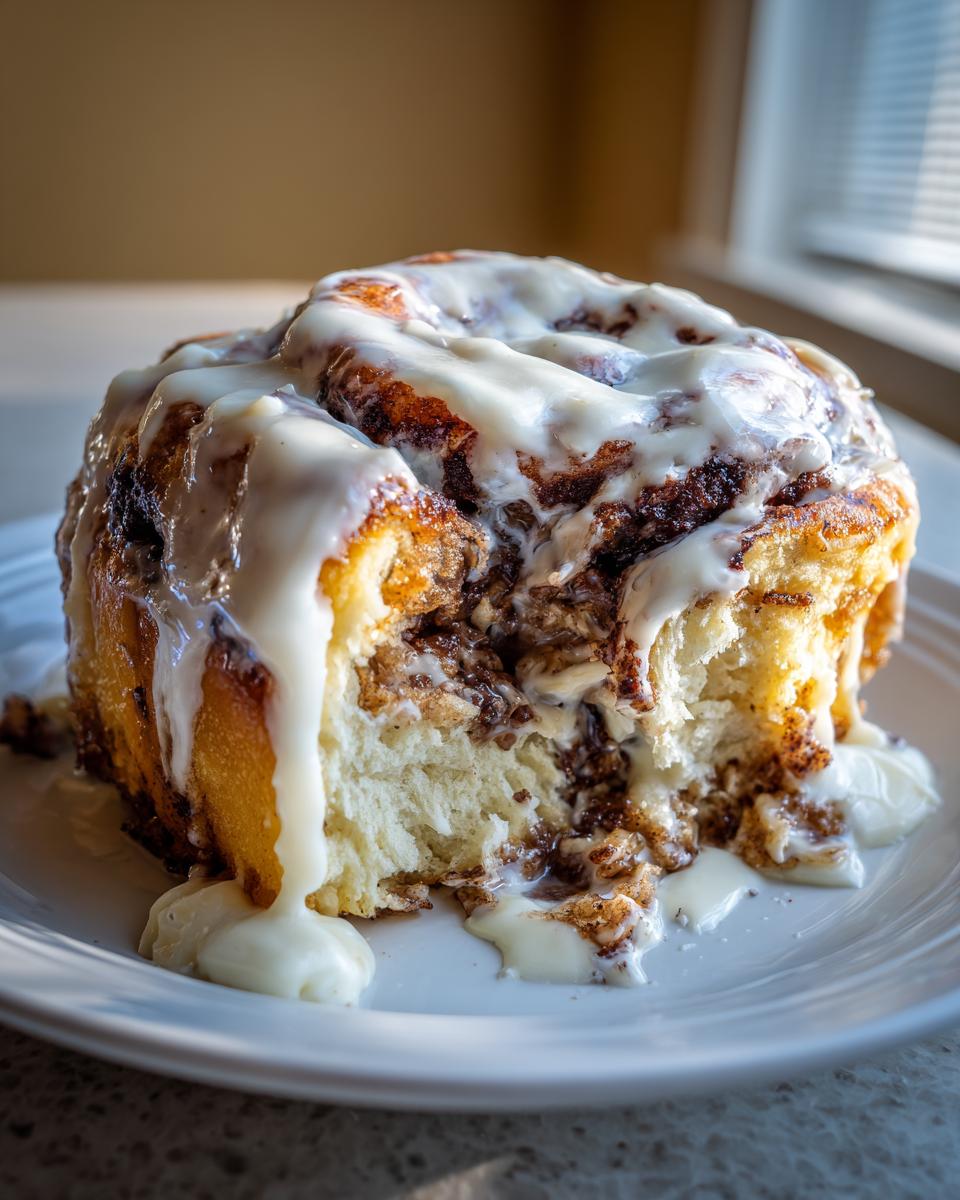
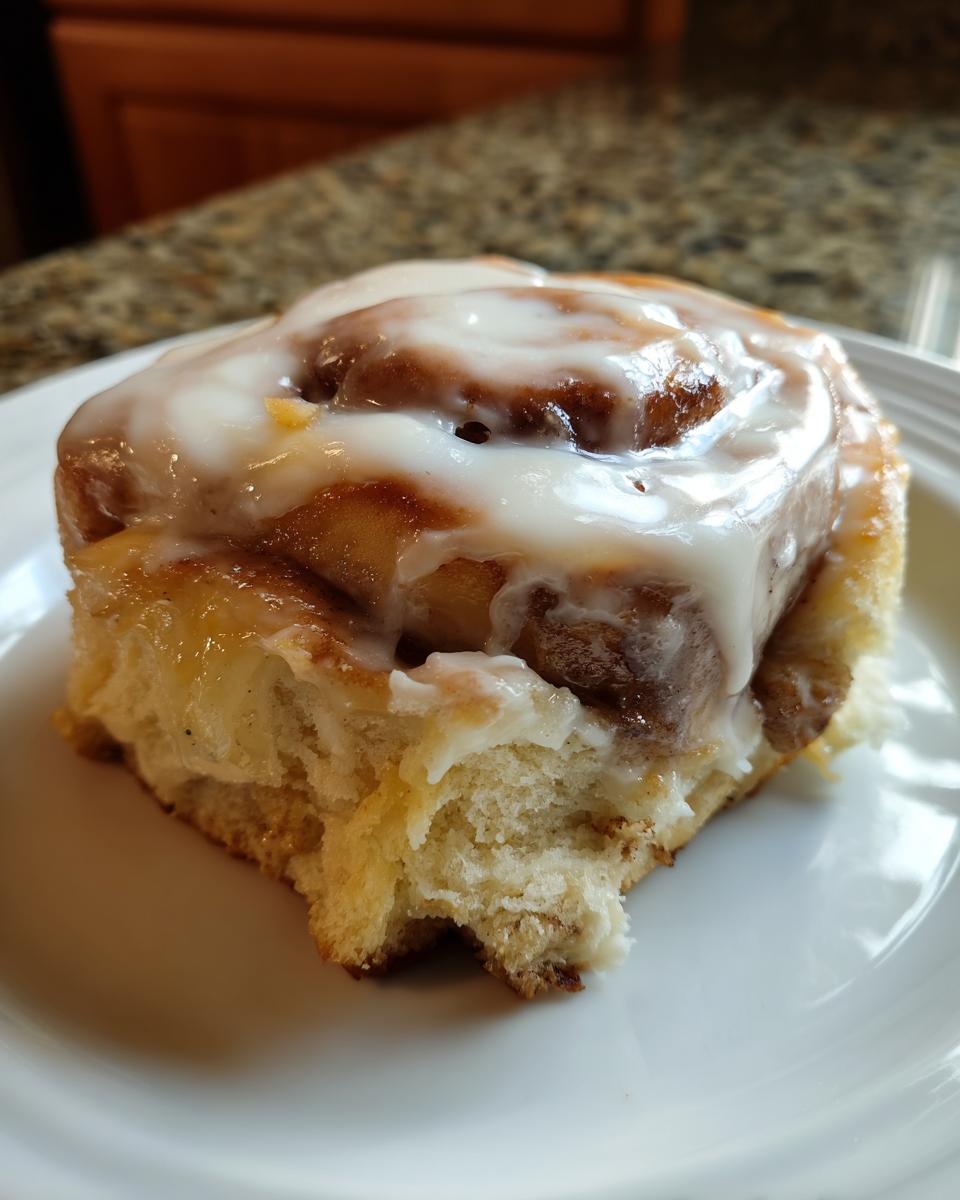
The moment those rolls come out, you need icing ready to go! This cream cheese icing is what takes these from good home baking to total indulgence. You want to beat together your softened cream cheese, powdered sugar, and that splash of vanilla extract until it is completely smooth and utterly creamy. The secret to that wonderful, drippy look you want is to add your milk just a teaspoon at a time. If you want that icing to pour beautifully over the warm rolls, you need a lower viscosity.
Ingredient Notes and Substitutions for the Cinnamon Roll Icing
The tang from the cream cheese really cuts through the sweetness of the filling, which is why I insist on using it for the absolute **best cinnamon roll**. If you absolutely run out of cream cheese, you can certainly make a simple powdered sugar glaze by just using milk or water, but honestly, it won’t have the same rich body.
If you want to mix things up, try swapping the vanilla for a little bit of almond extract or even a tiny bit of orange zest. But when it comes to that classic flavor, nothing beats the richness you get when you stick to the recipe! It’s ready to spread the second the rolls have cooled for just ten minutes.
Serving Suggestions and Storing Your Cinnamon Roll Leftovers
The absolute best way to eat these is right away! When those warm rolls soak up that thick cream cheese icing, they are simply unbeatable. That first bite when they are still tender and gooey? Unforgettable.
But let’s be real, sometimes you can’t eat twelve rolls in one sitting! Don’t worry about leftovers spoiling the magic. Store any uneaten rolls tightly covered on the counter for up to two days. They stay surprisingly soft because the icing holds onto some moisture.
If you need to warm them up—and I highly recommend you do—skip the microwave! It makes the dough tough faster than anything. Pop a single roll (or a few!) in the oven at about 300°F for about five minutes. They come out piping hot and soft again, making them the most delightful **sweet breakfast recipe** to serve your guests the next morning. Reheating restores that fresh-baked goodness perfectly.
Frequently Asked Questions About Making Cinnamon Rolls
It’s so common to have questions when you are dealing with a yeasted dough, especially when you are chasing that perfect texture! Don’t you worry about a thing; I’ve gathered the most common things people ask about making this **best cinnamon roll** recipe for you right here.
Can I use instant yeast instead of active dry yeast?
Yes, you absolutely can! Instant yeast is a bit more forgiving. If you use it, you can skip that initial warming step with the milk; just mix the instant yeast directly into your dry flour mixture before you combine everything with the wet ingredients. It still works perfectly fine for this **yeast roll recipe**!
My rolls didn’t rise very much. Why are they flat now?
When rolls are flat, it almost always comes down to temperature or old yeast. First, check if your milk was too hot and accidentally killed your yeast. Second, check the environment. Yeast needs a warm room to do its job. If your kitchen is cold, cover the bowl with plastic wrap and set it near a warm oven or in a sunny spot. If they don’t puff up after 90 minutes, I highly suggest starting over with fresh yeast—it’s much easier than trying to resurrect a flat dough.
Can I prep the dough the night before to save time in the morning?
This is one of my favorite tricks for a truly spectacular weekend breakfast! Yes, you can definitely make these **easy cinnamon rolls** ahead. Finish the first rise, punch the dough down gently, wrap the entire ball tightly in plastic wrap, and place it in the refrigerator overnight. When you wake up, let it sit on the counter for an hour to warm up slightly before you roll it out. It makes getting this **sweet breakfast recipe** out so much faster!
How do I make sure the icing stays creamy and doesn’t get hard?
The key to that beautiful, thick, pourable icing is the ratio of fat (cream cheese) to sugar, and making sure you add the liquid slowly. If you want it to stay soft longer after cooling, you can try adding an extra teaspoon of softened cream cheese or even a tiny splash of melted butter to the mix. For more information on our site rules and updates, you can always review our Privacy Policy.
Share Your Cinnamon Roll Creations
Now that your kitchen smells like heaven and you have a tower of the most perfect, gooey cinnamon rolls imaginable, I’d just be tickled pink if you came back and let me know how they turned out! Did the floss trick work like a charm? Did you sneak a taste straight from the pan?
Please take a moment to leave a rating right here on the page—even a few stars lets me know this recipe is still making people happy on a Saturday morning. It truly means the world to me when I hear how one of our family recipes made its way into your home.
If you snap a picture of your beautiful batch, tag me on social media! Seeing everyone’s creations is the best part of keeping this community going. We love seeing your breakfast spreads!
If you have any lingering questions after baking, or just want to share a story about your breakfast adventure, don’t hesitate to reach out via the contact page. Happy baking, everyone!
PrintSoft Homemade Cinnamon Rolls with Cream Cheese Icing
Follow this straightforward recipe to make soft, fluffy, bakery-quality cinnamon rolls swirled with cinnamon-sugar filling and topped with a sweet cream cheese glaze.
- Prep Time: 45 min
- Cook Time: 25 min
- Total Time: 165 min
- Yield: 12 servings 1x
- Category: Breakfast
- Method: Baking
- Cuisine: American
- Diet: Vegetarian
Ingredients
- 1 cup whole milk, warm
- 2 1/4 teaspoons active dry yeast
- 1/2 cup granulated sugar, plus 1/4 cup for filling
- 1/2 cup unsalted butter, softened, plus 1/2 cup for filling
- 1 large egg
- 1 teaspoon salt
- 4 cups all-purpose flour, plus more for dusting
- 1 tablespoon ground cinnamon
- 8 ounces cream cheese, softened
- 2 cups powdered sugar
- 1 teaspoon vanilla extract
Instructions
- Warm the milk until it is between 105°F and 115°F. Stir in the yeast and let it sit for 5 minutes until foamy.
- In a large bowl, mix the yeast mixture, 1/2 cup sugar, 1/2 cup softened butter, egg, and salt.
- Gradually add the flour, mixing until a soft dough forms. Knead the dough on a lightly floured surface for about 8 minutes until smooth and elastic.
- Place the dough in a lightly oiled bowl, turning to coat. Cover the bowl with plastic wrap and let it rise in a warm place for 1 to 1.5 hours, or until doubled in size.
- While the dough rises, prepare the filling. In a small bowl, mix the remaining 1/4 cup sugar, 1 tablespoon cinnamon, and the remaining 1/2 cup softened butter until smooth.
- Punch down the risen dough. On a floured surface, roll the dough into a large rectangle, about 12 by 18 inches.
- Spread the cinnamon-butter mixture evenly over the dough, leaving a small border on one long edge.
- Starting from the long edge opposite the border, tightly roll the dough into a log. Pinch the seam closed.
- Cut the log into 12 equal rolls. Place the rolls cut-side up in a greased 9×13 inch baking pan.
- Cover the pan and let the rolls rise again for 30 minutes. Preheat your oven to 375°F during this time.
- Bake for 20 to 25 minutes, or until golden brown.
- While the rolls bake, prepare the icing. Beat the softened cream cheese, powdered sugar, and vanilla extract together until smooth and creamy.
- Remove the rolls from the oven and let them cool slightly for 10 minutes before spreading the cream cheese icing generously over the warm rolls.
Notes
- For the softest rolls, make sure your milk is warm enough to activate the yeast but not so hot that it kills it.
- If you want a thinner icing, add milk one teaspoon at a time until you reach your desired consistency.
- You can prepare the dough the night before, let it rise once, punch it down, wrap it tightly, and refrigerate it. Bring it to room temperature before the second rise and baking.
Nutrition
- Serving Size: 1 roll
- Calories: 450
- Sugar: 45g
- Sodium: 300mg
- Fat: 24g
- Saturated Fat: 14g
- Unsaturated Fat: 10g
- Trans Fat: 0.5g
- Carbohydrates: 55g
- Fiber: 2g
- Protein: 7g
- Cholesterol: 60mg